 The best way to protect your phone is by storing it inside the Electronics Bay. One of my rockets just had a CATO from 600 feet high and came crashing down and landed on the launch road! The entire rocket was destroyed. However, the phone and electronics survived without a scratch! While I know I was very lucky, it shows consideration when building your electronics bay can have an impact. It is important that you allow air to flow freely around the phone so that it does not overheat, especially in the summer time. In all of the photos, notice that the phone is in a frame to insure air circulation. At the top and bottom of phone, I typically use break away framing made of balsa in case the main chute does not open and then use foam to absorb shock. If you use a phone case protector, make sure to test how well it dissipates heat by running the App in full sun for 10-15 minutes. Then, remove the case protector and run the same test again. If the battery temperature is significantly hotter or is over 115 degrees, don't use the case protector. If you use a sled style design to cradle the phone, install padding as follows to insure airflow:

Bay Designs
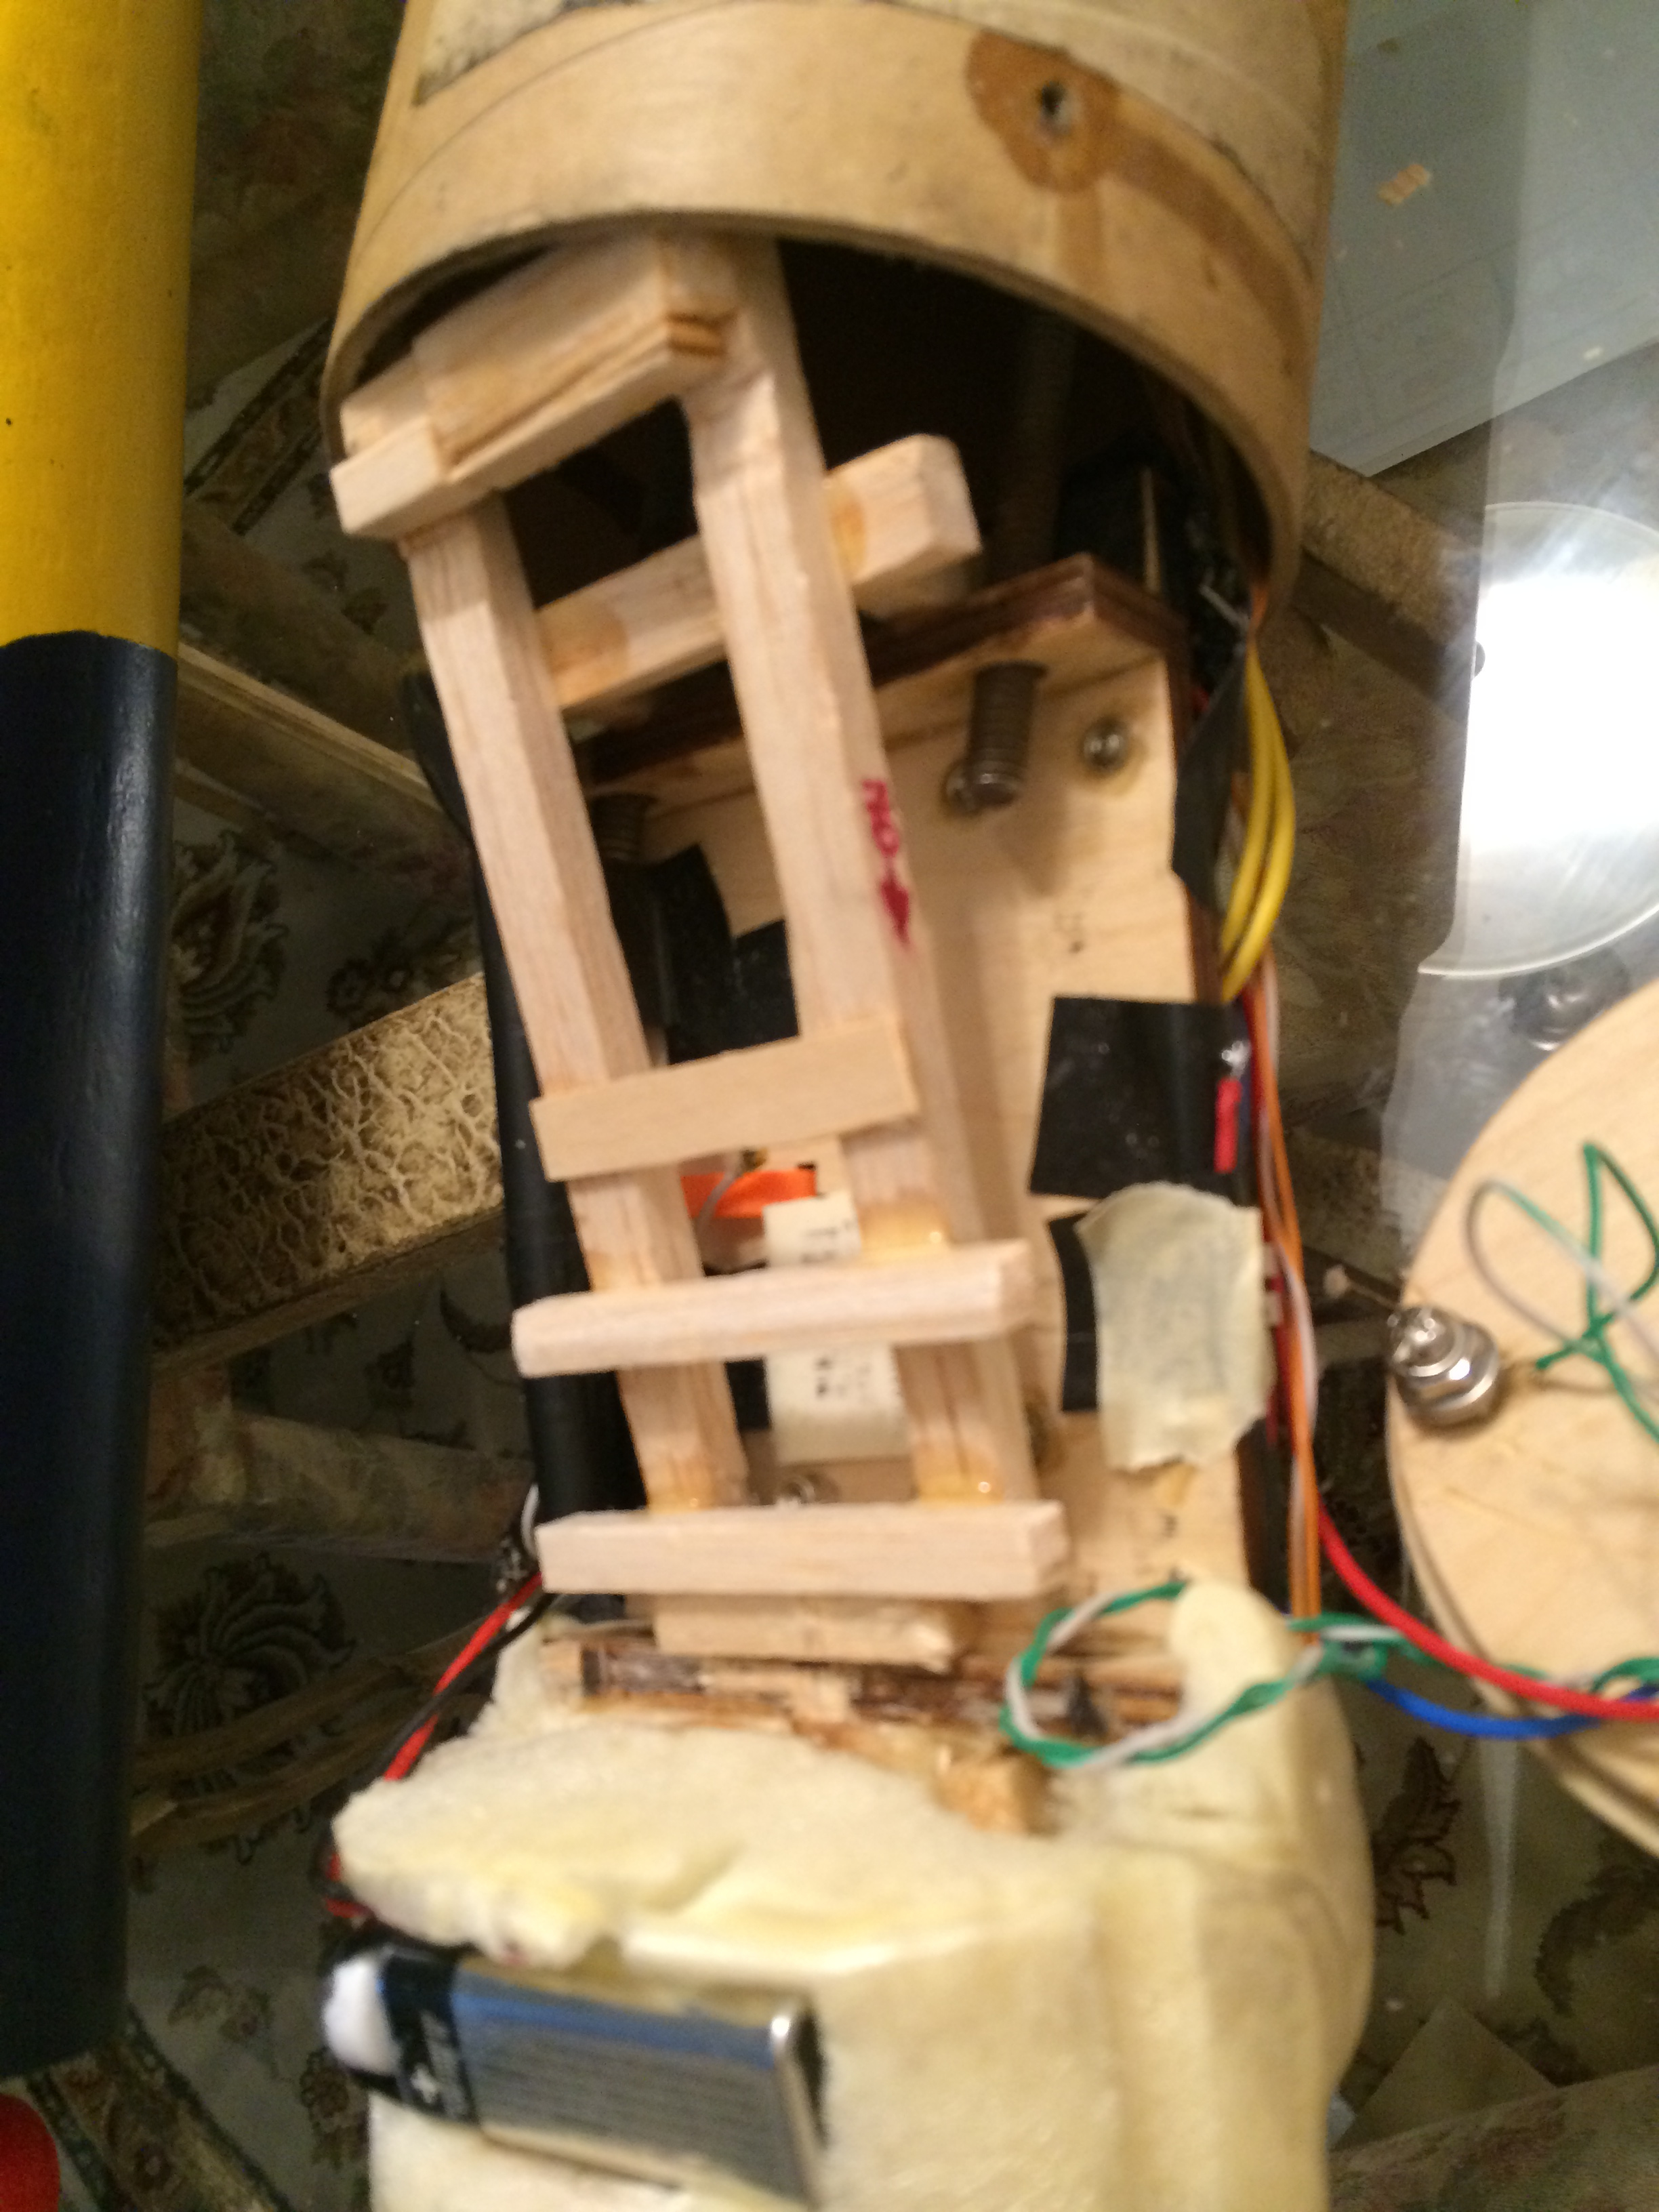 This framing allows the phone to sit on top of it, with camera pointing outwards. Note the tilt in the structure so that the Phone is tilting slightly towards the ground. This gives better ground footage during the flight. Notice the foam below the cradle structure. This gives extra cushion if a parachute does not open or there is a failure of the rocket during flight.
 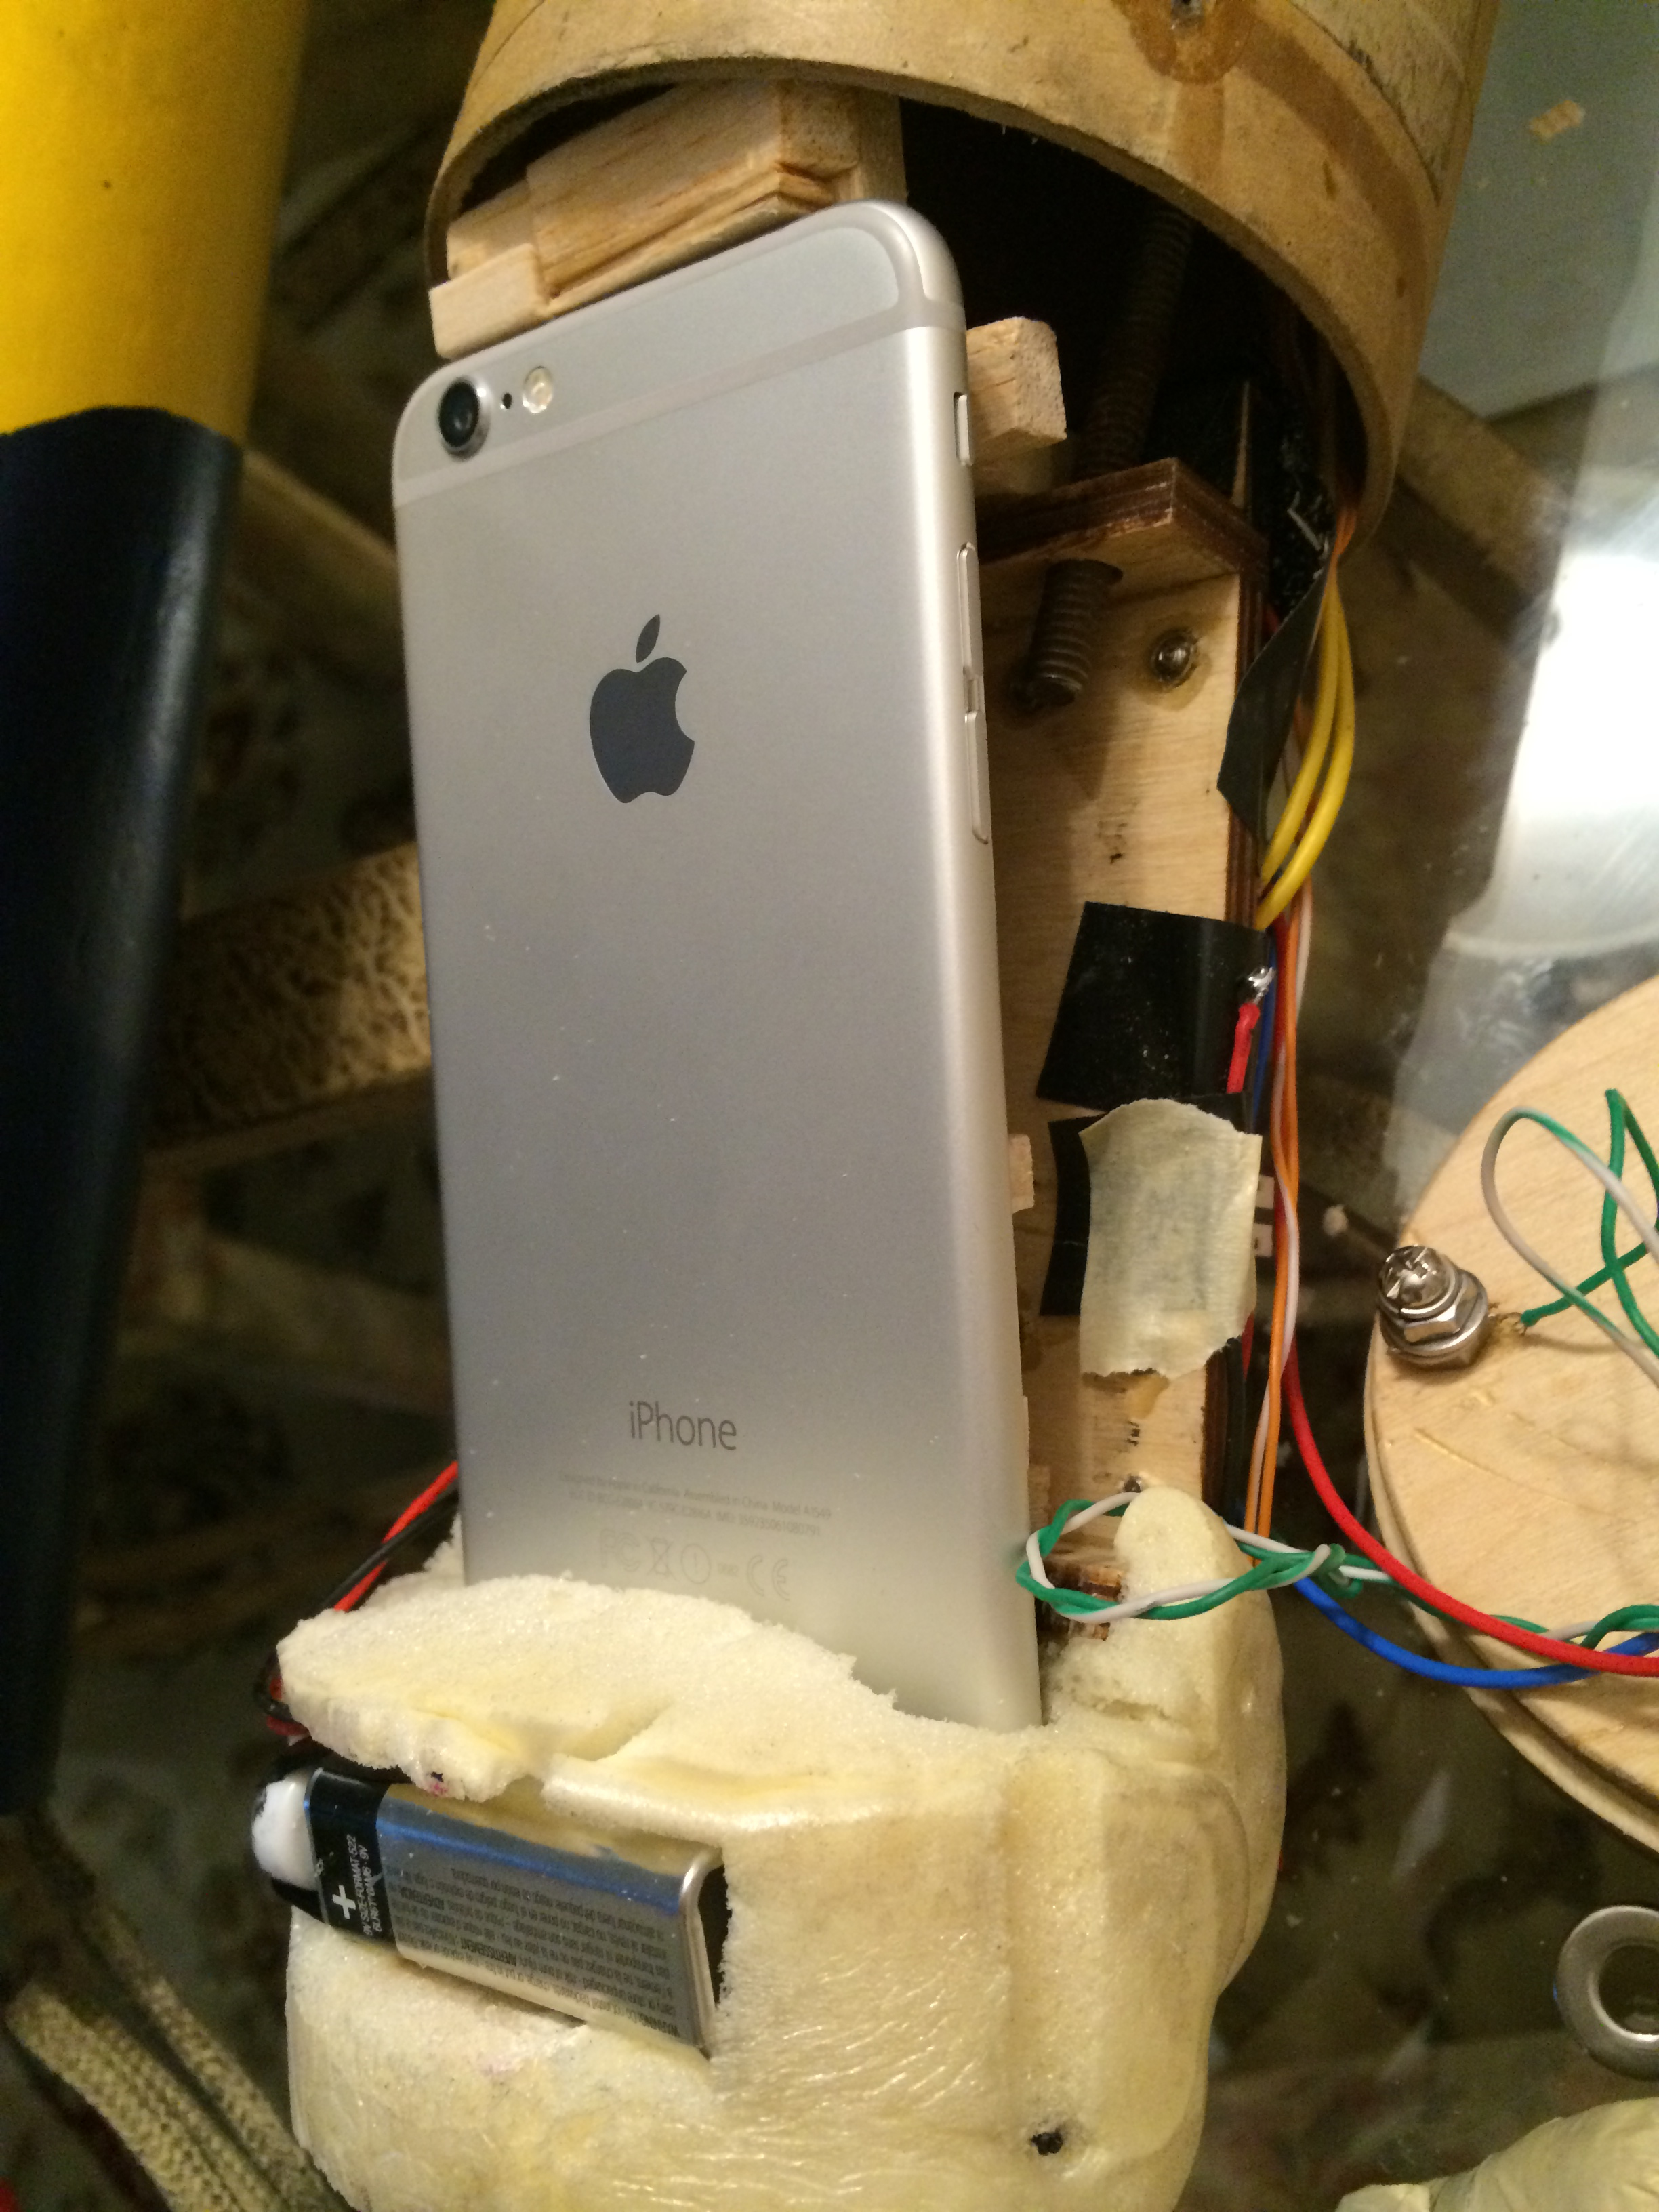 This is what the electronics bay looks like with the phone installed. notice that the top of the phone, when inserted into the bay, is held in place by the edges pressing firmly against the bay tube inner wall. When making the frame, make sure to give extra space on the bottom side (where you can easily change the cradle by simple cutting), as with each newer revision of a phone, the phones seem to be getting longer and wider. This will save you some time when you retrofit for an upgraded phone in the future.
 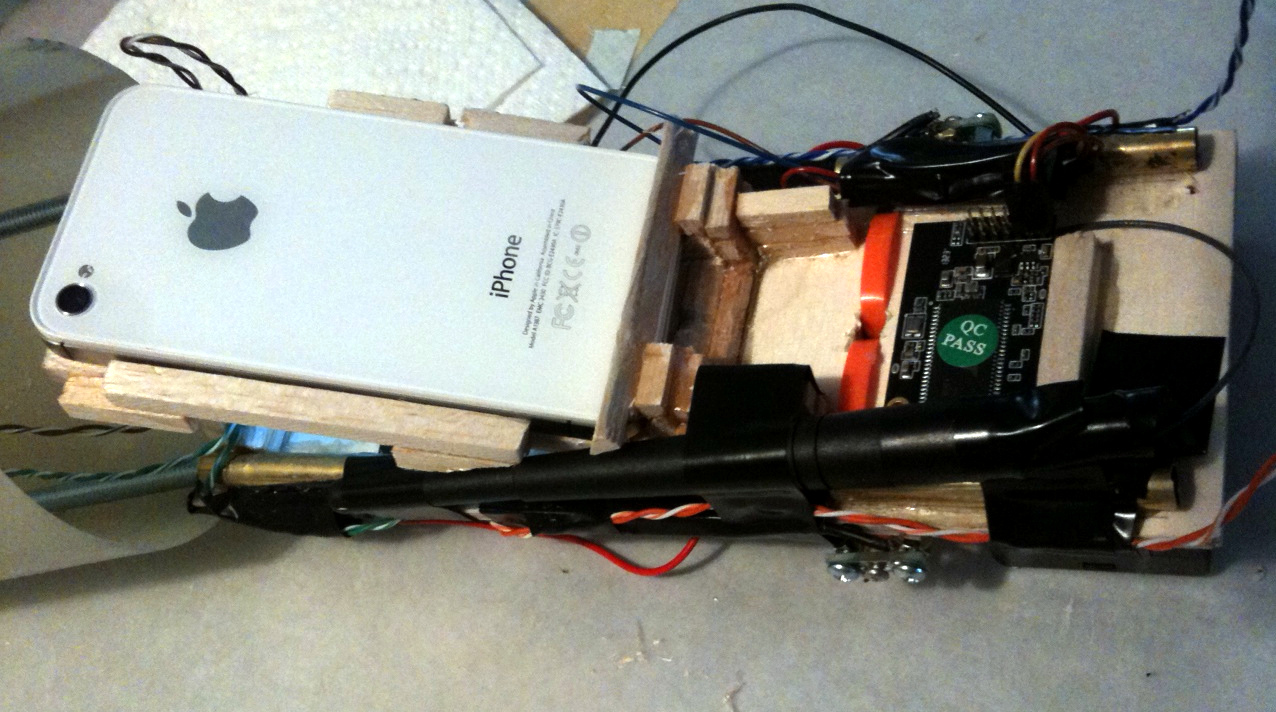 This is a more complex electonics bay example.
 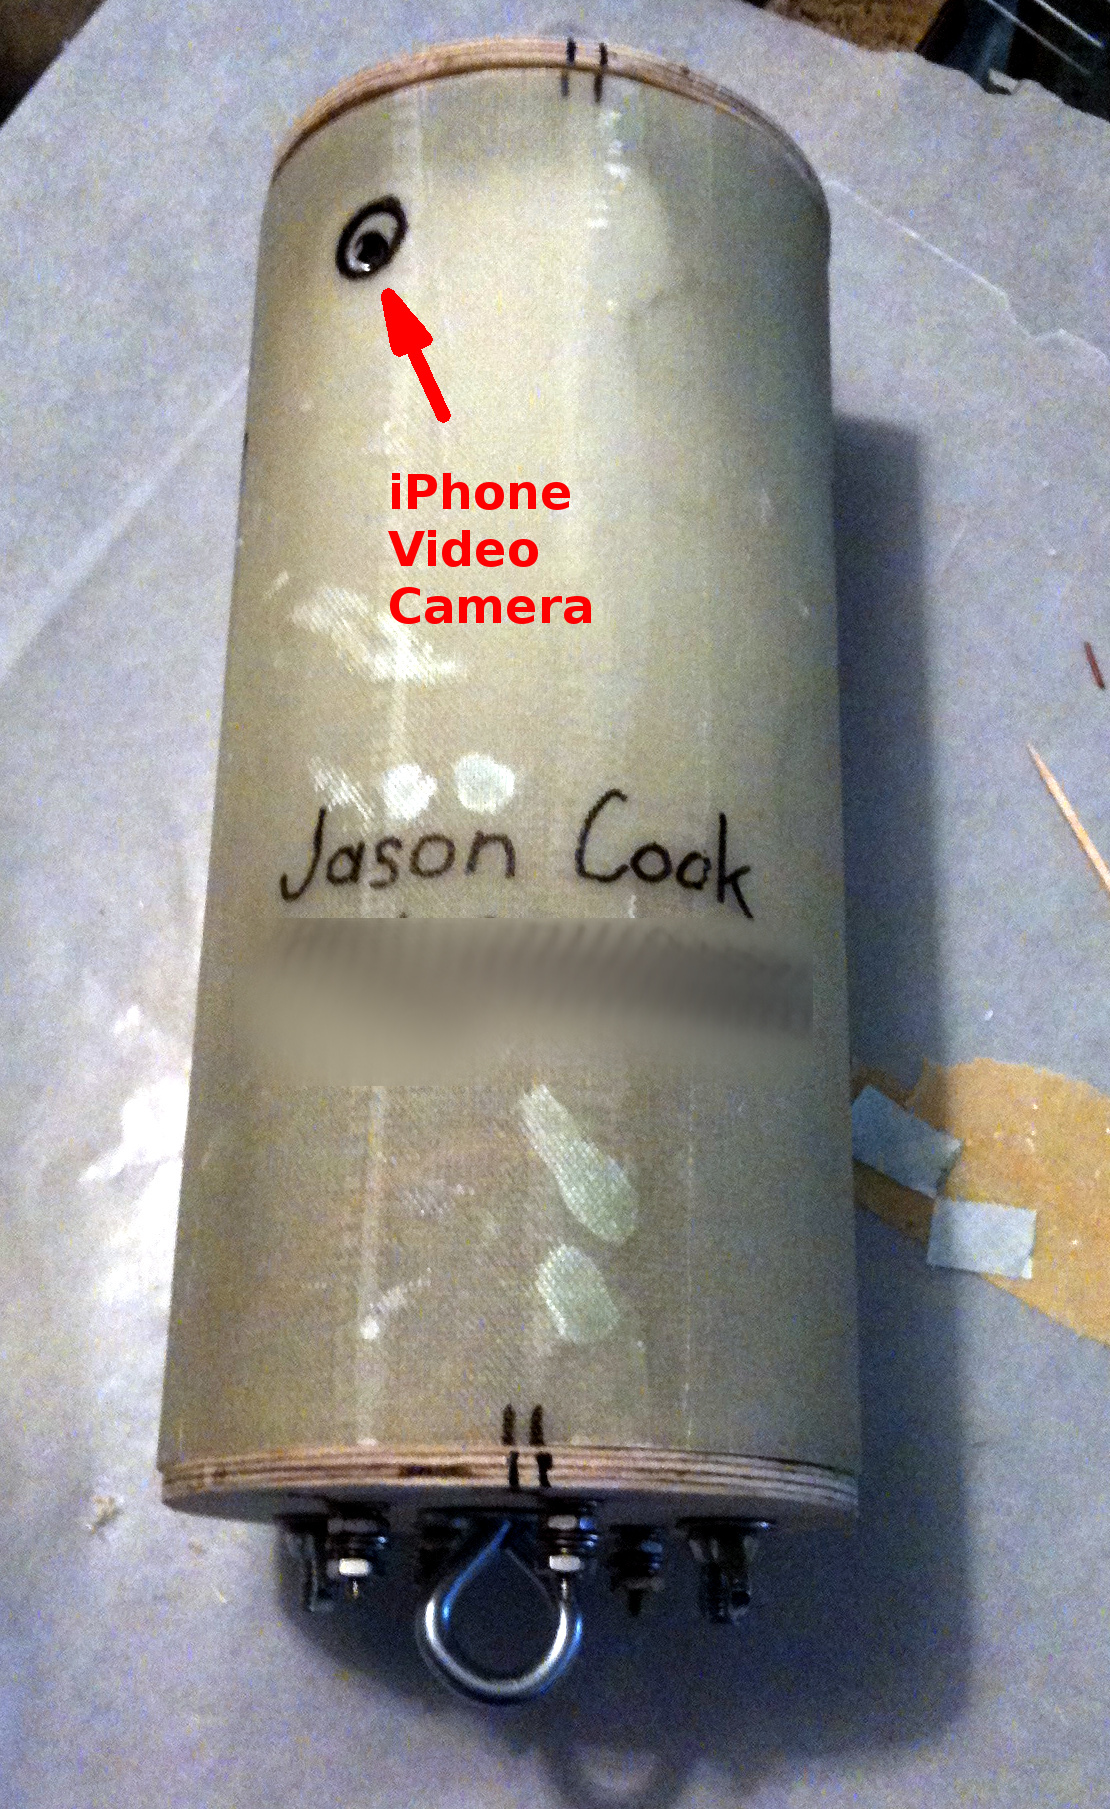 This shows what the electronics bay housing looks like, with the phone installed. You can easily see the camera through the hole.
 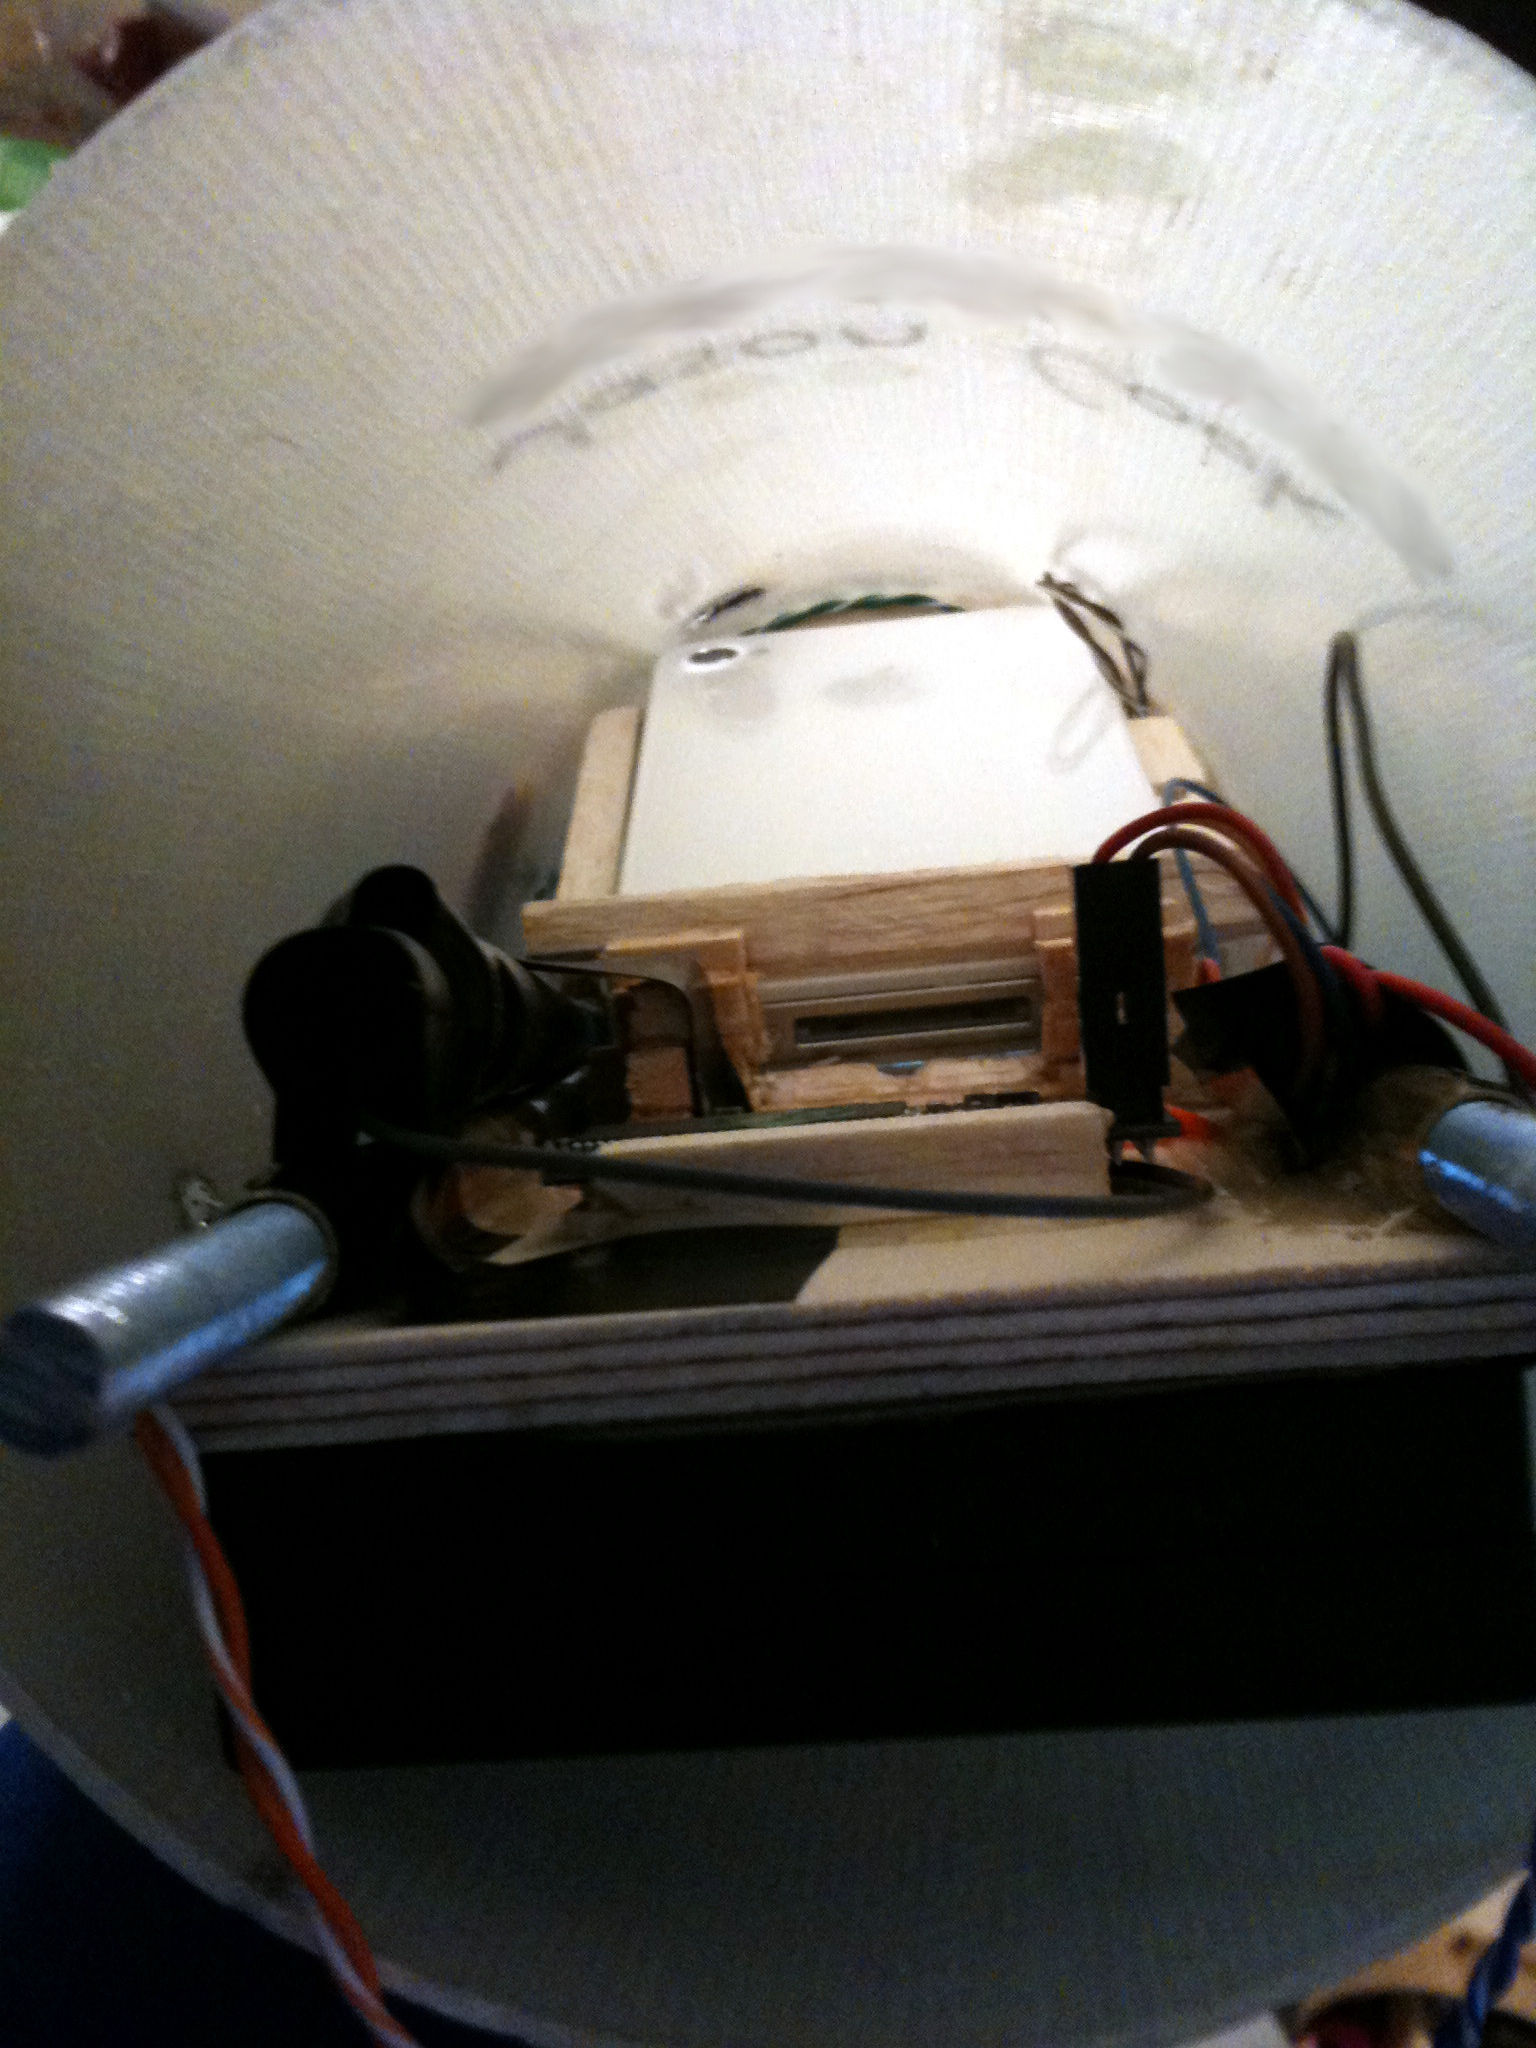 This shows how the phone is wedged in place in the electronics bay.
 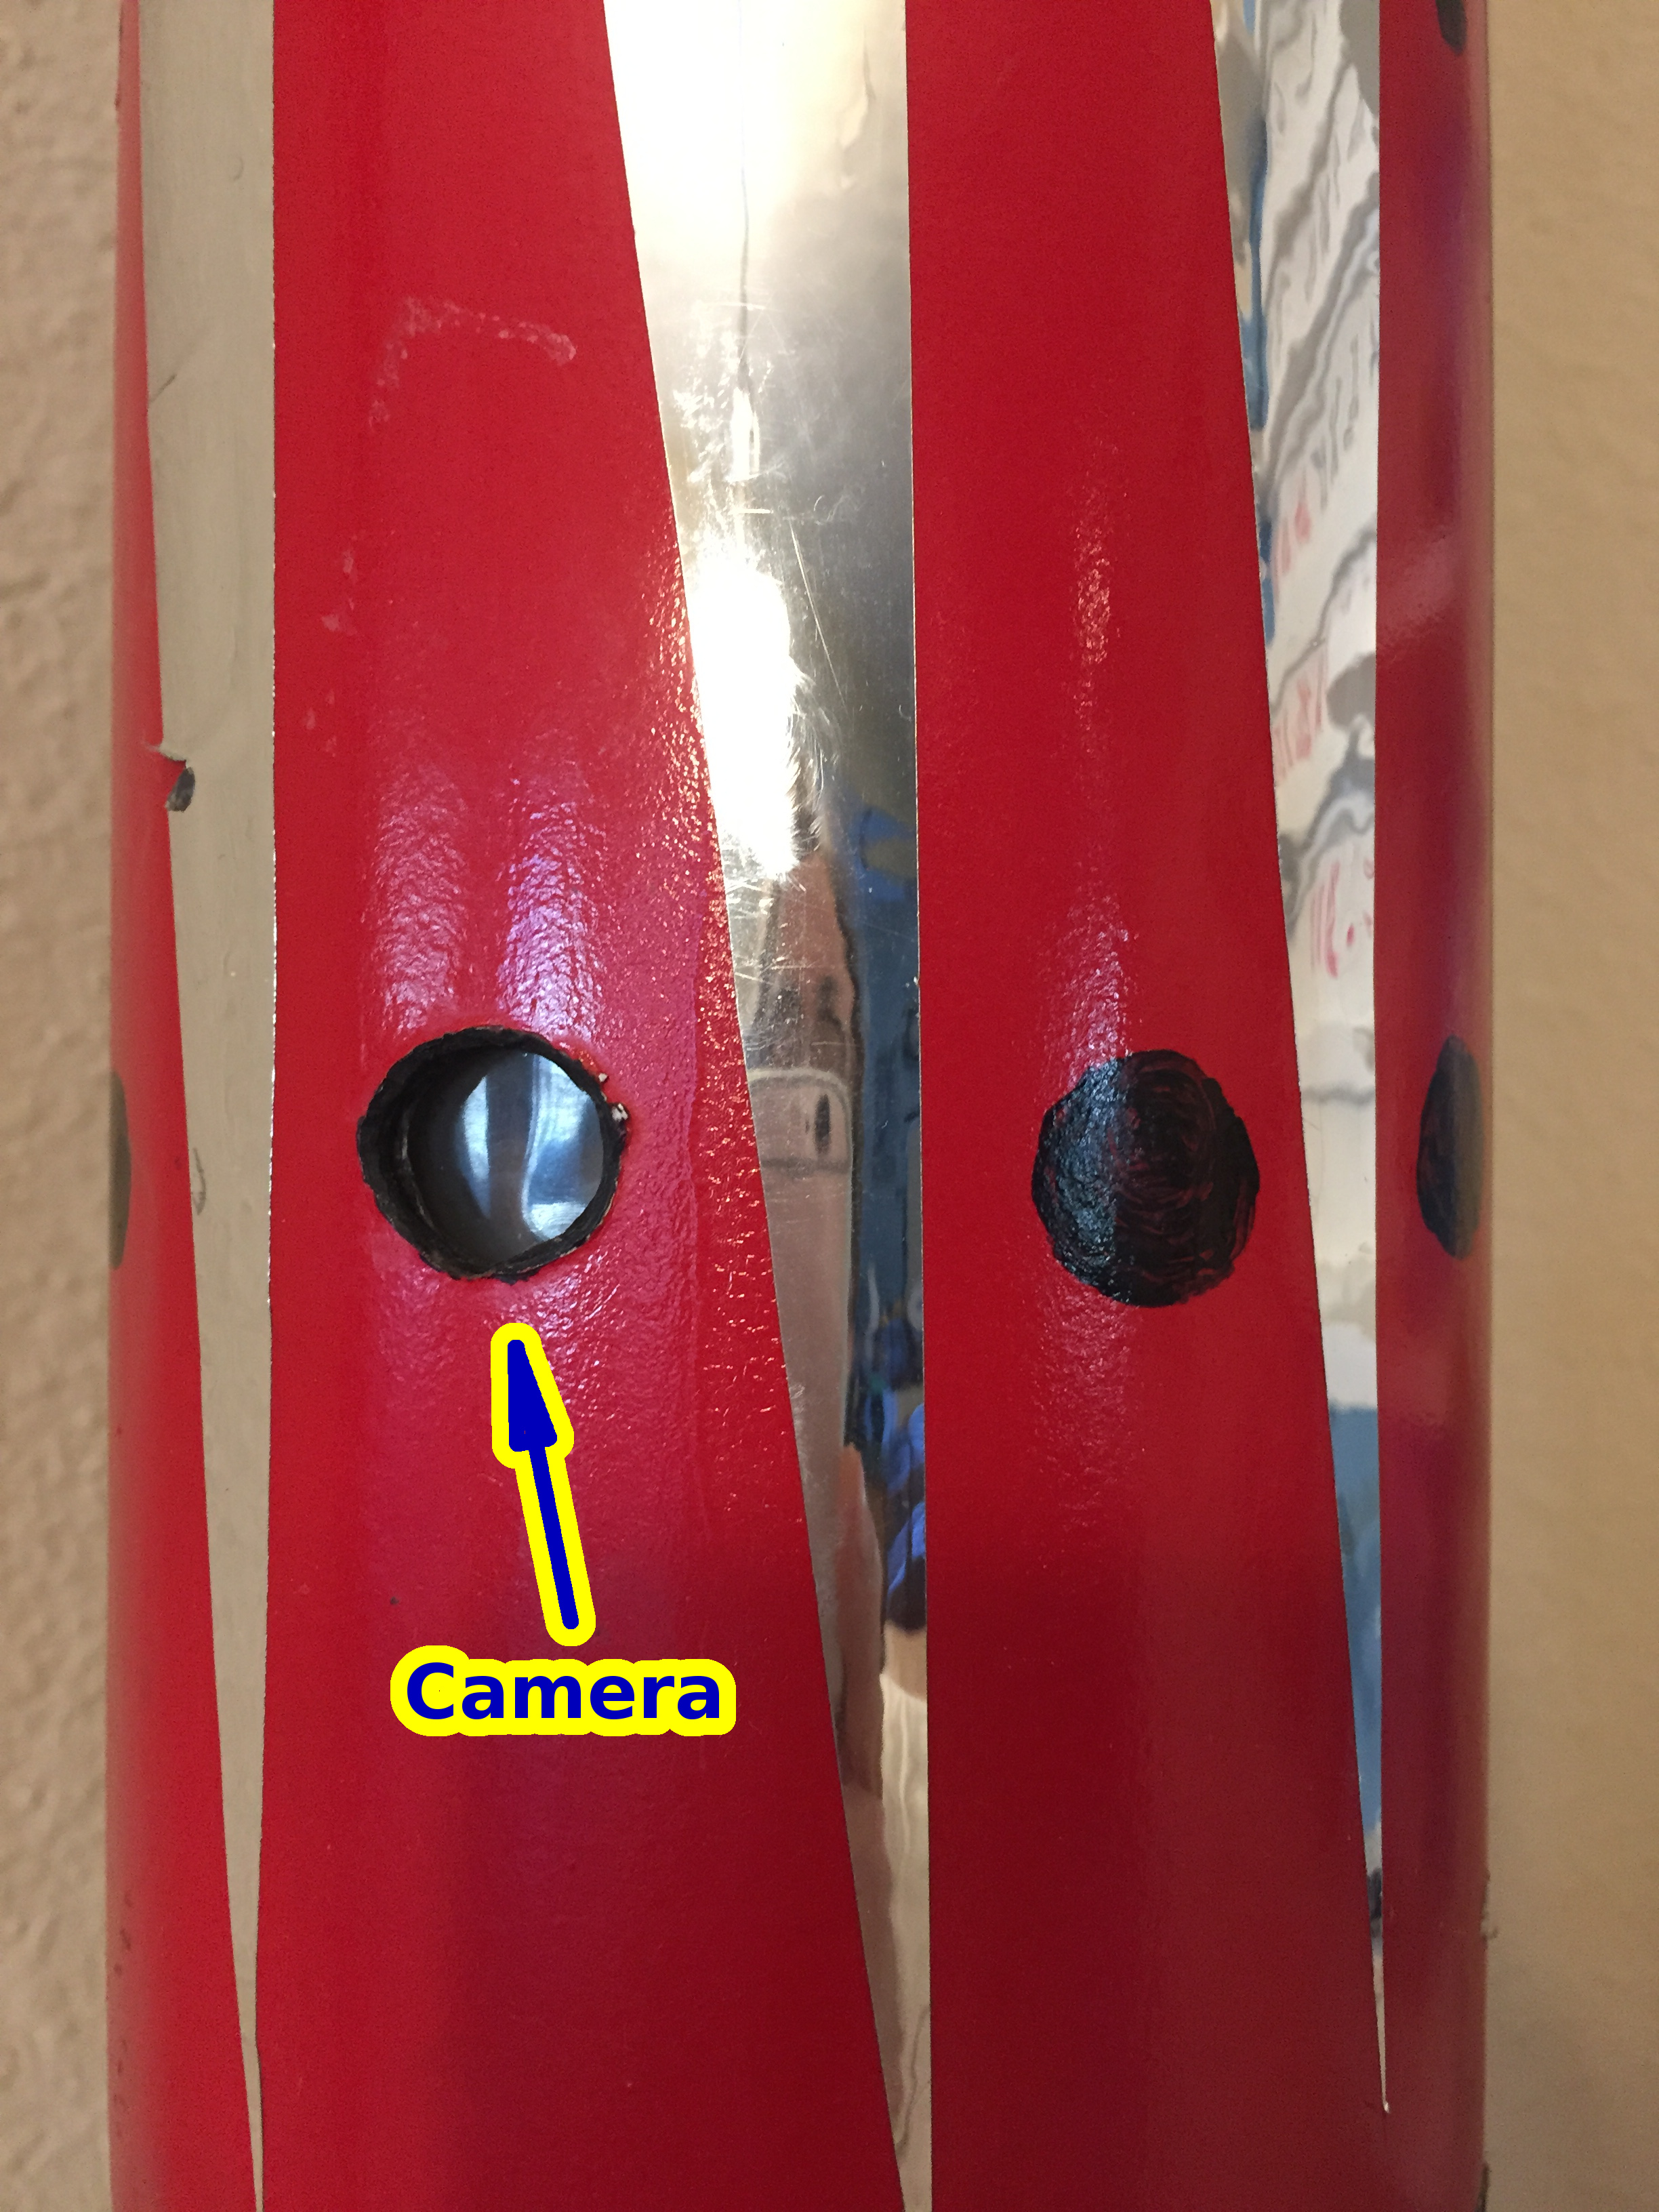 This is the outer surface of the rocket, where you can easily see the hole for the camera.
 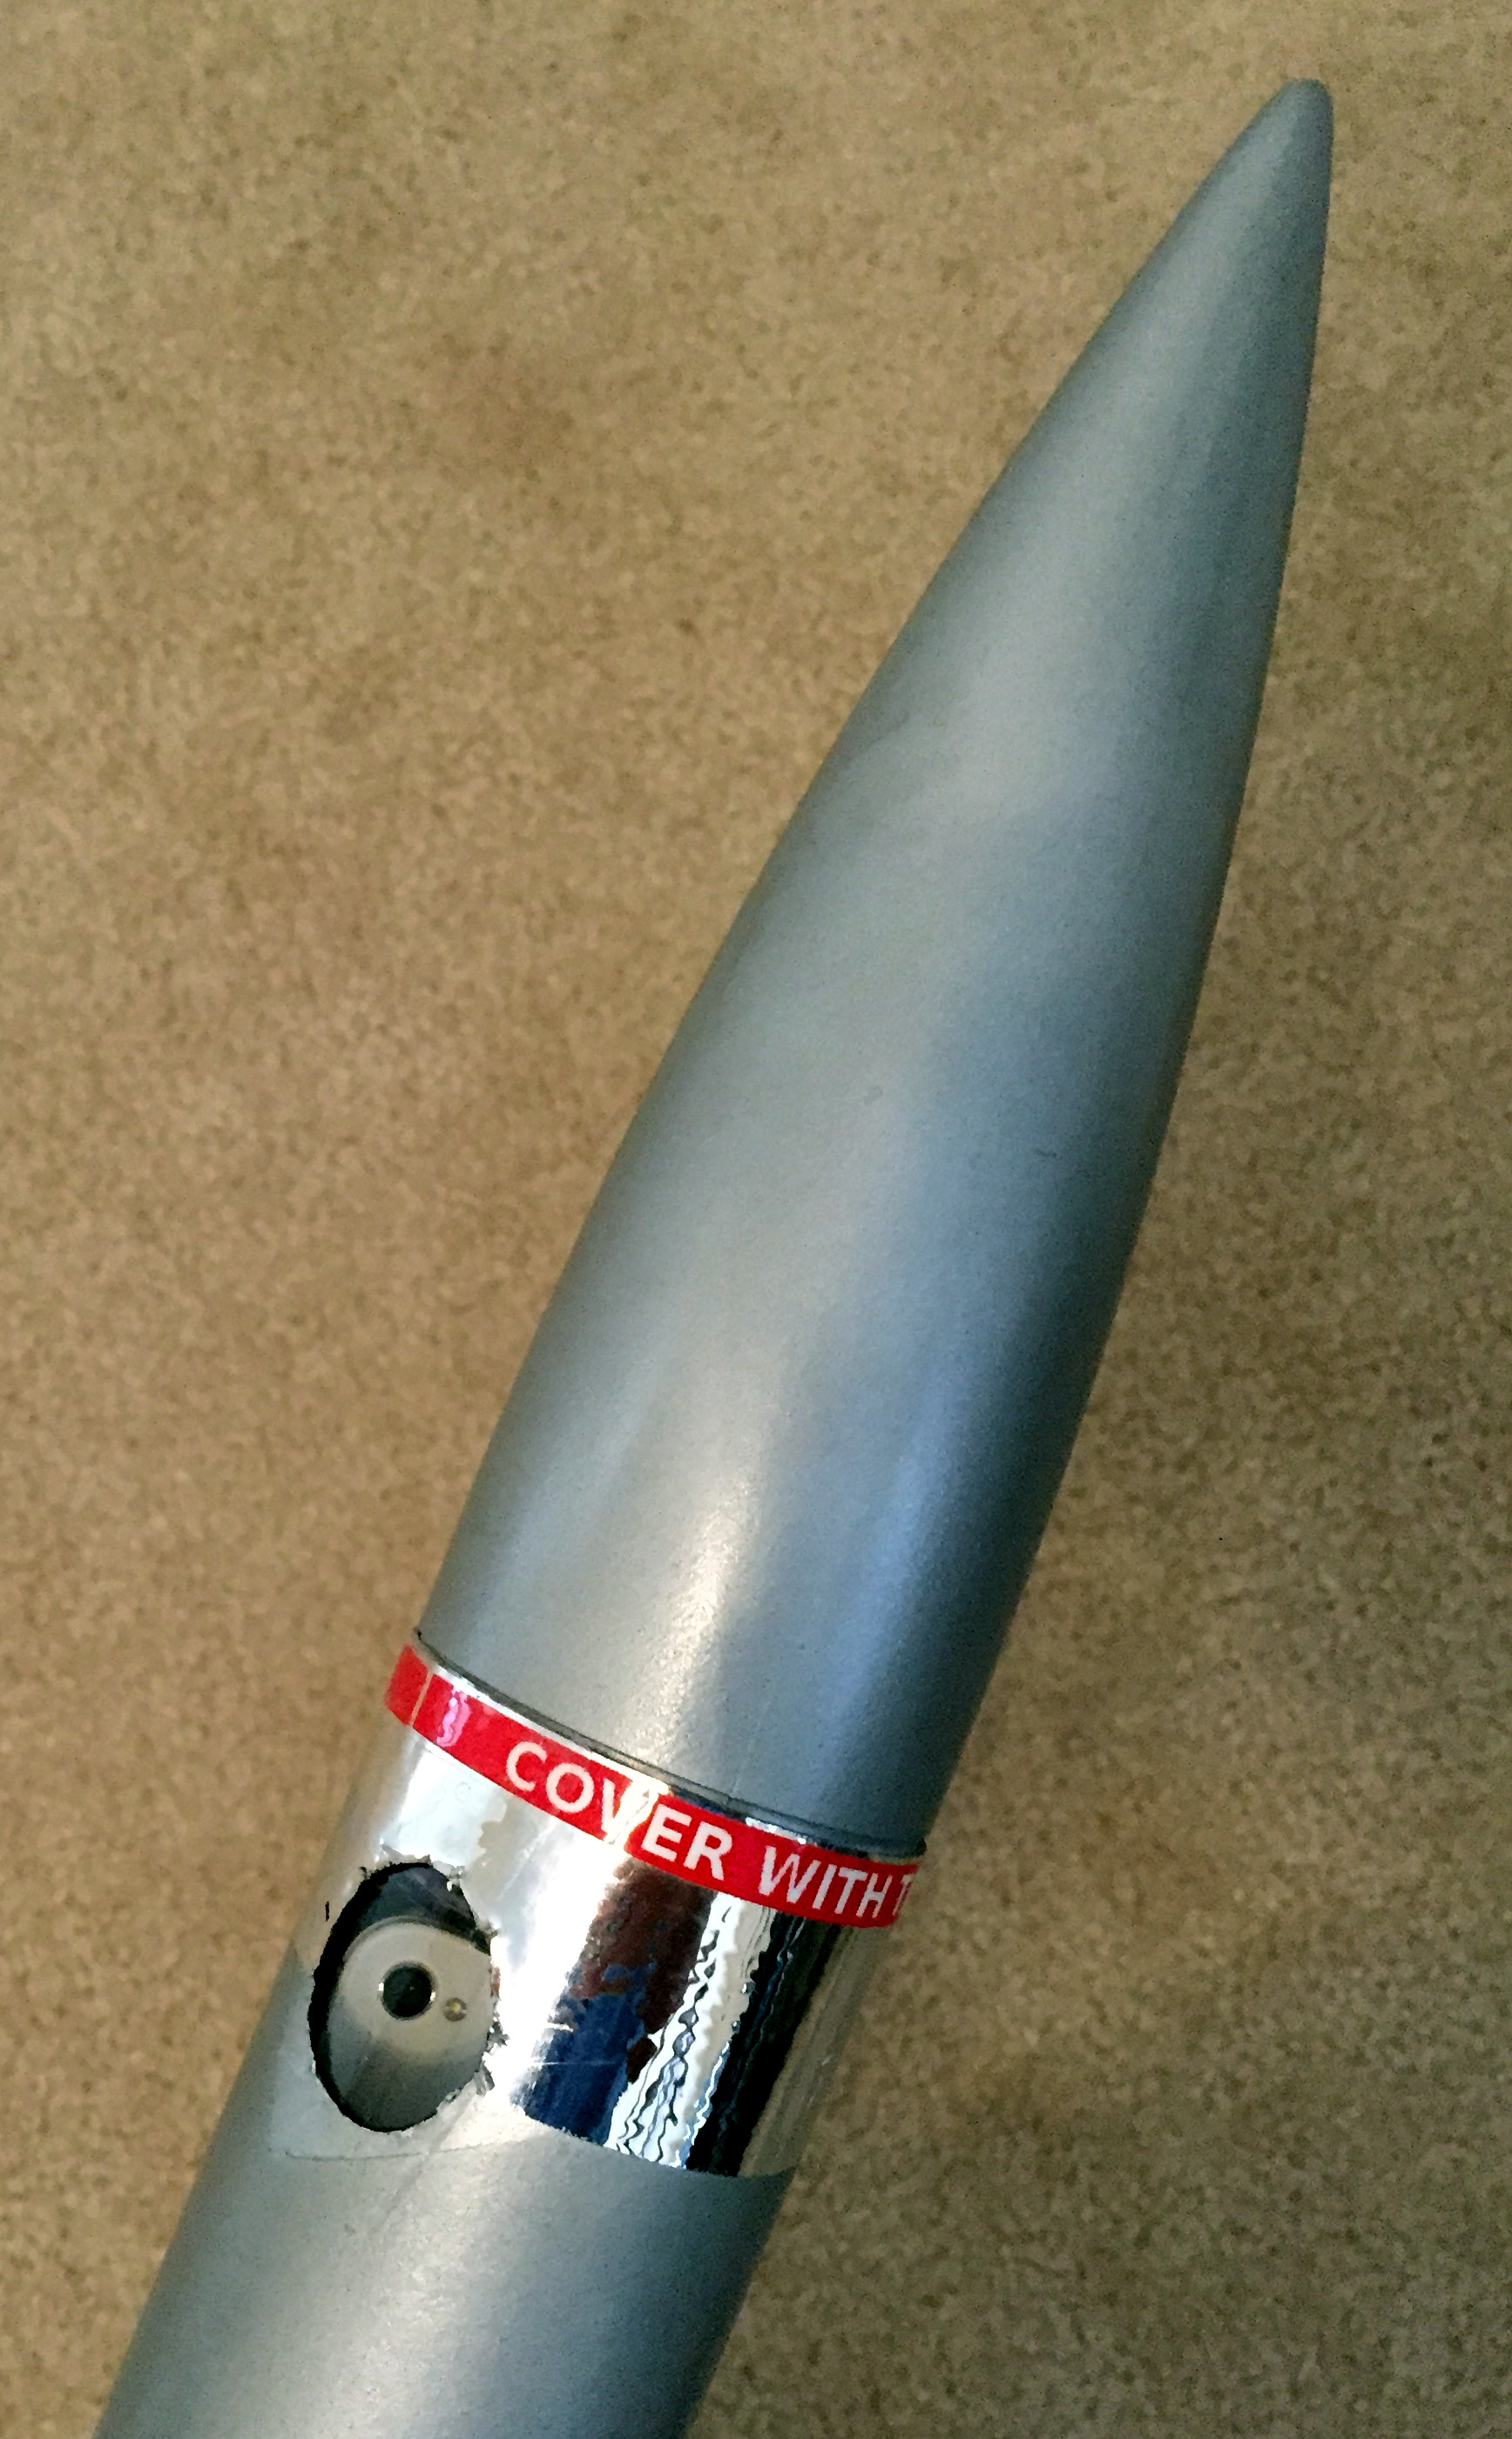 This example shows installation in a small diameter rocket that can barely contain the phone. Notice that the view hole is bigger as the phone is set further back.
 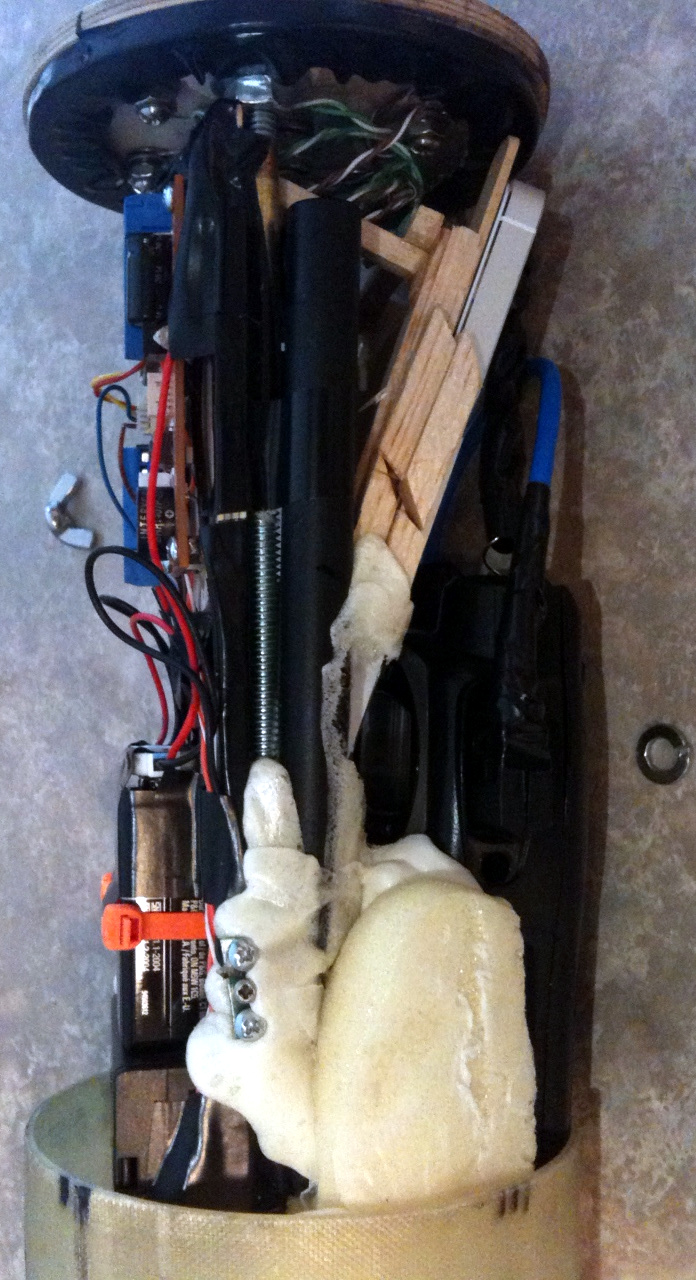 This example shows a complex electronics bay, with a GRMS radio installed. It is important to use shielded wiring (security 2 wire or 4 work great) and to make sure that the wires and circuit boards are as far as possible from the antenna. When using a radio, be sure ground test by powering on electronics circuitry when radio is engaged with only igniters (no charge!). Igniters should be installed (no powder) during test to insure of accidental firing does not occur.
 The best way to protect your phone is by storing it inside the Electronics Bay. One of my rockets just had a CATO from 600 feet high and came crashing down and landed on the launch road! The entire rocket was destroyed. However, the phone and electronics survived without a scratch! While I know I was very lucky, it shows consideration when building your electronics bay can have an impact. It is important that you allow air to flow freely around the phone so that it does not overheat, especially in the summer time. In all of the photos, notice that the phone is in a frame to insure air circulation. At the top and bottom of phone, I typically use break away framing made of balsa in case the main chute does not open and then use foam to absorb shock. If you use a phone case protector, make sure to test how well it dissipates heat by running the App in full sun for 10-15 minutes. Then, remove the case protector and run the same test again. If the battery temperature is significantly hotter or is over 115 degrees, don't use the case protector. If you use a sled style design to cradle the phone, install padding as follows to insure airflow:
 This framing allows the phone to sit on top of it, with camera pointing outwards. Note the tilt in the structure so that the Phone is tilting slightly towards the ground. This gives better ground footage during the flight. Notice the foam below the cradle structure. This gives extra cushion if a parachute does not open or there is a failure of the rocket during flight.
  This is what the electronics bay looks like with the phone installed. notice that the top of the phone, when inserted into the bay, is held in place by the edges pressing firmly against the bay tube inner wall. When making the frame, make sure to give extra space on the bottom side (where you can easily change the cradle by simple cutting), as with each newer revision of a phone, the phones seem to be getting longer and wider. This will save you some time when you retrofit for an upgraded phone in the future.
  This is a more complex electonics bay example.
  This shows what the electronics bay housing looks like, with the phone installed. You can easily see the camera through the hole.
  This shows how the phone is wedged in place in the electronics bay.
  This is the outer surface of the rocket, where you can easily see the hole for the camera.
  This example shows installation in a small diameter rocket that can barely contain the phone. Notice that the view hole is bigger as the phone is set further back.
  This example shows a complex electronics bay, with a GRMS radio installed. It is important to use shielded wiring (security 2 wire or 4 work great) and to make sure that the wires and circuit boards are as far as possible from the antenna. When using a radio, be sure ground test by powering on electronics circuitry when radio is engaged with only igniters (no charge!). Igniters should be installed (no powder) during test to insure of accidental firing does not occur.