   |


| Likes |  |
| Skill | 5.02 |
| Length | 56.00" 142.24cm |
| Diameter | 2.63" 6.68cm |
| Weight | 5.94lbs 2.69kg |
| Parachute | 36" 91.44cm |
| Drogue | 18" 45.72cm |
| Motor Mount | 54mm |
| Deployment | Dual-2 Computers |
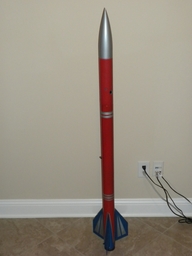
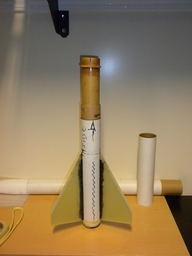
EXODUS
Description
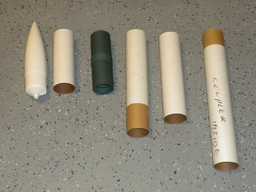
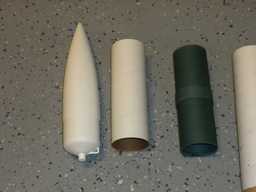
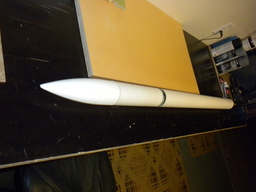
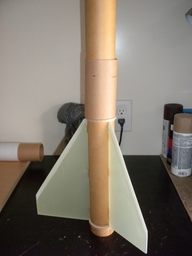
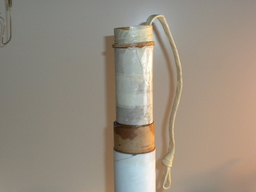
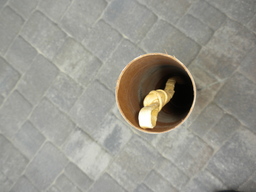
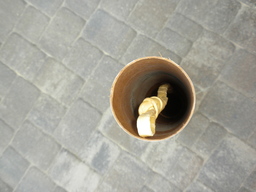
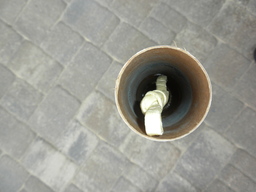
And yes I'm building a new rocket, The HiTech 45 and Eric his flash rocket inspired me to build a minimum 54 mm MM diameter fast rocket. The parts are LOC air-frames partly donated by Clayton and also a nice blue tube Av bay !! Thanks Clayton !!! The length will be around 53" to hold an 6XL casing and a small bay under the nose cone, But it will be on a chute release device so actually I will NOT use that extra front space, or maybe for the tracker TAGG... All is already figured out but still in the early stage because I need some good fins and that might take a few weeks, YES Giant Leap rocketry is delayed as always !!! When all is in It will be a fast building process. Tube will be wrapped in Hybrid Kevlar/CF and regular epoxy maybe if I have some left over High Temperature epoxy will use that for sure, This one will go over Mach 1 easy !!! Stay tuned, more to come soon !!! Name will be chosen as I build this
Update 10/13/2016 - Ordered the fins (3) today from PML.. They are in stock and will be shipped asap. Thanks Tim and Clayton for the links. Also looking into two vendors for the small stuff, like Giant Leap (no) and Wildman, Giant Leap has it all in stock but pricy on the shipping, just asked wildman if they have the same stuff and what there total price is....
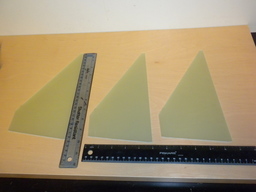
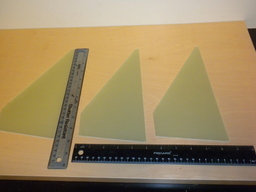
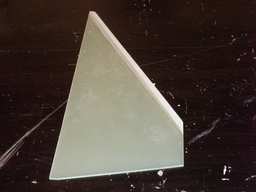
Update 10/17/2016 - The fins (3) from PLM came in today, they look great but I will cut around 1/2" and bevel them a bit. A bit quite heavy, did not expect that.
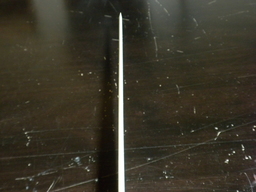
Update 10/20/2016 - Sanded the fins a bit so they are more 'airfoil'. it looks already great but will do some more over the weekend.
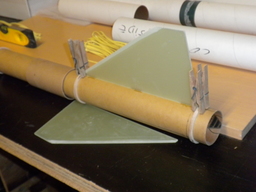
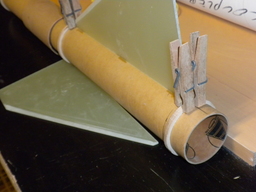
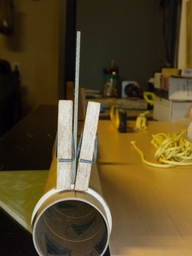
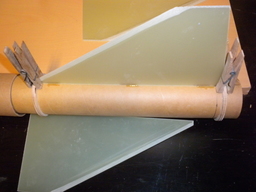
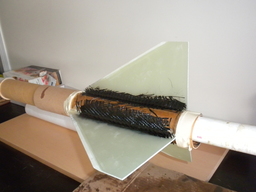
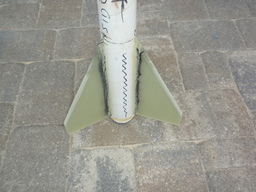
Update 11/04/2016 - Dry fitted the center rings and the motor mouth. Sanded the center ring inside a bit to make them slide over the MM tube. Also did some more beveling on the fins with the dremmel sander. Looks quite good. In a few days the real work will begin by lining up the fins and tack them on the MM with superglue first and see if the alignment is perfect before applying the real glue and fiberglass...
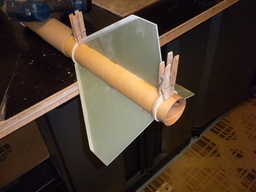
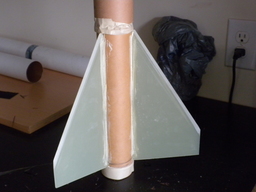
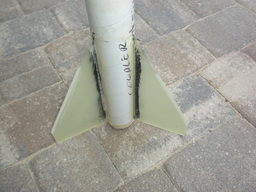
Update 11/05/2016 - Measured out the fin position and tacked the first fin on he motor mouth with CA glue.. When dry I start the second fin and the third and after that epoxy them on with Carbon fiber pieces before gluing inside the frame. Ok 3 fins are tacked in and drying for tomorrows epoxy work...
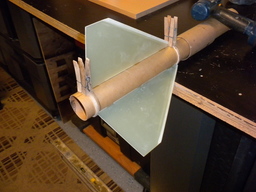
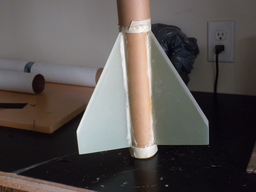
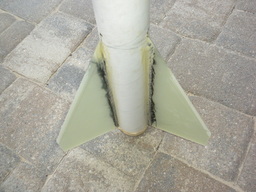
Update 11/06/2016 - Filled in the fin fillets with rocket poxy and smoothen it out. Then I applied a strip of carbon fiber on each fillet onto the motormouth to get more strength on the fins. So far all works great, Next is to cut the sleeves in the frame and slide the fin and MM setup in there and finish off the center rings with epoxy.
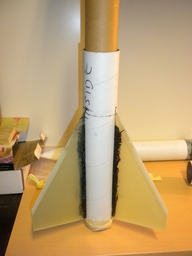
Update 11/06/2016 - late afternoon epoxy work, cut the sleeves out in frame to slide in the fin-can with MM, put also a piece of wood were the rail buttons need to go for more support. Also put a lot of high heat epoxy on the center rings. To hold the cut frame togetherI use masking tape and a rubber-band to hold them tight.
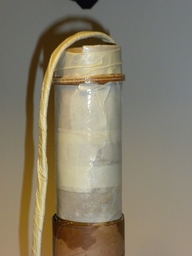
Update 11/07/2016 - Evening work, glued the shock cord to the motor mouth with rocket poxy and also applied high temp epoxy, then put masking tape around the whole build to keep it tight and close to the MM because there is not that many space for the casing and the wall. Also had to cut a slot in the center ring to pass the shock cord through.. Hope all will work out eventually when adding the second part of the frame and sleeve.
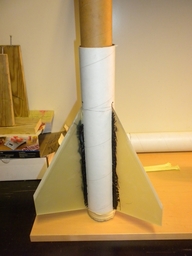
Update 11/08/2016 - Little cold today, so I did sleeve the next part on to the coupler and over the MM with shock cord, full of rocketpoxy and high heat epoxy, it's a lot so that might add on some weight also .. again... Also did the next and final part, sleeved that on and with the coupler also full of epoxy... The shock cord is just under he top so easy to reach to attach the 1/4" shock cord. The one on the MM is 1/2" shock cord. Also did a run of rocketpoxy on the fillets and smoothen it out with masking tape. Should be good to do for putting the hybrid layers on.
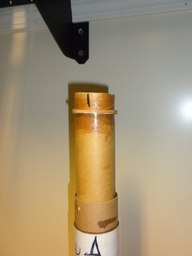
Update 11/10/2016 - Made two bulkheads inside (2) and one outside (1). Sanded them smooth and seems to fit perrrfect !!! Also cut the end of the shoulder of the nose cone and installed a bulkhead at the inside of the cut end and used rocketpoxy to glue them together. Then used a 1/4" eyebolt to hold them together tight ! That will be the front piece of the Av Bay. Made a run of rocket poxy around the inserted end pieces inside the nose cone to hold that part in solid. Also sanded the build up of the switchband down so the blue tube slides into the frame smoothly. I will have to build up the outside of that av bay blue tube, it slides to lose...
Update 11/15/2016 - Installed the 54 mm motor retainer with JB weld.
Update 11/16/2016 - Sanded the fillets out with the dremmel tool to get them smooth for glassing. Going to the store (The Home depot) now to get some hardware for the Avionics bay and the threadedrods.
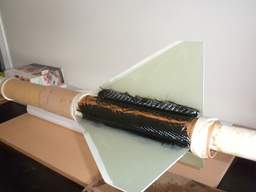
Update 11/19/2016 - Got all the hybrid cloth pieces cut and got he high heat epoxy out to start glassing this late afternoon. Hope the temperature stays good.
Update 11/19/2016 - evening, applying the first coat of Hybrid (Kevlar and CF)... seems to work well; I actually hate working with kevlar, it's just a bitch to work with, but it is done now, Did the main frame and the payload section. Waiting for those parts to dry so i can sand them and apply the E120 fiberglass on it and that's all folks, then sanding smooth, priming and painting... done...
Update 11/20/2016 - Sanded the body tubes, The Kevlar/CF hybrid is dry and looks really great ! Sanding was a breeze, just enough smooth for the final 2 E120 Glassing wraps (2). Cut the body tube and fin pieces already, might be overkill glassing the fiberglass but I want the fins to be strong. Fins are also a bit to big for the rocket but I want the stability for now. When the rest of the fiberglass cloth is in then I cut the payload piece and the Carbon Fiber nose cone part for final glassing. I might put a metal (can) tip in top for protection going past mach 1+. Also cut the CF wrap that goes INSIDE the shoulder of the nose cone for strength!!!
Update 11/24/2016 - The E120 glass is on double wrap on body tube and single wraps on the tip to tip fins with some extra glass in between. Looks nice and smooth. Sanding after.. Also have the nose cone wrapped in Carbon fiber lots of it ! and lots of epoxy. Hope it come out sturdy. The shoulder had a few wraps of carbon fiber on the inside also. That will be strong. looking for a metal piece to make the tip. After that a wrap of E120 fiberglass also.
Update 11/27/2016 - Sanded the Nose Cone - carbon fiber - smooth, next is a few wraps of E120 glassing and a metal tip nose cone.
Update 11/29/20216 - Did a clear coat of epoxy on the frames (2) - Also put a clear coat of epoxy inside the nose cone. Also Wrapped the nose cone in E120 Fiberglass, Did not work well... Sanding will help.
Update 12/02/2016 - Did another clear coat on the fins and some on the lower frame. Also did a clear epoxy coat on the nose cone and inside the nose cone. Next is sanding like hell !!
Update 12/02/2016 - Night - Just checked, the retainer got stuck, a bit, the clear coat epoxy seeped into the blue tape and the treads.... Dam, got it off just in time before it all hardens. Had to clean out both parts, took me a while, was panicking for a bit !!! But got is all out, checked this morning on December 3 and it seems ok !!!
Update 12/03/2016 - Started sanding the rocket parts, needs a lot of sanding also to get them smooth, on the fin can that's were the sanding be the toughest. I will put a lot of sanding in it to get it real great. Also did another clear epoxy coat on the nose cone, still looking how to get the metal on it !
Update 12/04/2016 - Did a bunch of sanding today, I'm realizing that I will be sanding the kevlar cloth to get the bumps out, I will do so and apply epoxy again. It will be a tough jod the sanding part. I made a promise NOT to use kevlar again... It seems that it all raffles out at some point and I'm wondering about the strength. Also sanded the upper bay and the nose cone, that carbon fiber sands really smooth !!
Update 12/12/2016 - Evening after work, did the fillets with rocket poxy, did not tape off the fillets so lots of clean up sanding after.
Update 12/13/2016 - After work, did not sand the rocket poxy, just put a coat of bondo on it and will sand the whole shit later when dry...
Update 12/19/2016 - Came home and had lots of energie to work on the Av Bay. Drilled the holes for the treated rods, cut the brass tube in half like 5"... Also had to cut the fiberglass sled to make it fit and slide inside the bay. Installed the nuts and washers and lock nuts on one side, need more washers... I just wonder if the two batteries and two stratologgers will fit on one side of the sled, the sled is also offset to accommodate the Iphone.
Update 12/20/2016 - Started on the sled. Attached one side on the sled, waiting for it to dry so I can attach the other end. Might take all night, it cold in the garage, even for 30 min epoxy !!
Update 12/21/2016 - Did the other end of he sled, will take some time to dry also. Drilled the holes for the rods and tighten on end already with washers and lock nuts and a beat of epoxy glue. Also cut the bottom of the charge wells so that the screws will come though clean to attach the igniter. There will be 2 charge wells on both bulkheads.
Update 12/22/2016 - Some av bay work done just lining up the rod and the av bay end build ups. Cut the guiding holes. Glued in the brass pipes. All dry and looks and slide great, will have to sand the edges and make them rounded so they fit inside the av bay. Also cut the charge well feet to make those long screws fit better for the igniter attachments.
Update 12/26/2016 - Did sanded the ends of the tubes flush so all he parts connects nicely together ! Then sanding the fillets, much sanding for this rocket also !!
Update 12/27/2016 - Did some work on the Av Bay external wiring and installed the charge wells also.... 4 of them, 1.5 grams FFFFg..... Also making a housing for the RTX GPS tracker that came in from Missile Works the other day, seems to work great and I'm making a protective cover for the battery and module.
Update 12/28/2016 - Worked on Av Bay, Minor work Glued some dividers on sled, like separation for two stratologgers, separation for battery... Still have to do the other side where the Iphone goes... Battery will be different positioned, Hoping that it all will slide inside.... Used Rocketpoxy to glue the dividers in, will dremmels sand it all smooth... 2 Stratologgers came in today also..
Update 12/29/2017 - Did glue the dividers for battery and Iphone, also the two switches will be on that side ! Used rocket poxy and clean it up with the dremmel... Also redrilled the holes for the charge wells, they were actually to close together... Used washers on all both sides.. Still have to sand the excess epoxy of the sled and clean up before installing the stratologgers.
Update 12/31/2016 - Glassed the Av Bay outside to make a snugger fit, still have to apply more epoxy to make it better snug...
Update 01/01/2017 - Did some work on the sled, the night before I painted it black with the high temperature paint, Today I drilled the holes for the stratologgers screw sockets..and glued them in with rocket poxy. Looks cool and is very solid. Did also most of the wiring for the two loggers / battery and switches. just left the switch option open for now..
Update 01/06/2017 - Yep New name = EXODUS...
Update 01/15/2017 - Started sanding on the entire rocket again, with use of dremmel I could get the fillets smooth.... plan is to cover the whole rocket with a clear coat of epoxy with balloons and sand that down smooth when dry ! Did fill in some bondo spots where the glassing was not done right...
Update 01/16/2017 - Did a full clear gloss coat on all the rocket parts including the av. bay and some inches on the inside (both) of the upper bay. The lower frame will have CA glue on top inside just a few inches to make it stronger there.
Update 01/18/2017 - Attacked the rocket with heavy duty sandpaper, wanna get it over and done with....wanna paint so badly....Still some dips to fill in and a bit finish sanding...
Update 01/19/2017 - Primed the rocket parts this evening after work, still lots of dips to filler in with bondo filler. Also thinking about making the fins 1 inch shorter so that they will be 3.75" instead of 4.75", makes the rocket .2 mach faster and 2000 feet more altitude also.
Update 01/20/2017 - Cutting the fins back to 3.5" so the rocket will go faster and higher, Was not an easy job but I got it lines up properly and it worked great. Also spot bondo on the frame for sanding later.
Update 01/21/2017 - Put a dab of epoxy on the contacts on the bulkheads inside and applied masking tape over it to protect the contacts. Also glued in the divider between the two switches, did solder the switch contacts on the doghouse quick connect wires, shorten them also but wanna keep the quick connect between the stratologger and the switch....Also applied a dab of epoxy on the soldered points at the switches contacts and also use the shrink socks. Next will be gluing the switches in place that the label is orientated right up.
Update 01/22/2017 - Sanded the rocket some more all parts with 220 pro sanding paper. Looks good. Sprayed the nose cone with the black BBQ high temperature paint and also the fincan.
Also drilled the holes like, 1) vent hole in upper frame, 2) plastic screw holes for the av Bay, 3) stratologger vent holes, 4) The sheerpin holes (3) for the nose cone - I also did the Av Bay stop ring earlier last night is a double up airframe pieces that I cut like 2" high and glued inside each other to give that more strength and is solid in place. Last will be the window and when that is properly lined up then the holes for the two switches. Realized that I screwed up the switches, the epoxy ran into the switch and blocked every movement there. have new switches on order with the solid connectors now.
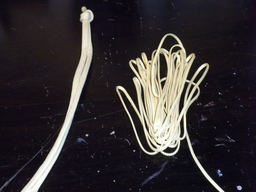
Update 01/23/2017 - Nothing done today, tired from work..... ordering more shock cord, Nomex/Sunward chute protectors and 2 - 500 lb swivels....and rail buttons from Apogee.
Update 01/24/2017 - After using bondo on the dips and cracks I primed the rocket - all parts. . Then I applied another coat of primer. Sanded the bondo down a bit.
Update 01/25/2017 - Sanded more on rocket with 380 grit and used bondo again for the filler in dips.. Then primed all the parts again..
Update 01/26/2017 - Did another bondo spot on a few dips... surely not perfect yet, but I can live with the imperfections. Still puzzled about the paint and color design.
Update 01/29/2017 - spend a full day on re-organizing the Av Bay setup, wires were too long to fit things in properly, so I have to dig out the switches again, came out easy, re-cut the wires of the switches and also the main chutes and back up...I uses making tape to hold them in place, now things fit properly with the phone and also the holes for the switches line up. Put some more Rocket poxy on the contacts of the charges of the main and backup and covered it all with rocket poxy also. No painting done today.
Also came to an agreement with myself for a paint design.... finally, it will be red and blue and a white band on the bottom just above the fincan.. Will proceed with the paintjob on Wednesday when temperatures are warmer.... Just the base coat for not the red coat, the blue on the fins is minor and also the white banding, still debating on the nose cone color... might be black or wait.....silver...
Update 01/30/2017 - Started the painting: Did the nose cone in the silver color and looks good but will do a second coat. Did the red all over the rest of the rocket and looks great BUT had some runs and needs and second coat anyway. will sand light tomorrow and do another coat Red...
Update 01/31/2017 - Sanded the first Red Coat down quite a lot, and sprayed a fresh red coat on that came out good, quite heavy... The bottom frame looks good but the upper bay looks funny, will sand that down with 1000 grit and see what happens.
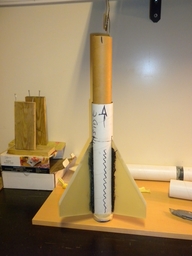
Update 02/01/2017 - Sanded with 1000 grid and looks a bit better now, did the design with blue masking tape with the help of Florence to cut the lines of the arrow design on each side. Peeled it off very carefully. Then painted the blue paint on the fins. After peeling the whole blue tape off when paint was still tacky, looks great, some line are not so straight but that's ok for me. Next is the silver lines on the fins and body.
Update 02/02/2017 - Yes, did the taping for the silver lines on the lower body frame and fins... very secure work but did ok and after spraying the paint on and peeling the tape off carefully it seems to look good, some imperfections but I can live with that. Wanna so a silver band higher up on the frame but the paint is getting low. so I will see what I do... .... Late nights job Silver banding done... Rocket is finished painted !!!
Update 02/03/2017 - Rocket looks great, did another silver-band on top of the lower body frame. Looks just fine, just to break the long red body color. This will be it for the painting. Also installed the rail buttons like 24 inch apart, glued them with Rocket poxy. Another late night job, did install the window, took me 3 times to get that in without epoxy on the window. But all taped up and in.
Update 03/04/2017 - Dam dam dam, just weighted the rocket fully loaded with no motor or casing dam, it was 2430 grams !!!! is like over 5 pounds !!! To heave for my taste !!!.
Update 03/04/2017 - Did some more work today. Drilled all the left over vent holes in lower frame and also the sheerpin holes in lower frame. Did wrap the shock cords in masking tape where they are exposed to the charges. Also did some epoxy in the top of the lower frame inside to protect from moisture and give it a bit stiffer and smoother exit for the av Bay. Also recalculate the GP point with fully loaded rocket. Also polished and waxed the rocket. Fit the parachutes inside the rocket and the 36" main fits tight... have to roll that up pretty tight to fit.
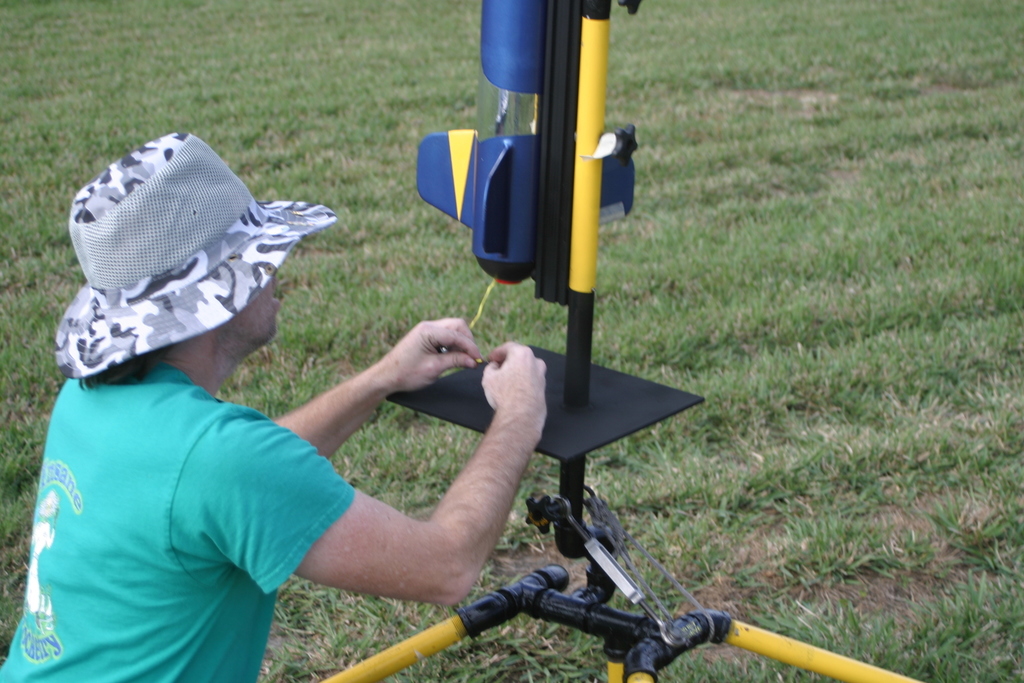
Update 02/05/2017 - Connected the XMas lights for the pyro testing. All the lights responded well, so next is he real pyro tests.
Update 02/07/2017 - Applied a bit of 30 min epoxy on the inside of the lower frame (top) and also on the shoulder of the nose cone to make a bit tighter fit.
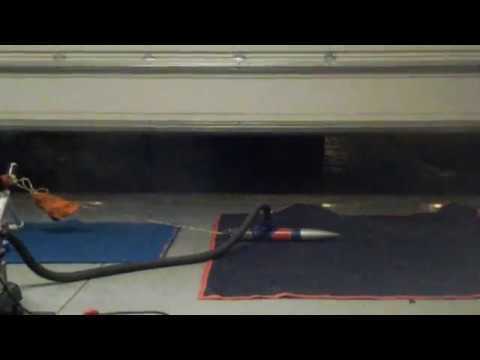
Update 02/08/2017 - Did a pyro test this evening, have to make the bay more snug, .5 FFFFg failed to separate.
Update 02/09/2017 - Another pyro test done... Made the fitting snugger on both sides and used almost 1 Gram.. and worked fine. Will keep using 1 gram just to be sure that it separates... and 1.2 gram for back up now.
Update 02/09/2017 - Grinded the rail-button heads a bit down, they were sticking out a bit to far and might hit the inside of the launch rail.... Had this happen before with another rocket.. Also made the screws for the Av Bay a bit shorten so they don't hit the electronics inside.. just a precaution.
Update 03/05/2017 - Rocket was recovered after one week hanging in the trees. All seems ok and survived the long trip there. Some modifications will have to be made and also refitting the part, and also a much longer shock cord like double the one is in now like 40 feet! Also thinking about a fiberglass nose cone with the RTX tracker inside so I have data all the way up and down. I have to find out if it all fits in there maybe with a 38 mm Motor Mouth and closure, Will find out after I have the rocket back and the exact measurements also.
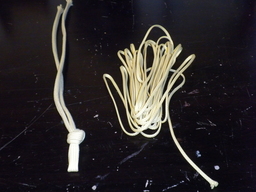
Update 03/19/2017 - Rocket parts came in, Nose come with composite tip and shoulder, 20 feet extra shock cord, center rings and bulkhead. So I started working on the nose cone and sleeve to get the RTX inside, and it seems to work well, The center rings needs to be cut larger on the inside the get the RTX tube protector inside, It works great now and slides in perfect, Plenty room in there for protection material also.. Did extend the shock cord with a climbing knot - Alpinebutterfly bend and taped the knot secure with masking tape, knot can be undone if needed. Installed a eye-boltin the center ring, I doubled up the center ringto give it more strength and installed the inner tube with epoxy and rocket poxy on the outside. This whole gizmo will sit on top on the shoulder and will be sanded to get it smooth all the way inside the ose cone. The very end of the tube will have rocket poxy to secure it also. now the tube that I used is a motor liner that can take lots of heat so that will work in the nose cone just fine. do not expect that much heat for a mach 1.77 !! haha, A bit over reacting again I guess here.
I also secured the new shock cord with a Davy Knot on the loop of the shock cord inside the rocket, will tape it all off and use soft protector to avoid zippering also.
Installed a shock cord bridle in the nose cone from a left over piece, doubled it up for security. Working on the nose cone screws and closure fro the RTX spacing in there, lots of rocket poxy used to secure the nut in there. Quite a contraption but seems to work, Only one problem would be to get the screws in all the way inside the nose cone, but I guess there are special screwdrivers for it.
Working on the spin in the next few days also....According Jason the trim should be on the right side of the rocket, looking from the back of the rocket. Same as his EZI rocket, Will start will 1" full width Scott professional masking tape and a second strip of 1/2 the width of the same masking tape over the full length of the fin. Will put a thin strip of epoxy on it to secure the masking tape. And when all seems to work I will paint it.
 |
|
Update 03/21/2017 - Started working in the nose cone, did one fiberglass wrap to get it close to the width of the upper bay. For the last coat I used the balloons for easy sanding. The inner tube is finished and the RTX slides in good
My only concern is to get the screws in that keeps the bulkhead in place, Maybe a long screwdriver that holds the screw in place. Will also use lock nuts.
Today I also did the taping on the fins, One full 1" width and one 1/2" width I will use some thinner epoxy to hold that in place and if that lowers the spin drastically I will paint it.
Update 03/22/2017 - Sanded the nose cone fiberglassing smooth then applied bondo spot filler, sanding again, primer coats etc... Just want to make the transition smooth with the upper bay to minimize drag there. Applied also primer ans sanded that bay smooth. After all the sanding ans fillers and primers I painted both sections, Nose Cone metallic silver and the bay the basic red. It seems it all came out great. So next is fitting the sections again and see that all items fit in there and then the weight. Hopefully it's a bit lighter then the previous setup so I can go higher and faster......
Dam.... FULLY LOADED (no motor or casing) weight is 2695 grams, will try to get it lower, or leave some stuff out !
Update 03/25/2017 - I repainted the upper bay RED and the upper part of the lower air frame RED, just to get rid of some hoopie doos...Looks great now, still have to wax it all.
Update 07/11/2017 - Started to modify this rocket for the 18 K flight at Mach 1.77 in November the Turkey Launch in Tifton, GA. Started on the hole to line up the switch better so I have a better off/on view on the left switch. Next will be the position of the Iphone camera lens, it's actually ok as long as I get that window frame out of the picture. but cleaning up the glass will make it alright! Then next is the fins for spin correction, maybe one small layer of tape or just paint that tapes parts that are on already might get it much better.
Update 07/13/2017 - Working to make the holes perfect round, applied bondo spot fix and the looks great now, Also sanded the upper bay and primed it already. Did the test and yes the switches are both lining up perfect. Tomorrow I will paint it red !
Update 07/14/2017 - Primed the bay last night, and todayafter work I painted it one coat of RED paint. It looks great the way it is and i will keep it like that and polish and wax in a few days....
Update 07/16/2017 - Bay is painted RED and will ne polished and waxed after a few days also. Did prime the taped area on the fins for spin correction, did two coats of bluepaint that might get it closer to less spin. Will be polished and waxed also later. Seems that all is working great and ready to launch in November 2017.
Update 11/27/2017 - Exodus was launched at GRITS in November 2017 and recover safely (see file). But the plastic coke bottle window melted due to the heat at mach 1.79 ! So right now I'm looking at some hole saws for glass cutting. Seems to be easy, Just find a good bottle around 3" ! Also need to fix the fin were the spin correction tape came lose !
Update 02/21/2018 - Cleaning the rocket up, I mean for repainting the body, started touching ups with bondo spot, sanding, but it looks like I will be sanding down the whole body and do the design over again, will be tough but have the time now, still recovering from my heart attack a week ago.
Update 02/22/2018 - Sanding the whole rocket down as much as I can (like), well eh that it's a smooth surface. Used sandpaper 100 grit for now, primed the whole bodies and applied spot bondo for now just for the uneven surfaces and small holes .. All primed, ready to put coat of paint.
Update 02/23/2018 - sanded 1000 grit, smooth but not perfect, Started painting the red color - one coat, will do fine, no more. All the Red is painted on. Have to get some blue and silver for the rest to finish.
Update 02/24/2018 - Got the Blue and Silver paint from the store, painted the blue on the fins and it looks all great.
Update 02/25/2018 - Taped the rocket bode for the silver painting, lots of taping. Painted the silver paint on the fins and some on the lower body circles. After removing the tape and paper it really looks great. Still have to do the fine silver lines on the fins to finish it all off. But it really looks great already !!!
Update 02/26/2018 - Painted one side of the fine silver line on all 3 fins, tonight I will tape off the other side to paint the other silver line on the fin part. Ok evening now, other side silver line is painted and done, Will check the entire rocket what it needs next tomorrow. Window and wax and shear-pin holes ? not sure...
Update 10/28/2023 - After all these years I found a matching plastic cup for the window section, cut out a square and glued it in with rocket poxy. Done.
Parachute Main = 36" - Parachute Drogue = 18" with spill hole (yellow).
Pyro Main = .8 grams Backup = 1.2 grams
Pyro Drogue =.8 grams Backup = 1.2 grams
Summary | |||||
| Total Launches | 4 | Highest Altitude | 15418 ft 4699.41m | Cumulative Altitude | 31940 ft 9735.31m |
| Total Fail | 0 | Highest Velocity | 1349 MPH 2171.89km/h | Average Altitude | 7985 ft 2433.83m |
| Average Motor | J | Average Thrust | 501 | Total Thrust | 2004 |
| Motor Sum | L | Motor Failure | 0 | Average Speed | 716 MPH 1152.76km/h |
Launches
| Date | Title | Likes | Weight | # | Status | Altitude | Velocity | Motor | ||
| EXODUS - FORTH FLIGHT - MACH TWO | | 5.73lb. 2.60kg | 1 | Success | 15418 ft 4699.41m ?17821 ft ?5431.84m | 1349 MPH 2171.89km/h ?1271 MPH ?2046.31km/h | L935-IMAX | ||
| EXODUS - THIRD FLIGHT | | 5.94lb. 2.69kg | 1 | Success | 2265 ft 690.37m ?2833 ft ?863.50m | 247 MPH 397.67km/h ?280 MPH ?450.80km/h | I165-17-CSTAR | ||
| EXODUS - SECOND FLIGHT - MACH ONE | | 5.18lb. 2.35kg | 1 | Success | 11957 ft 3644.49m ?12973 ft ?3954.17m | 1044 MPH 1680.84km/h ?1077 MPH ?1733.97km/h | K780-15-BS | ||
| EXODUS - FIRST FLIGHT | | 5.18lb. 2.35kg | 1 | Success | 2300 ft 701.04m ?2887 ft ?879.96m | 224 MPH 360.64km/h ?274 MPH ?441.14km/h | I120-15-I MAX |


Video
 |
Images

 1 2 3 4 ... 8
 |
 |
 |
 |
 |
 |
 |
 |
 |
 |
 |
 |
 |
 |
 |
 |
 |
 |
 |
 |
 |
 |
 |
 |
 |
 |
 |
 |
 |
 |
 |
 |
 |
 |
 |
 |
 |
 |
 |
 |
 |
 |
 |
 |
 |
 |
 |
 |
 |
 |
Comments
Nice build Freddy - now clean it up!
Thanks Tim... Applying hybrid - Kevlar and Carbon Fiber - now and then finish off ith E120 Fiberglass, then sanding smooth, priming and painting...done, no more projects !! Flying time !
timcub on 2016-11-18 13:32:34Z wrote:
What kind of altitude you planning on pushing this one too? Will you be able to fly it at NEFAR?
Actually Tim, I started making this one because I got a replacement CTI casing 3 grain and 2 1 grain motors... This was a replacement for that 38 mm HiTech rocket, I told them that I only want 54 mm replacements and they did offered me those.... So the one grain motors do not fly any of my other heavy 54 mm rockets, so that's were I started building this min. diameter rocket to fly those one grain motors... Again the project gets way out of hand building wise... But it fits a 6 XL casing that will take it to mach 2 to around 18 K....knowing that makes me start building it more solid = more weight again... We will see, that might be a shredder at Grids next year !!! But can't wait to fly it on those 1 grain motors !!!
timcub on 2016-11-21 13:20:09Z wrote:
Did you give up on Grizzly?