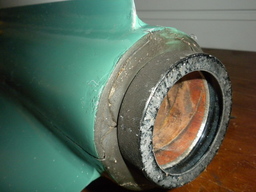
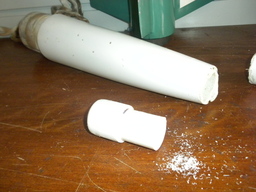
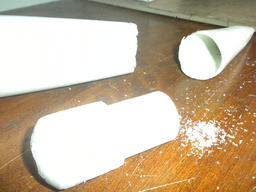
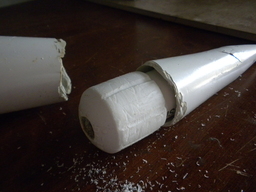
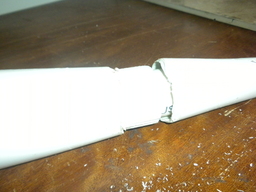
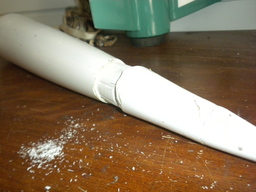
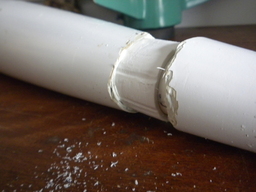
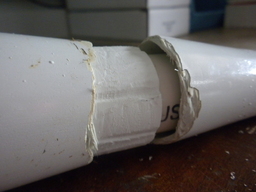
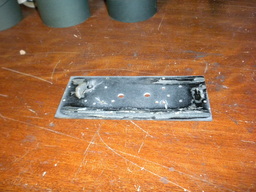
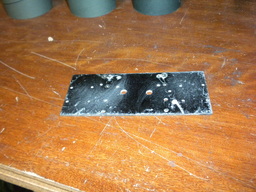
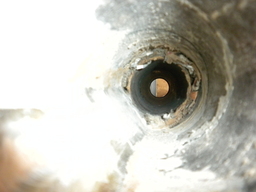
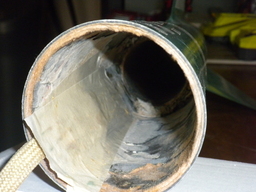
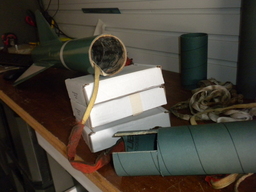
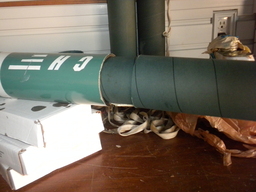
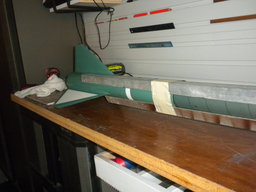
Well, the original Tomach had a incredible bad flight in October 2021 came down ballistic and got badly damaged. The fin can and lower booster part survived. Some parts are still usable like shock cords and the AvBay and sled. These parts will all be refurbished and examined before use. So Tomach II will launch again soon
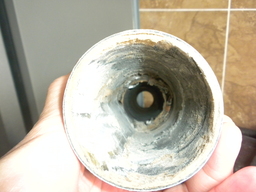
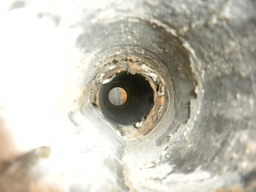
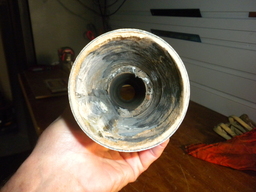
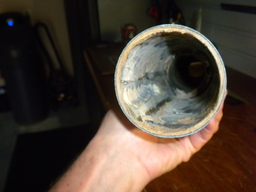
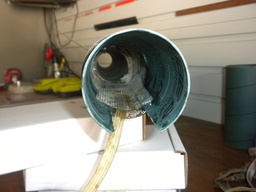
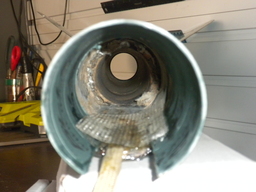
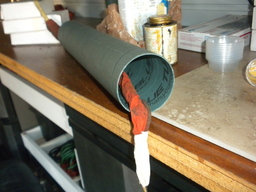
Update 12/19/2021 - Got all the broken pieces from Carlos this December 18, 2021 of the unfortunate ToMach flight in October 2021. Most of the item are re-usable but will be cleaned and washed and closely exanimated before an actual launch. I did cut the boosted down to up a few inches above the motor mouth and start cleaning that out a bit, It needs more drying so I can sand the cardboard in there and use a layer of epoxy to penetrate there to hold the sleeve for the extended new part. It will be a bit longer so that it fits a 6XL casing and that I do not have to pack things to tight !!! will order a 48" piece of fiberglass tube so I can cut the booster part and the upper part and make also the sleeve. The AvBay needs to be replaced to make new holes for window and for switches. It will all come together again and much better!!! Promise! Stay tuned!
Update 12/21/2021 - Thinking now, will make the AvBay and sled big enough to accommodate other phones also. The window might be a bit bigger than usual because of the offset of the phone's camera.
Update 12/22/2021 - Contacted Tim, and he has Blue Tube, like 30" and a few shorter ones, like around 15". I can have them for free he said. Now that's�a great start to start building!!!
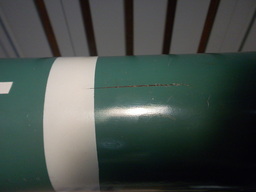
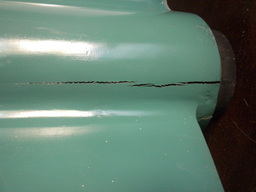
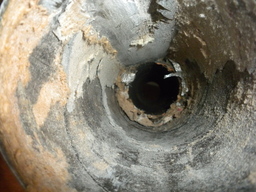
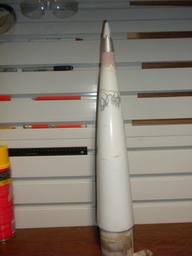
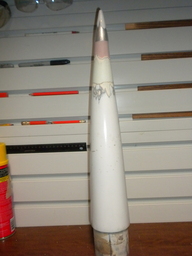
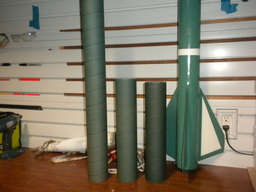
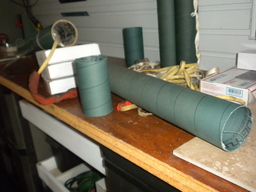
Update 12/26/2021 - Started to clean out and peel out some more cardboard inside the cut-off booster. It's now 25" long (with fin can), will add another 25" of blue tube and a sleeve so that the whole combination will be around 48" long. Upper Bay will be around 18" long, so with the nose cone that will be a total length of 83" long! The booster also has some cracks in the body that I need to address for safety. but that fin can feel and looks rock-solid!!
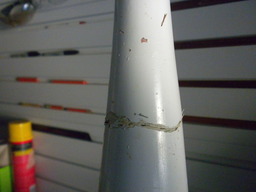
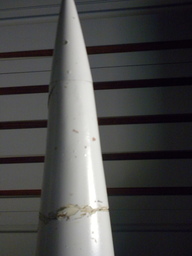
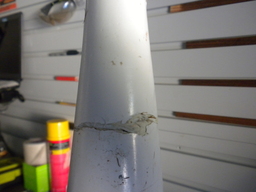
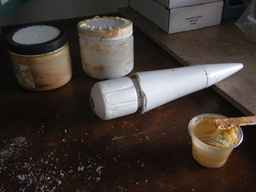
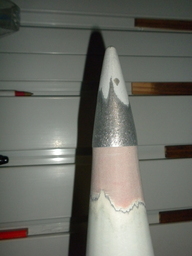
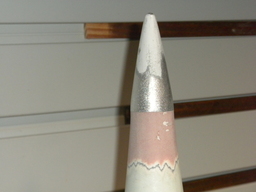
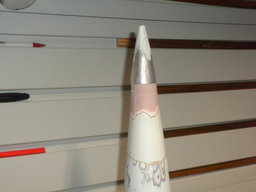
Update 12/27/2021 - Started�to fix the nosecone, most crucial thing is to have it glued on the INSIDE, so I applied a PVC pipe and coupler get the most glue on the inside walls. Used Rocket poxy and sanded the inside and the PVC pipe for better grip. So far, all good, still drying and all will be heavy sanded, also that metal nose tip will be sanded smooth, and all will be inline and aerodynamic.
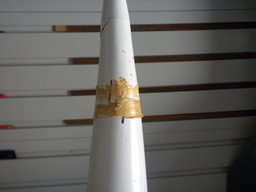
Update 12/28/2021 - Rough sanded the nose cone top and tip, took some off the metal tip also, this was to big anyway for the original nose cone, so I might take�some more off there and make it pointier!!
Update 12/29/2021 - Sanded the nose cone tip a bit more today, and it came out a bit better, might do some more before I prime it.
Update 01/20/2022 - Cleaned out the old sled, removed the stratologgers and battery holders, saved the screws, not rusty. Sanded the sled clean from epoxy so I will use that again for the next setup.
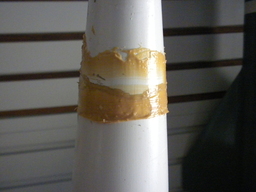
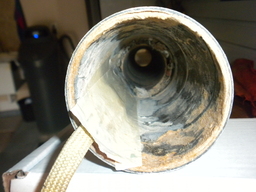
Update 02/13/2022 - Did some work today, cleaned out the lower fin part to get that ready to glue/epoxy/ rocket poxy the shock cord in. Sanded out a groove so it will not interfere with the casing, actually the motor casing 6XL will not hit that part anyways. Glued the shock cord inside with rocket poxy and on top some fiberglass with epoxy. Cut a sleeve and left the shock cord part out to the buildup is not too much there. Cut the rest of the lower part blue tube so the total length will be 44" that is quite enough for some room and for streamer. All drying now overnight and checking tomorrow morning if all is good and solid.
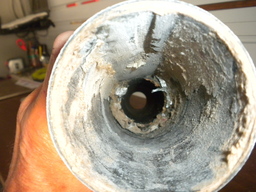
Update 02/14/2022 - Started also on extending the upper bay, the tube that Tim gave me was a bit too short for that purpose, so I extended it to 21 inches. The inside sleeve will also serve as stopper for the Av Bay at 4 1/2 inches. All is drying now and clamped with 3 L angle rods.
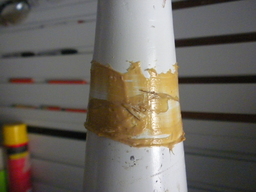
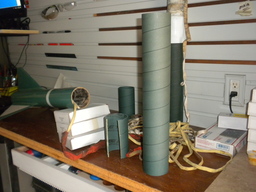
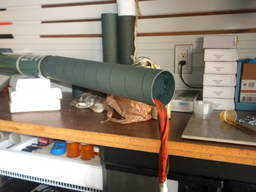
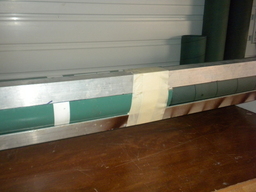
Update 02/21/2022 - Did some fiber glassing, booster part and upper bay. Only 2 wraps, will see how hard it is when all dry, Might do a 3rd wrap that I have left over, it's�the heavy-duty fiberglass clots from West Marine.
Update 02/22/2022 - Did another two wraps today, and now when dry it feels and looks dam solid!!�It's the fiberglass from West Marine, in store roll, kind of heavy made but great ! Glad that this fiber glassing is done, now the sanding part and fillers and priming till smooth before painting.
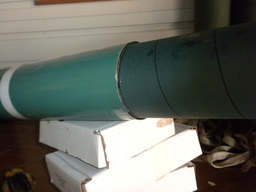
Update 08/26/2022 - Started sanding the booster and upper bay. Will prime later this weekend and sand some more, does not need to be perfect. Have other rockets that need to perform to the max. Today I also ordered a Blue Tube AvBay from Always ready rocketry, hopefully get that fast soon so I can put the whole rocket together and paint. Also ordered the DOGHOUSE-Binder Design dual wire set with switches and battery holders... The perfect flite stratologgers are out of stock for now.
Update 08/27/2022 - Sanded out the nose cone slide in section of the upper bay and also the shoulder of the nose cone so that it slides smoother. Painted the whole parts with killz and see how that comes out after sanding, might not be such a great idea will see what happens when I start sanding.
Update 08/28/2022 - Sanded with 80 grit, then primed all the pieces. Used fillers in some spots to make things smoother there, sanded with 220 aggressive sandpapers. All smooth will primes a last time when it stops raining. Probably after that I will apply the first green paint coat. Sanding, priming, sanding and final primer cot on.
Update 08/29/2022 - Painted the green coat on today, all good, still some nick knacks, but good to go. Does not have to be perfect.. The nose cone has also a new fresh white coat.
Update 08/30/2022 - All painted up, fins design and on booster, might do a big T with arrow (Tomach) later after all is done.
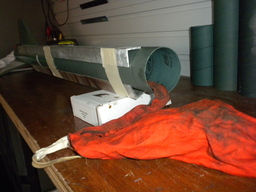
Update 08/31/2022 - Installed the second rail button on the booster. The wires, battery holder and switches from Binder Design came in today. Installed the battery holders on the sled that I could recover from the Tomach disaster flight. All cleaned up. It is 8" long and the avbay that I ordered is also 8" long, so I might cut that down a bit and reorganize the items.
Update 09/01/2022 - The AvBay arrived, and it looks and fits great. Will put a thin coat of epoxy on the avbay and will Carbon fiber the bulkheads to make them stronger. Have to re-align the holes so that they line up with all the other 3" rocket Avbays. Will do some more work in the weekend and probably finish the AvBay.
Update 09/02/2022 - Did some epoxy work today, did a coat on the AvBay epoxy with balloons to sand smoother and fit a bit snug. Both bulkheads have fiberglass and epoxy coat (thick) on top, will re-drill the holes at the right location when dry. Also did a coat epoxy on the sled, just some leftovers...
Update 09/03/2022 - Dam the epoxy came out rubbery, wrong mix, had to sand it off on the booster half, the upper stage half fits in snug like it needs to be, so I left it that way, but the booster half has to slide properly. Did the epoxy again on the bulkheads after I peeled�it all off. The new mix seems ok for now. Redid the bulkheads and the epoxy seems ok now, sanded and painted. Also sanded the AvBay so that it fits real snug into the upper bay and snug into the booster. Installed the inner (2) stop rings (BT) inside to hold the bulkheads in place, will continue tomorrow with installing the rods and drilling precise holes to line up those rods with other AvBays.
Update 09/04/2022 - Working on the sled today, drilled the holes off-center in the bulkheads. Installed the eyebolts (2) with nuts washers and locknuts. Also, the rods�are installed, with washers, nuts and locknuts. All is confirm with the other�3" sledges. Installed and glued the sliding rods. Fiddled some more with the AvBay setup, installed the terminal blocks and the charge wells. Will have to epoxy all of those later when finished.
Update 09/05/2022 - Did some wiring today, still waiting on the stratologger to come available again.
Update 09/17/2022 - The RTX/GPS came in today, tested and all working good. Still waiting when those two stratologgers care available.
Update 07/03/2023 - I posted a request in the SRA site and Tripoli for 2 stratologgers CF - I got a message from a nice gentlemen Darin Raymond�offering me two older Stratologgers for $80 both and data cables. I hope to receive them in the next week. So now I can finish this rocket and fly it in October sometime.
Update 07/09/2023 - After a long wait I got my hands on two older SL100 Stratologgers, never used. Had to switch some stratologgers out on an other sled because the SL100 were to big/long so I used the CF stratologgers for this unique sled with unique switches. This sled will only serve this ToMach rocket. Modified the sled and tested it all out and it's ready to go. Just have to drill the vent holes / the holes for the two switches and the holes to hold the AvBay on the upper stage.
Update 07/09/2023 - Started measuring out the holes for the screw switches. (2) I drilled those out already and will round them off with the dremmel. After that I will try to measure out the holes (smaller) that I need to drill in the nose cone upper bay.
Update 07/10/2023 - Did some work on the AvBay, drilled the holes (2) for the switches. Lined them up with the upper bay and drilled those also. Was a bit off there but patched the mis drilled holes nicely.
Update 07/10/2023 - Drilled those holes for the plastic screws (3) that holds the AvBay onto the upper bay. Sheer-pin holes drilled for the nose cone (2). All painted with Alpine green. Drilled vent hole in booster. I guess that rocket is ready to launch in October.
Update 09/23/2023 - Today I got the right length 83" an d empty weight 11 pounds. Quite longer and heavier than the original one.
Update 09/29/2023 - Got the extra charge well installed for the booster Back Up charge. All complete now.
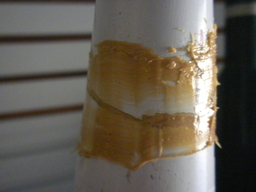
Update 10/23/2023 - Did some modifications on the nose cone, and sanded it mote flush with the upper bay and also the tip a bit more sanding. It's better now, some painting later this week. Had some Fiberglass leftover from my Project X repair, so I fiberglassed the tip of the nose cone a bit more, sanding after.
Update 10/24/2023 - Just did a clear coat of epoxy to make it look better.
Update 10/25/2023 - Sanded the clear coat a bit smooth, this have to do now, after this priming and painting and that's it. Primed the top section and nose cone, touched up a few uneven spots, sanded and primed again. This should do it before painting, maybe a light sanding with 180 grit or so.
Update 10/27/2023 - Lots of sanding and priming and sanding again, Had the white paint coat on, sanded that smoother and painted it again. This will do it now, looks good enough.
Averages & cumulative are calculated if there are actual values present, not just estimated. None of the averages or weighted. Please do not populate actual values with estimates.


 1 2 3 4
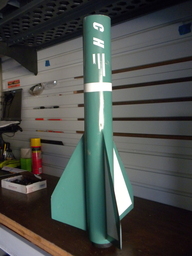

Comments
Enough of it survived to me that it isn't even a different rocket, possibly new bay, and replacement of damaged tubing. The nose, at least from the photo, looks like a sheets of fiberglass over break and it will be back in shape.
Oh yes that nose cone can be fixed with fiberglass !! And the rest will be cut off and extended with new tubing. Hoping that the avbay is re usable, seems that the rods are bend... But hey it will fly again, can't wait to start working on that one !!