   |


| Likes |  |
| Skill | 5 |
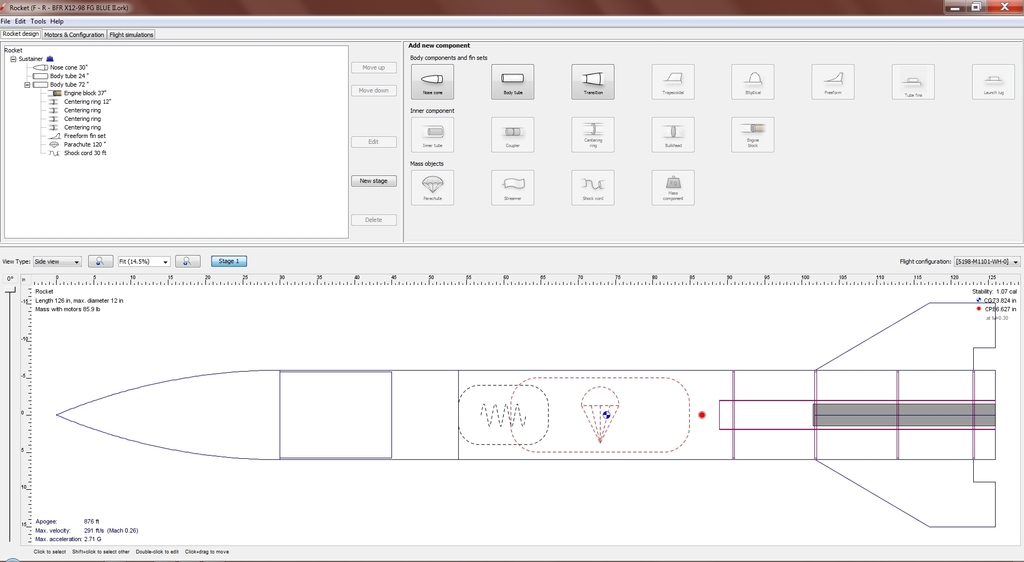
| Length | 110.00" 279.40cm |
| Diameter | 12.00" 30.48cm |
| Weight | 75.00lbs 34.02kg |
| Parachute | 120" 304.80cm |
| Drogue | |
| Motor Mount | 98mm-98MM - 75 MM |
| Deployment | Single |
B(F)IR
Description
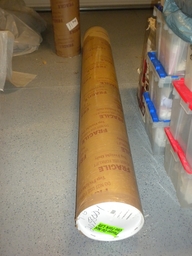
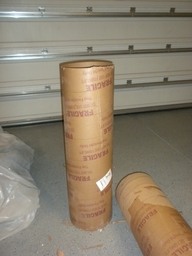
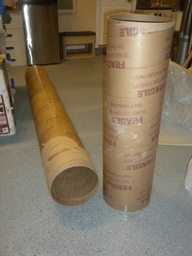
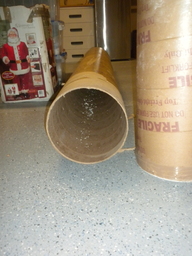
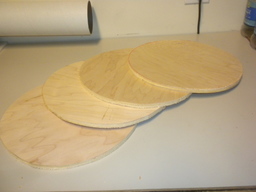
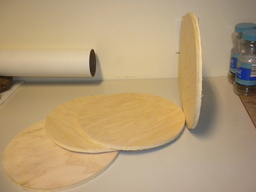
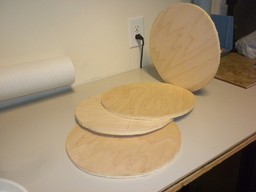
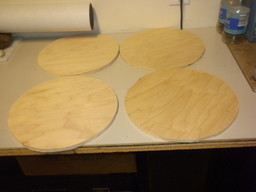
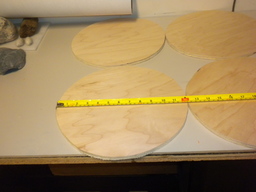
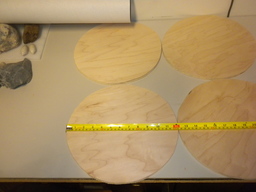
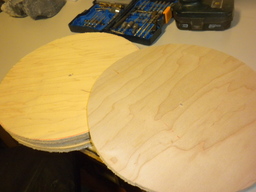
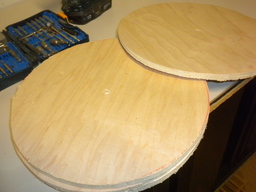
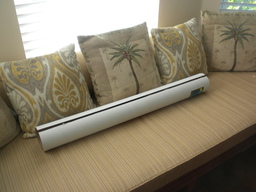
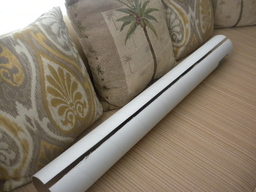
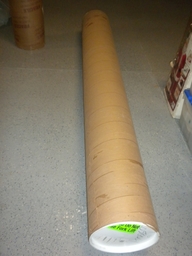
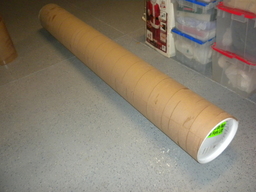
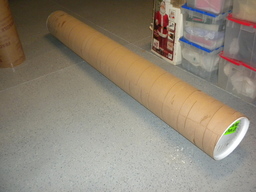
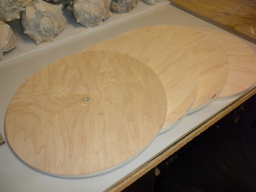
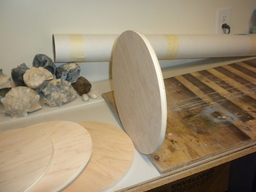
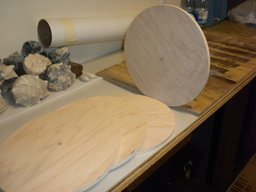
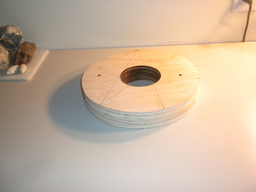
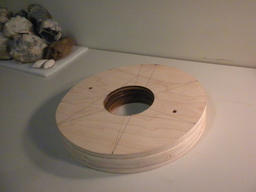
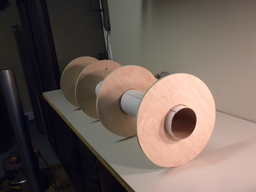
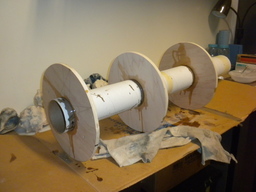
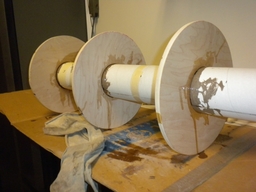
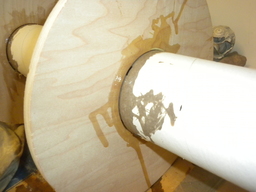
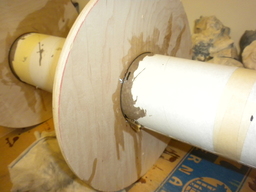
Oh Boy, what did I start.... A BFR building project, for now I really do not know how it will look, but it's gonna be huge !! haha. Had a real heavy duty Cardboard tube from work (outdoor screening) like 8 feet long. And some plywood. So I got that in my car and looked at it when home, Dam so big and heavy !! I started cutting 12" diameter wooden bulkheads...for the motor mount ! Just rough cut circles that I need to fine tune and sand to fit the interior of the cardboard tube.. This project need to cost me NOTHING... I mean just the parts I can find to make it nice and maybe flyable !! haha Money will be spent on Epoxy / fiberglass / paint !!!! That's all, and if it turn out ok THAN I will get heavy duty shock-cords and chute !!! haha Just want it to look great and mean !!
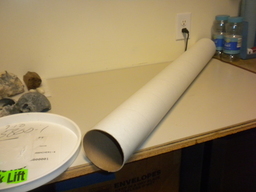
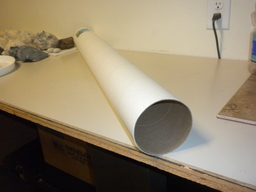
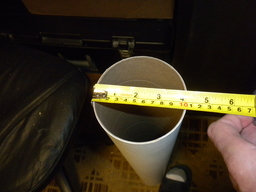
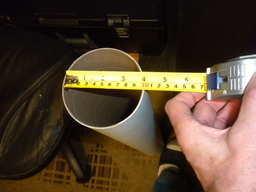
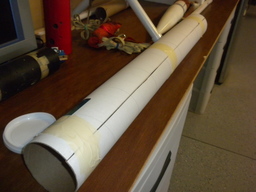
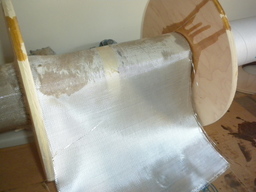
Update 12/15/2018 - Started to peel off the cardboard a bit to get it lighter and for fiber-glassing also.. Today I found the MM tube in Staples that will make a nice 98 mm MM after glassing... Working out some fin designs to make it safe and balanced to fly..
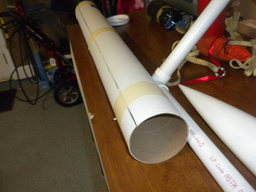
Update 12/16/2018 - Good thing I still had Jason his 98 mm casing so I could snug fit the cardboard tube I had from Staples. I taped it to the right size, so I can fiberglass that later. Peeled a whole layer of the cardboard tube, so that is done, some sanding and than ready for fiber-glassing. Also at work we are sanding the old hardwood floors down with a professional sanding and 40 grid heavy duty sandpaper belt, I can use those to perfect the center rings (4) more to fit into the tube. Still to do is the Sleeve or coupler tube and peel that down more so it fits the other tube..
Tube outside diameter = 39.5 "
Cost so far = Staples $ 6
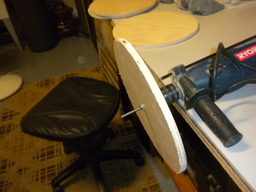
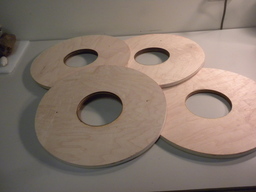
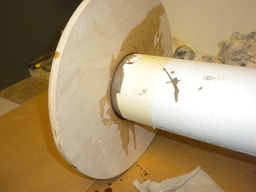
Update 12/18/2018 - Came home with heavy duty flooring sandpaper like 35 grid and started sanding those rough center-rings down. It took a while but it all worked great, was suppose to be a weekend job but that is done now, so glad ! Now have to 'find' or borrow a 4" hole saw to make the cut for the Motor Mouth, so I can tack that in there and see how it all fits together before making and attaching the fins. Ordered the 98 mm retainer from Aeropac today also.
Cost retainer 98 mm = $ 70
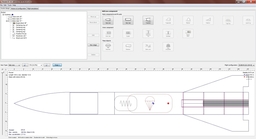
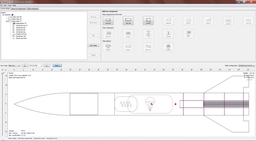
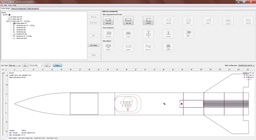
First Design, not so happy with it:

Second Design II:
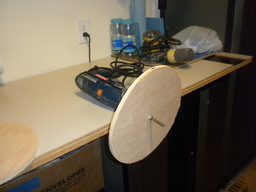
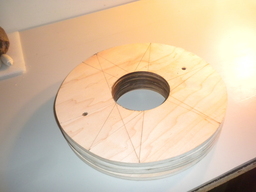
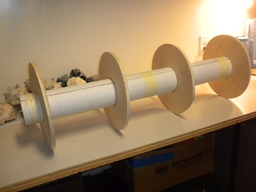
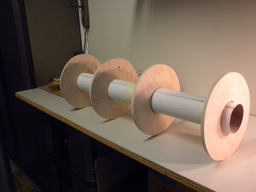
Update 12/19/2018 - Things seems to go faster than anticipated. Borrowed a 4" hole saw from Kevin at work today and when home I started aligning up the center-rings to find the real middle point to start drilling that 4" hole through all the 4 (1/2") bulkheads. Used my heavy duty drill to get through all of them in one time, very tricky not to twist your wrist by doing that, But it worked all great, was done in a few minutes with smoking hole saw. Then I fitted the 4" tube and it fits snug ! Actually all is ready now to tack those center-rings on the motor mouth tube and after that the fins and fiber-glassing and heavy epoxy and rocketpoxy ! Oops need motor retainer to get that measure squared away.
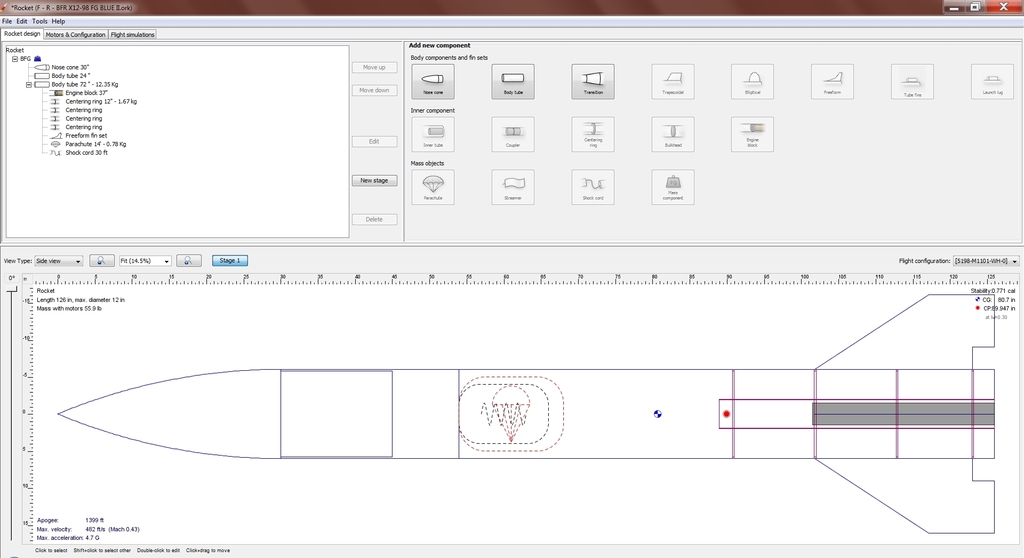
Update 12/20/2018 - So far the tube is 12.35 KG = 27.22 Lbs - The center-rings (4) are 1.67 KG = 3.68 Lbs. Actually for now all seems to be on the positive side to proceed with the project, If I can stay below 40 Lbs - 50 Lbs that should be great ! Oops shock cord and chute....
Update 12/21/2018 - Investigating the rocketman chutes, like 14 feet chute will give a 44 Lbs rocket a decent of 17 ft/sec. which is great. Weight of that chute is around 1.73 Lbs, that is great ! Made also a cut out template of a fin design, might make it an inch bigger, just to be on the safe side.
https://the-rocketman.com/chutes-html/
Design 3 - a bit bigger fins and weight adjusted:
Update 12/22/2018 - Picked up My slow hardener 206 and epoxy 107 at the West Marine store in St. Augustine. All is inside the house to keep it warm for now so I can use it later. They also sell fiberglass by the yard, Real heavy duty but for one wrap that might do perfect. Will tack 3 center rings tomorrow already.
Expenses for the epoxy and hardener = $69
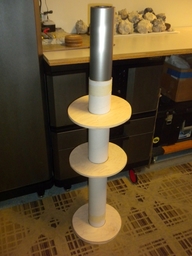
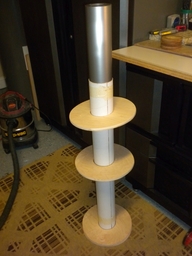
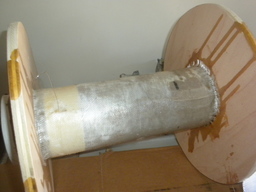
Update 12/23/2018 - Tacked the 3 upper center rings on the motor-mouth so when dry I can finish this up with fiberglass so that the whole construction is fiber-glassed solid and ready to tack the fins on. The last center ring will be glued on when everything is on and in the rocket so that I still can reach for extra epoxy inside the motor construction and center this last ring with the 98 mm retainer.
Expenses for the fiberglass = $39
Update 12/24/2018 - Christmas Eve - Cut the pieces for the motor mouth to glass, like 11" wide and around 14" long to go in between the center rings. Made them longer so that they overlap a few inches. Epoxy was heated up inside the house at 74 degrees but when I took it in the garage it got cold fast and I have to work a bit fast to get it all done properly, Can't imagine glassing the big tube ! That will be done in sections of course.
Update 12/26/2018 - The 98 mm retainer came in today from Aeropack, it seems that it is really really snug. Tried it on the grizzly's AvBay and it did NOT slide in. Maybe it needs some sanding or so ?? Will ask Bob from Aeropack.
<<< The RA98 is designed for 98mm motor casings to slide through. A 98mm coupler tube will not fit because they are sized to be a close fit into a 98mm tube. Motor casings have smaller diameters than coupler tubes so they easily slide in.
We have never had any complaints. We have been asked if the motor tube is supposed to fit into the retainer body. It does not as the motor tube is supposed to be flush with the bottom edge of the lower centering ring. This way the motors aft closure rests against a firm aluminum lip instead of against the end of the motor tube.
In your case you?re trying to fit an avionics bay through which is likely made from or sized to a 98mm coupler tube so it has a very close fit. If your av bay is really close you could mill the ID of the retainer body so it slides through. But if the retainer will be used to retain a motor then be careful not to remove too much of the ID as the step takes the thrust of the motor.
Regards,Bob
>>>>>>>>>>>>>>>>>>>>>>
Update 12/27/2018 - Thinking about doing the fins in 3/8 birch plywood and glass them, if I start off with 1/2" than they might be to big and heavy. After glassing the 3/8" they will be perfect. Also Clayton sold his 3-D printer, and does not have access to bigger 3-D printers, So I will construct the nose cone mold and fiberglass it when I have the right shape that I wanted.
Update 12/28/2018 - It has begun - started to glass the lower part of the rocket already. Was pretty easy to do. I did a light coat of epoxy before I put the fiberglass on and that worked great. So 36" done already. have to get more fiberglass to do the upper part and also for the fins. Will get the 3/8" birch this weekend so I can cut the fins and start fiber-glassing those also.
Update 12/29/2018 - Picked up more fiberglass at west Marine. Warm day today, did the second part of the fiber-glassing. all worked smooth.Will do the rest in the next few days and than start on the fins. Will get some 1/2" from work and sand it down a bit before fiber-glassing.
Expenses today: Fiberglass = $58 - Brushes (4) = $5
Update 12/31/2018 - New Years Eve - Glassed the last part of the tube, overlapped like 24" with the other glassing, so I can feel how strong those two layers might be. Also epoxied inside the tube for strength. This side will be the motor end. Cut a fin template in Thermoply for pre-cut in wood.
Update 01/01/2019 - Weight after first glassing coat = 13.48 KG. Also went to Lowe's today to pick up a 2x4 1/2" sheet plywood for the fins, can make only 2 fins out of it, need one more sheet !
Expensestoday: Plywood = $25
Update 01/03/2019 - Cut 2 fins today, came out great. Will need one more plywood Oak sheet 2X4" 1/2" and also two more yards of fiberglass.
Update 01/05/2019 - Picked up 2 yards of fiberglass again at the West Systems St. Augustine store this evening before we went to the Lights Of St. Augustine trolley ride.
Expensestoday: Fiberglass 2 yards = $35
Update 01/06/2019 - Went to Lowe's today to get me a 2 X 4" oak plywood sheet, that will be glassed after cutting the fins, I cut two more fins out of the ply sheet so now I have 4 in total for glassing in the next few days.
Expensestoday: Plywood = $25
Update 01/07/2019 - Started fiber-glassing the fins on both sides. Put 6 mil plastic in between and a lot of weights on top.
Update 01/08/2019 - Peeled off the plastic of the fins under pressure... Plastic came off great and easy... Really cool plastic to use for a next project.
Weight of fins: 5.760 kg
Update 01/12/2019 - Working on the fins. Measured the circle to get them all lined up properly. Circumference= 39 1/2 " - so #1 @ 0" - #2 @ 90 3/8" - #3 @ 18 3/4" - #4 @ 27 1/8". Got everything marked and numbered.
Will tack the first fin on tomorrow or so. Also sanded the center-rings a bit mucho to get the whole motormouth to slide in just right and tuck, not much play and it has to slide in a certain orientation also. Will get some more epoxy on the inside of the tube. Also cut the slots for on the fins were they meet the center-rings to slide in. All is kinda tight but feel good to continue to the next step, soon. Weather looks and still feels warm and soft for epoxy. Also did cut an 1/2" of the root of the fin were they meet the motor mouth. Now I have to sand the slots out more to get them properly tacked on the motor mouth.
Update 01/13/2019 - Worked some more on the fins today, notch them out more since I took 1/2" off the root were they meet the MM. Sanded them all including the leading edge, just a bit bull-nosed... Not much, 1/2" is is to much to sand them in a real sharp edge, but no need for this rocket. Not a performer... Just get it up and fly like 1K ! Now all is ready to tack the fins on the MM in the next few days. The whole setup is huge, I hope to get that in the car one day.
Update 01/23/2019 - Measuring the fin cut outs again, double checking measurements. Tacking the fins top and bottom with drywall screws so they don't move.
Update 01/24/2019 - Measured and made the markings on the tube were the cut outs for the fins need to be. All is more than double checked on the fin can and the tube. It will be a very tight 1/2" slots. This is just to tack the fins on the bottom with epoxy and glassing. Then it will be pulled out of the tube to get it all glassed were the fins meet the motor mouth. Also need to epoxy on the inside if the tube all the way were the fins and center-rings go.
Update 01/25/2019 - Came home after work with lots of energy. started cutting the slots on the tube for the fins to slide in. Used the dremmel saw. Cut on the 9.7/8"markings and the measured 1/2" to the left at all mark lines. All was even measured the day before. Sliding the fincan in was actually easy. So now I can adjust the still loose fins properly so that they are plumb with the round motor mouth. Had to screw the center-ring to the tube to make it all tight. Used wood-glue to tack two opposite fins in place, Also use the straightedge and clamps to make sure that they were even and parallel... The wood glue started to leak onto the tube. Not good, still have to take out the fin-can for fiber-glassing when all is tacked properly. So I took it out and now it's drying upside down. Will make sure that I take more precaution when taking the 2 other opposite fins in. When this is all dry I will fiberglass the hell out of this before I secure it in the tube..
Update 01/26/2019 - Tacked the fins more to the MM - used strips of fiberglass this time and lots of epoxy. Double measured the distance between the fins and made sure they were evenly set. Waiting for this all to dry for the next step. Also epoxied more inside the tube at the motor mouth / fin section so that this cardboard is more soaked with epoxy to secure the fins and center rings with epoxy. All will be very well bathed in epoxy. Also picked up more epoxy and hardener at the West Marine store in St. Augustine.
Expenses today: Epoxy kit $79
Update 01/27/2019 - All dry nice and sturdy feeling. Marked out the lines for the screws to go when slided all inside the booster tube.
Update 01/28/2019 - Did some small blocking on the center rings were they meet the fins. Just an extra stronger feeling for the fins were the epoxy does not reach. Use 3/4" - 3" blocks and 1 1/4" drywall screws. Will weigh the whole contraption before it goes into the Motor mouth !!!
Update 01/31/2019 - Did got my courage together and cut a ring from the left over 12" tube that will be place and glued on top of the fin-can inner part. Then I decided to measure like 24" of the original rocket tube and start cutting 2 feet of it. It came out dam great ! Did mark it were they meet so they will have to match up when sleeved in after it is all setup and glued inside the upper part.
Update 02/01/2019 - Sanded the fin blocking today smooth with the center rings. Next is install a U- bolt on top of the forward center ring and than slide fin-can inside tube and glassing.
Update 02/02/2019 - Was awake most of the night, finding a way to reduce the weight. Started drilling holes in the center rings and the fins were they meet the motor mouth. Reduced it with 600 grams. Went to Lowe's to get that U-bold, actually not such an heavy duty one, but good enough for backup. Drilled two holes and removed the fin blocking there to get that rectangle washer in and two nuts. All worked well and is secured on top and bottom. Also Used some left over Fiberglass to enforce the fin-can and the fins and the center-rings in some area's. Did use fiberglass on the U bolt as well top and bottom, should be all more than secured enough for now. Waiting for it all to dry.
Expenses today= U-bolt $ 2.
Total weight of naked booster and fin can separately not glued in yet is 20 kg. = 44.09 Lbs. so still with in the margin.
Update 02/03/2019 - Sunday morning, rainy day.. again... Mixed epoxy and put it on the rim of the center rings. Slided the whole fin can contraption inside the tube, easy slide, not heavy, till the fins reached the end of their cut outs. SO that was that already ! Cut some pieces if fiber glass and lay them down inside the very bottom bay of the fin can to re enforce it their and to bond it with the tube wall. All good. Than I slided the last center-ring inside the very bottom and it came out flush with the end of the motor mouth. All good. All center rings are screwed off with 1 1/2" drywall screws. Two screws on each side, and tighten up as much as it could. The rocket is standing up for now to dry and to settle so that the bottom center-ring gets some epoxy on the inside. Next will be fiber-glassing the fins into the tube and fiberglass the bottom of the last center ring. Need more fiberglass for sure. Than sanding smooth. Will get that final weight later this week.
Update 02/06/2019 - Total weight of naked booster = 22 Kg = 48.50 Lbs. This is the cut booster up to 73 3/4 " - upper stage has been cut off to be reunited with nose cone (still have to make the shoulder and coupler).
Update 02/08/2019 - Cut the left over tube for other parts, like 20" for nose cone a 12" tip will be added, have to make the foam cutout so I can fiberglass it and also need 15" (2) center-rings with a 10" middle cut out, just to get the form correct. Also cut the shoulder 10" and the 'coupler' 11" for the upper part. all parts need to be corrected for with like 15" for the nose cone and the shoulder needs to slide in correctly and also the 'coupler' that has to slide in smooth in the lower booster.
Update 02/09/2019 - Picked up 3 yards of fiberglass at West Systems again. This is for the fins and the coupler and shoulder. Did cut the couplers a bit more and tighten them up with a piece of wood and screw it together so now they have the almost perfect rounding to slide tight in the booster and upper bays for separation. The exposed ends will be fiber-glassed for strength and than some sanding to make it real smooth. Have also some foam to get me started on the tip or the dome of the nose cone.
Expenses for today - fiberglass 3 yards = $ 60
Update 02/10/2019 - Started fiber-glassing today, first cut the fiberglass strips that goes on fins/fillets , than cut the excess off the end of the booster so the motor end is more exposed. Also worked on the shoulder and coupler, cut those fiberglass pieces also and some leftovers that will go on the inside when the wooden 'helper' is removed and all is dry. Also put some epoxy inside the booster tube and on the inside of the coupler and shoulder to give it more strength. I made a bigger batch of epoxy to get it all done, but all the end it feels really like jell, it started to stiffen up and difficult to spread. So I had to make a smaller new batch to finish the shoulder and coupler, did not want to much epoxy on there so it still will be tight when sleeving in and out. Next will be some wider pieces of fiberglass cloth on the fins to cover the fillets a bit better before sanding.
Also cut 4 more 30 X 15" overlapping fiberglass cloth for the final wrap on the fins and over the fillets. This will be done early morning. and finish off the two couplers and shoulder on the inside after unscrewing the wooden 'helpers' to keep the curve in shape. Also gathered some 16 X 16" foam to make up the dome nose cone tip. That will be a 12" high dome.
Update 02/12/2019 - Did not feel like doing anything after work today, Florence had some procedure done over the weekend and on Monday and we were kinda exhausted from that. What I did is drawing some circles on 3/4" and 1/2" plywood for the nose cone. That will be around 15" diameter so a little bigger than the body. Sort of the falcon from Space-X. Will make those cut-outs at work with a jigsaw.
Update 02/14/2019 - Found new name for rocket: B(F)IR - Big "F" Insane Rocket. I leave the F up to you...
Update 02/23/2019 - Had a few setbacks the last few weeks, Health problems and car repairs $$$$, just continue with what I have right now. Finished the last layers on the fins, overlapping the body tube as well. Still need to do the sanding after this all is dry and than another coat of epoxy to make the body smoother for final sanding and painting! Have not figured out yet about the nose and cone shape.
Update 02/28/2019 - Had a jig saw from work, so I could cut the circles for the nose cone. 3 in total, will drill holes with hole saw to cut down on weight also.
Update 03/03/2019 - Did some more work on the nose cone, Cut one more rib out, Drilling circles in the ribs does not seem to work great, they loose some strength and fall apart easier. So I cut an extra one and there are now 4 circle ribs in the nose cone, Had them all aligned up and screwed in place. Next is fiber-glassing those ribs and double check if all is square.., Than the shoulder in, fiber-glassed. After that I will close up the nose cone, Still have to do the open side with 1/4 sheet and sand rounded as possible. Fiberglassing the whole thing inside and outside.
Update 07/27/2019 - After months a found the time today to go to West Marine and get some epoxy and hardener!! Work and private life has been really busy so far this year and other expenses. So today I epoxied the shoulder parts together and also the nose cone parts so they slide in the booster and upper part. Used some left over Kevlar cloth (dam hard to cut that stuff) just to re enforce the parts, will have to clean up those dirty parts.
Update 07/28/2019 - did some more epoxy work today, tucked some fiber glass and carbon fibers in the open grooves and soaked them with epoxy.
Update 08/02/2019 - Today I glassed the upper bay part/nose cone. I will need another layer of glassing.
Update 09/22/2019 - Sanded the whole rocket today, needs another epoxy coat and light sanding after, also fillers with bondo, just a few, does not have to be perfect.
Update 03/13/2021 - Finally more work done, Primed the whole rocket, all parts, will sand a few times and apply bondo to make the body smoother...
Update 03/15/2021 - Made a contraption for the nose cone, was thinking about this when sleeping, this contraption will make it easier to fill in the foam in between and get the shape better. All parts are glued together. Also will give the body an extra coat of primer.
Update 03/17/2021 - The nose cone has a lot of vertical ribs sections, these will be filled in with foam and topped off with spray foam to make the curvature better and smoother, so over that will go the fiberglass/epoxy. Just a few layers will make it strong enough I hope. Did also marked the circle for he base of the nose cone tip, that will be all glues together. Just to ad here: 4 nose cone ribs are 1/8 plywood and the ones in between also 4 are cardboard, they are all glued together with heavy duty wood glue.
Update 03/18/2021 - Cut the bottom circle for the nose cone and glued the rib section onto the round platform with heavy duty wood glue. Using wooden ribs and cardboard ribs in-between.
Update 03/23/23021 - Cut circles holes in the wooden ribs and also the bottom platform to save a bit on weight.
Update 06/10/2023 - Did some work on this rocket today. Sanded the two upper bays and gave them a thick primer coat. This will be all patched and sanded again.
Update 06/11/2023 Put another patching coat on the two upper sections. Ok both section dry, more patching, sanding and then priming. Looks good enough, will sand with 200 grid or so when primer is dry. Have to come up with door sections to install access the stratologgers and electronics per section. Will have multiple chutes. Put a section divider in one of the top sections. This is to reduce the space when I install charges there. I will install more of these to ensure that the separation work flawless. Added also a section divider in the upper nose cone section. Both are screwed and glued in with Elmer's wood glue. The dividers are 1/8" thick.
Update 06/14/2023 - Sanded the upper sections smoother, also sanded the booster with the electrical sander grid�150.
Update 06/15/2023 - Primed (heavy) the booster and fins. Will sand when dry.
Update 06/16/2023 - Did a second primer�coat and sanded with 150 grid.
Update 06/18/2023 - Cut out two windows and a door area in the upper nose cone bay all 4" diameter.
Some Links:
https://www.facebook.com/groups/SpaceModeling/
https://www.shapeways.com/?fbclid=IwAR2tblY6kwKY4zNxI-BN__YpX2rnnhYBc3jCZobRByHiM23rsK486FAOWgs
Images

 1 2 3 4 ... 10
|
 |
 |
 |
 |
 |
 |
 |
 |
 |
 |
 |
 |
 |
 |
 |
 |
 |
 |
 |
 |
 |
 |
 |
 |
 |
 |
 |
 |
 |
 |
 |
 |
 |
 |
 |
 |
 |
 |
 |
 |
 |
 |
 |
 |
 |
 |
 |
 |
 |
Comments
Uhoh!
Love the bulkheads.
Crazy big !!!! dam heavy.. haha Crazy project....
esotericdude on 2018-12-16 01:27:10Z wrote:
Fra-gee-lay. It must be Italian!
I see an upscale Lumpy in your future!
So is this a Big Falcon Rocket?