   |


| Likes |  |
| Skill | 5 |
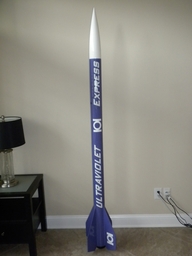
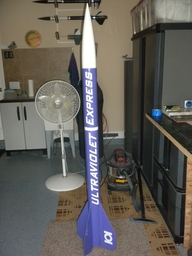
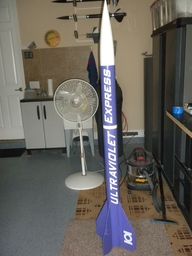
| Length | 73.50" 186.69cm |
| Diameter | 4.00" 10.16cm |
| Weight | 16.26lbs 7.38kg |
| Parachute | 70" 177.80cm |
| Drogue | 34" 86.36cm |
| Motor Mount | 75mm |
| Deployment | Dual-2 Computers |
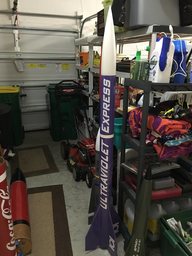
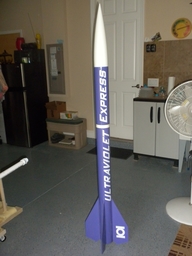
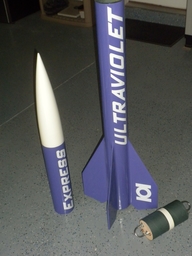
ULTRA-VIOLENT EXPRESS
Description
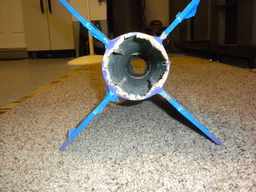
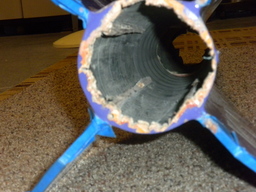
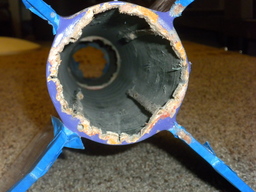
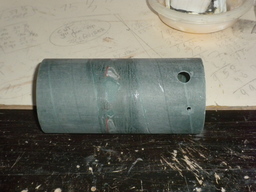
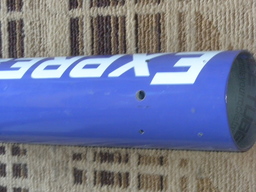
And yes, a new project... Jeff gave me this rocket because it was over over build and heavy and had only a 38 mm MM in it... I started already as far as I can taking out the old motor block and try, really trying to get that out for a 75 mm MM, yes a 75 mm MM, The rocket has the blue tube and is fiber-glassed !!! Nice project, but will take a long time to get that going !
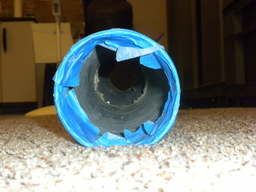
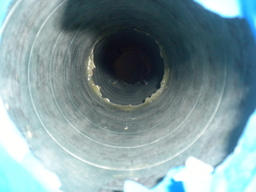
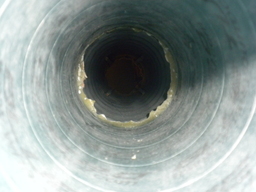
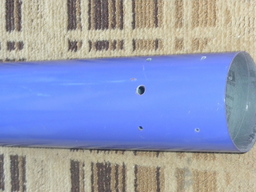
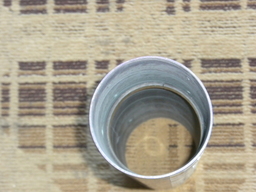
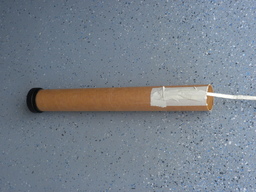
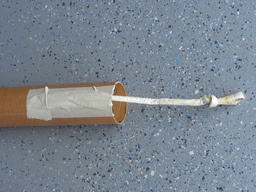
Update 05/22/2016 - Today I got the 38 mm blue tube motor mouth out !! It took me a few hours, and I had to extend the saw saw with another blade to reach all the way inside. The two blade were taped together with masking tape.. It took me a few treys to get it all out deep inside the tube. I still recovered like 12" of unharmed blue tube !!
Update 05/29/2016 - Today I applied the CF on the Av Bay bulkheads used 'heat' epoxy, also the shoulder of the nose cone has CF on the inside with 'Heat' epoxy.
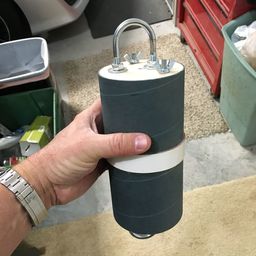
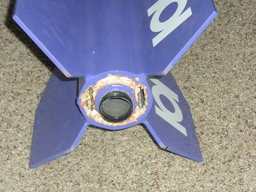
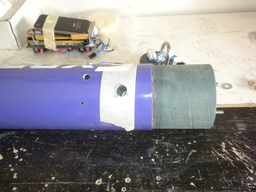
Update 06/08/2016 - Wildman's rocket stuff came in today, that 75 mm MM fits like a glove, only ordered the wrong center-rings need 75mm-98mm. Will be sent out soon. Also the Aeropack retainer came in and it all fits nice !!!
Update 06/12/2016 -Pored some more epoxy in the Nose cone eye bold section and also some Rocket poxy, all looks and feels very solid. Put some epoxy on the outside of the Av Bay were I sanded it down, will have to sand that also to make it feel snug.
Nose cone has the expanding foam inside today
Have to weigh all the components, it seems that I have to add like 500 gram (1.1 lb)nose weight to make it stable to fly on a 75 mm motor. = 1.6 cal.
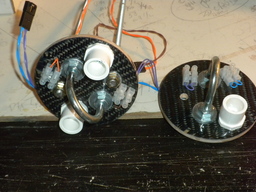
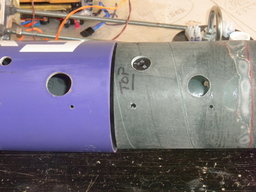
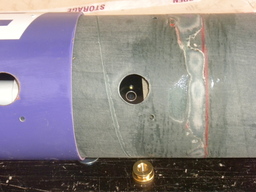
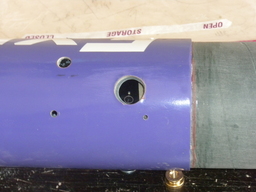
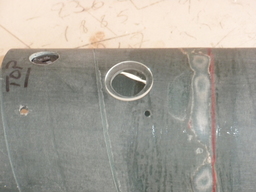
Update 06/19/2016 - Did the screw holes on the AvBay and also the switch holes. Made the build up from fiberglass and glued it in with 30 min epoxy.
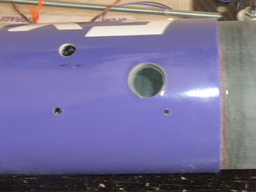
Update 06/26/2016 - Made finally the window cut out. Had to measure things a few times to get the right location. Was critical because I want it to match with the other rockets windows. All came out great, glued the glass window piece in place. Also worked on a backup kevlar loop in case I want to use a 54 mm motor casing that does not have the top closure. All glued in with rocket poxy !! Also sanded out the fin roots a bit to get the motor mouth unobstructed slide in. So all is done, the only thing is waiting on the center rings to glue the motor mouth in place !
Update 06/28/2016 - The little holes that I made while cutting the fin can out has been fixed with rocket poxy and sanded smooth with dremmel. The whole rocket is now scrubbed so ready for touch up painting after the motor mouth is in.
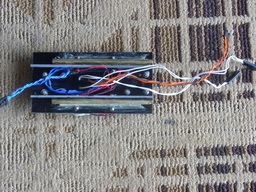
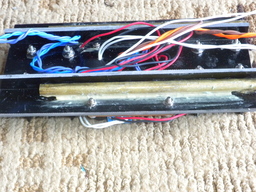
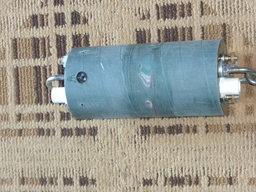
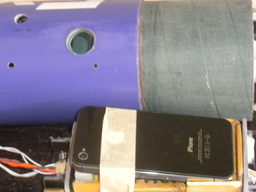
Update 06/29/2016 - All the holes are drilled, like the screw holes, vent holes, sheer pin holes and window and glass is all in. The Av bay is ready and the sled fits. Did some build up the other day to match the Iphone and holder so it's close to the glass and it looks perfect. So for now nose cone and body paint and touch up, install motor mouth and center rings. Waiting for wildman for those parts and the parachute protectors and that's it !
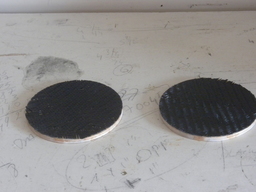
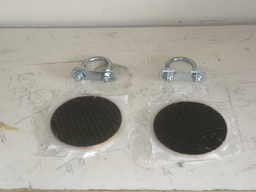
Update 06/30/2016 - Cut a few wooden strips (8) that will be glued on the motor mouth to support the fins, There will be two on each side of the fins and glued on the Motor mouth. I had to sand a lot down because they were a bit to wide and were touching the main-frame to much. When the center rings are ready then I will glue the motor mouth in place and finish off with the bottom center ring and the retainer. Will do this all together so I can line up everything nicely when he glue is still liquid. Still doing the center-rings out of wood and thick because Wildman sent me the wrong center rings again, This time they were fiberglass rings and to thin !... The wooden strips glued on the motormouth will be filled up with lots and lots of rocket poxy and then pressed in place all the way where the bottom center ring will be. Will do that this 4th of July weekend... Fun !
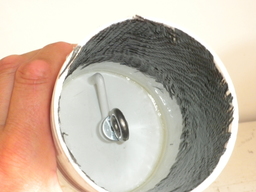
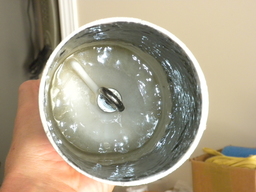
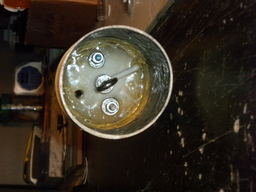
Update 07/01/2016 - Jeez was that a trip! Gluing the motor mouth in place today ! First made my own center-rings because I did not like the thin fiberglass rings. Made them by hand and cut them out with a jigsaw saw.. Took a while and also sanding till they fit properly! Then put a lot of epoxy inside the frame on the fin roots a lot !! And also a lot of epoxy on the motor mouth guide pieces that I glued in on the MM previously! Pushed the MM in and realized it was a bit off center, took it out again with all the glue !!! Andre-centered it ! Dam was that a job !!! But the glue is distributed very nicely now, Pushed the bottom centering in place so that it sits inside the frame a bit, did this to secure the retainer a bit more on the outside so it sits in the rocket poxy also now. Installed the retainer with JBWeld and rotated it a bit to spread the JBWeld more. Then after that I pored the space up to the rim with rocketpoxy !!! A lot so that motor mouth is solid in now... Installed the top centering also, had some trouble getting that in place but it all worked great ! All is centered !! Still have to poor some more epoxy in the inside of the top centering just to make sure. But it looks that that part has already enough Rocket poxy also! done !!!
Update 07/02/2016 - Painted the nose cone (black inside also) white and the body frame, protected the lettering which looks great and is in great condition. Installed the rail-buttons(JBWeld). Rocket feels heavy now with all that glue on the motor mouth, will re-calibrate it before flight. In a few days I will polish and wax it all. Rocket looks great already ! Put CA glue inside the tops of the frames.
Update 07/03/2016 - Assembled and installed the motor, just wanna see how the stability was, It just reached 1.09 cal, not enough, so I added more weight in the nose cone and see how that works after the epoxy is dry. Will do another test calculation. But It should be fine at 1.5 cal then.
Update 07/03/2016 - Nighttime job - did some epoxy on the inside of the frames lower and upper (not the sliding parts like Av Bay and nose cone section) to protect the tube from the pyro blast.. Might help a bit.
Update 07/04/2016 - Drilled sheer pin holes in lower frame and fixed the motor mouth with JB Weld, had little crack in it. Also polished and waxed the rocket totally!
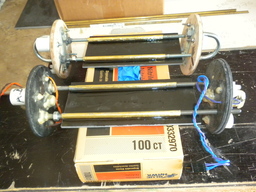
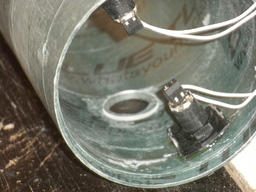
Update 07/05/2016 - Motor mouth sanded out, and K735 motor loaded. Only thing is making the charges.
Update 07/06/2016 - Jeff Milner comment "The design is an upscale of the Estes Polaris rocket.The Polaris was the first rocket that I had built - it flew dozens of times until it was crushed when a bike fell on it in the garage."
Update 07/16/2016 - Was not happy with the short heavy design, so I asked Bernie for a 12" blue tube and coupler, and he had one !! Picked it up on a very rainy day in Palm Bay SRA launch site.
Update 07/17/2016 - Started the night before after the SRA rainy day launch on fiber-glassing the extension from Bernie and coupler, Lots of air-bubbles in the fiberglass,did a fast job and screwed up a bit, but sanding will take it out later.
So it was dry, and after yard work I started sanding with 150 PRO grit sandpaper and it seems to work great, after that I put a laminating last epoxy coat on it to make it smoother and then sanding again.
Update 07/19/2016 - Upper new extension bay seems still a bitsy tacky Painted it with black heat paint and will wait to sand it. Really don't know how it stays that tacky, never had a problem with my epoxy mix before.
Update 07/21/2016 - Did some more black heat paint coats, but after sanding still the same sticky result....Was getting tired of that sticky coat from the laminating before so I re-glassed it with micro-balloons for easy sanding later or next day. It's dry now already and it feels great. hopefully just a light sanding coat and then primer and painting..... Also the shock cord from 'onebadhawk' came in today very nice 7/16" kevlar with 3 loops, looks really great and light.
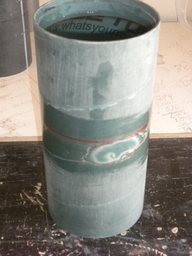
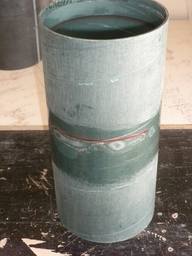
Update 07/22/2016 - Indeed laminating coat with 'old' epoxy mix worked out great. Sanded it and applied a few primer coats with sanding in between, very smooth. Also applied some bondo to fill some uneven area's. All dry and then the final 'grape' color coat, looks great now ! Very happy with the result !
Update 07/24/2026 - Made a 'sign' sticker to fill up the 12" extension gap between the lettering. Bought some 'cricut' sticky paper and cut out the design, after applying on the rocket I will paint it white.
Update 07/25/2016 - Sign is painted on, had to do it twice, did not like the rounding of the first design. second time worked out great!
Update 07/27/2016 - Drilled the vent hole in the lower bay. applied CA glue in the lower booster. Did the polish and waxing on the whole rocket. Looks great, love it.
Update 07/29/2016 - Sanded out the top of the booster so that the Av Bay sits in more comfortable for deployment. All fits nice and snug and she is ready to go
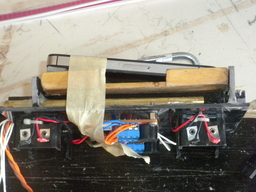
Update 08/10/2016 - Did some last minute adjustments on the Av Bay, to hold the Iphone, In front rised the fiberglass holder a bit and also on the two side to hold it there from sliding sideways, Has to break out the old sides and sanded it down. Seems to work great when dry.
Update 10/11/2017 - Did a fast final adjustment on the sled, Used a machine screw to hold the Iphone from sliding forward, This might be a permanent setup for that phone.
Update 10/15/2017 - Posted a spin comparison of the 3 flight, needs more tape to reduce the spin, the two masking tapes I put on tho fins was not enough to reduce any spin. Will tape the other two fins also, so then 4 fins are covered.
�
�
Parachutes: Main 70" X-Form (Michael) - Drogue 24" (Dome)
Charges: Main 1.8 grams - Drogue 1.8 grams / Backup: Main 2.2 grams - Drogue 2.2 grams.
�
Summary | |||||
| Total Launches | 9 | Highest Altitude | 5646 ft 1720.90m | Cumulative Altitude | 31082 ft 9473.79m |
| Total Fail | 0 | Highest Velocity | 428 MPH 689.08km/h | Average Altitude | 3885 ft 1184.15m |
| Average Motor | K | Average Thrust | 581 | Total Thrust | 5232 |
| Motor Sum | N | Motor Failure | 1 | Average Speed | 356 MPH 573.16km/h |
Launches
| Date | Title | Likes | Weight | # | Status | Altitude | Velocity | Motor | ||
| ULTRA-VIOLENT EXPRESS - TENTH FLIGHT - CATO | | 16.26lb. 7.38kg | 1 | Motor Failure | ?2681 ft ?817.17m | ?275 MPH ?442.75km/h | J449-15-BLUE STREAK | ||
| ULTRA-VIOLENT EXPRESS - NINTH FLIGHT - NO GO - WINDS | | 16.26lb. 7.38kg | 1 | Other | ?2681 ft ?817.17m | ?343 MPH ?552.23km/h | J449-15-BLUE STREAK | ||
| ULTRA-VIOLENT EXPRESS - EIGHT FLIGHT | | 16.26lb. 7.38kg | 1 | Success | 3769 ft 1148.79m ?4835 ft ?1473.71m | 359 MPH 577.99km/h ?415 MPH ?668.15km/h | K500-18-RED LIGHTNING | ||
| ULTRA-VIOLENT EXPRESS - SEVENTH FLIGHT | | 16.26lb. 7.38kg | 1 | Success | 4120 ft 1255.78m ?6058 ft ?1846.48m | 415 MPH 668.15km/h ?509 MPH ?819.49km/h | K740-18-WHITE CS | ||
| ULTRA-VIOLENT EXPRESS - SIXTH FLIGHT | | 15.68lb. 7.11kg | 1 | Success | 2648 ft 807.11m ?3920 ft ?1194.82m | 261 MPH 420.21km/h ?358 MPH ?576.38km/h | K454-19-SKIDMARK | ||
| ULTRA-VIOLENT EXPRESS - FIFTH FLIGHT | | 14.33lb. 6.50kg | 1 | Partial | 2656 ft 809.55m ?3342 ft ?1018.64m | 304 MPH 489.44km/h ?375 MPH ?603.75km/h | J760-19-WHITE THUNDER | ||
| ULTRA-VIOLENT EXPRESS - FORTH FLIGHT | | 16.26lb. 7.38kg | 1 | Success | 4179 ft 1273.76m ?3938 ft ?1200.30m | 351 MPH 565.11km/h ?337 MPH ?542.57km/h | K445-17-CL | ||
| ULTRA-VIOLENT EXPRESS - THIRD FLIGHT | | 16.26lb. 7.38kg | 1 | Success | 3936 ft 1199.69m ?4272 ft ?1302.11m | 367 MPH 590.87km/h ?376 MPH ?605.36km/h | K630-15-BLUE STREAK | ||
| ULTRA-VIOLENT EXPRESS - SECOND FLIGHT | | 16.26lb. 7.38kg | 1 | Success | 5646 ft 1720.90m ?6232 ft ?1899.51m | 428 MPH 689.08km/h ?435 MPH ?700.35km/h | K510-Classic | ||
| ULTRA-VIOLENT EXPRESS- FIRST FLIGHT | | 16.26lb. 7.38kg | 1 | Success | 4128 ft 1258.21m ?4683 ft ?1427.38m | 363 MPH 584.43km/h ?398 MPH ?640.78km/h | K735-SKIDMARK |


Images

 1 2 3
1 2 3
 |
 |
 |
 |
 |
 |
 |
 |
 |
 |
 |
 |
 |
 |
 |
 |
 |
 |
 |
 |
 |
 |
 |
 |
 |
 |
 |
 |
 |
 |
 |
 |
 |
 |
 |
 |
 |
 |
 |
 |
 |
 |
 |
 |
 |
 |
 |
 |
 |
 |
Comments
Jeez Freddy! So much work getting those centering rings out! Great job!!!
Yes It was a pain in that rockets ass !!
Really great work Freddy - you always amaze me!
Thanks Tim, Rockets are my life, and you and my rocketry friends......if real life does not get in the way!!!
timcub on 2017-05-19 12:23:17Z wrote: