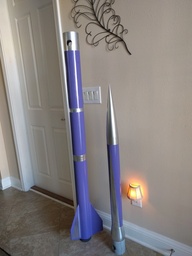
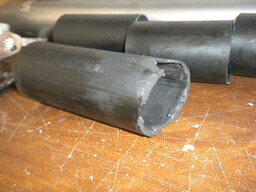
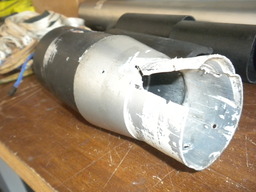
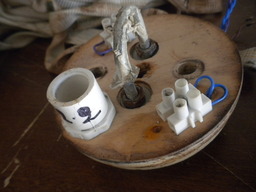
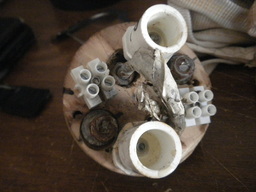
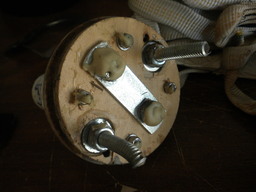
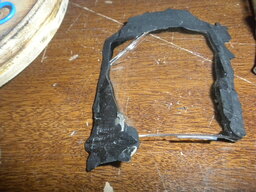
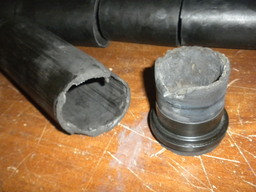
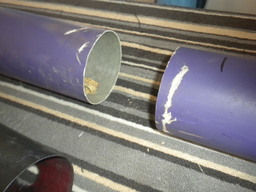
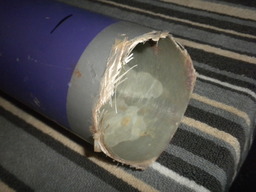
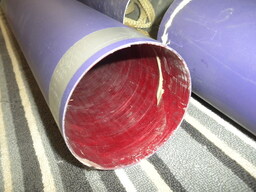
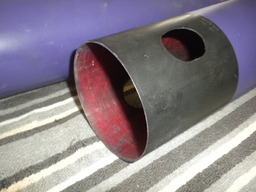
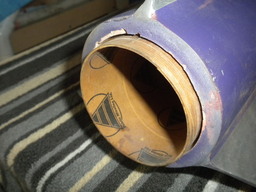
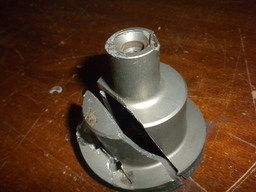
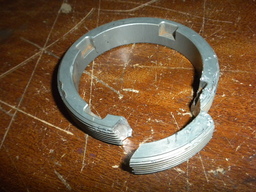
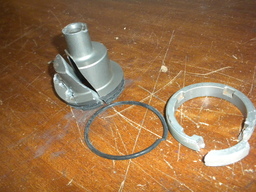
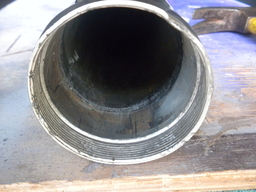
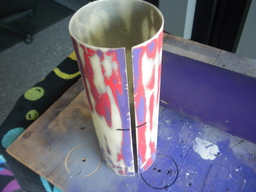
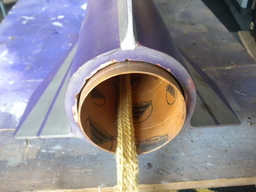
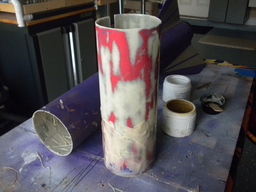
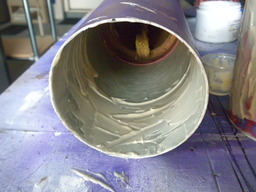
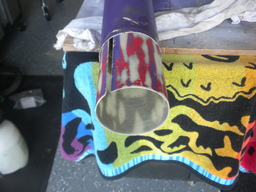
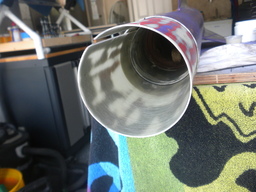
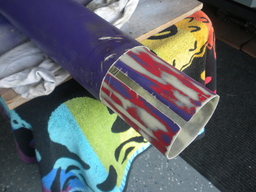
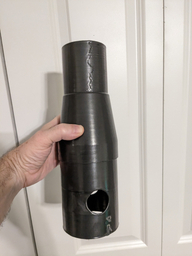
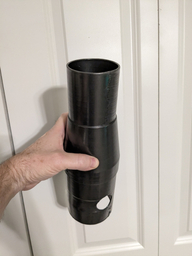
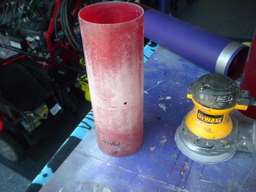
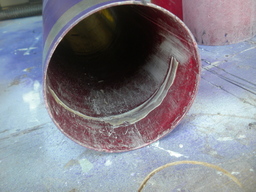
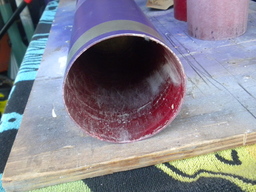
This rocket had a great launch at AIRFEST 29 in KANSAS in September 2023, but the flight did not ended good, at 14 K the rocket separated probably due to the high Mach 2 forces. Came down in sections, nose cone and upper bay not damages, booster and AvBay got separated in different sections and fin-can and casing came down under Mach speeds and got berried in the hard soil, Had to use a shovel to dig the booster section out. Contacted Bernie for some parts, and also looking around for a fiberglass transition coupler 4" to 3".
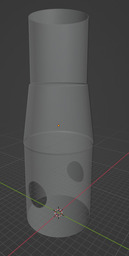
Update 09/13/2023 - Asked Jason Cook today if he could 3-D print a transition AvBay from 4"to 3" in heavy duty material, he said he could but he made the suggestion to apply fiberglass to the two side up and down into both airframes, to make it more solid. I will pass by when the weather is good on a launch weekend.
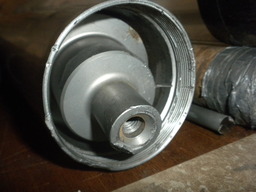
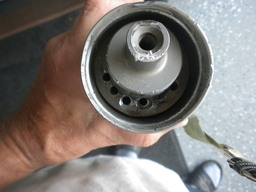
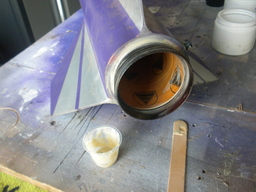
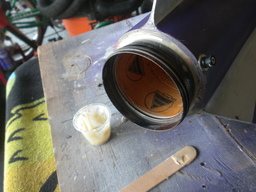
Update 09/14/2023 - Got the top closures out with a special designed saw blade. The epoxy avbay needs to be made first before I continue order all the other parts. The rocket has to be solid !!
Update 09/17/2023 - Stopped by Jason yesterday after the launch. Showed him the transition coupler and he was willing to 3 D print a new one and a much stronger one, might wrap it with carbon fiber so the top will be snug in and solid installed with like 8 screws. 4 rows with 2 screws each. He also gave me some valid information about the phone calibration, Will tape a reminder on the phone and the rocket airframe for doing this. Also Bernie is looking for the hardware pieces I need for the casing.
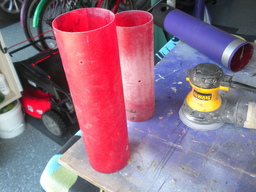
Update 09/20/2023 - Did some work on the airframe/booster, made the sleeve, sanding it to make it rougher. Cut in seize and used Rocket epoxy to glue it all in. At the same time I glued in the motor retainer with Rocket epoxy and use the mallet hammer to drive it inside the booster a bit so that seats better in there. Jason seems to work on the transition bay and it seems to go fast and smooth.
Update 09/21/2023 - Asked Tim what fiberglass airframe he gave me for this rocket, It as AMW Animal works, so I contacted them and hope to get the right airframe from them soon.
Update 09/22/2023 - Jason posted another picture of the new transition piece, it looks awesome and it seems to come together real nice. Can't wait to see it close by.
Update 09/23/2023 - It looks like Jason has finished the coupler already !!! It looks very solid and the walls are nice and thick !! So I guess this will work perfectly for the next flight in 2024 !!! All I have to do is to extend the booster that i cut short of the broken of section. Tim might have 24" fiberglass airframe that I can use for this extension. Thank you all guys !!!!
Update 09/24/2023 - Jason is going the extra mile to make the transition coupler really solid. <<Working the horizontal print (inner shell) with another acetone vapor this morning, as it melts the surface, it shrinks it a little. It's very close to fitting --- and with both outer and inner shell, it's STRONG!!!Acetone vapor only works with ABS based prints. Your material is ABS +�Carbon Fiber. How do you acetone vapor? You get a pot, and you line the inside sides and bottom with paper towels, taping to the top edge so the side ones can't fall down. You then pour about a half inch of acetone in the bottom and place your part on a platform so it is not resting in the liquid acetone. You then place the lid on the pot, with the part inside. The acetone travels up the paper towels on the side, and gives you better uniformity for your whole part. The part sits in pot for 45 minutes to two hours, you have to check on up on it. Depending on the thickness of the part, size of the part, and outside temperature. You wait for the exterior of the part to appear wet (I have a glass lid), and with smoothed lines. It will dry this way! The wetness look is simply because the outer surface has recurred smooth. When you go to remove, you must be careful not to touch the part, so you remove it by the stand you placed it on. Within 5 minutes, you can gently touch it as the surface has recurred. The interior is still somewhat flexible. While vaporing, if part droops or deforms anywhere, you immediately remove it, careful not to touch. Once the part sits for 5 minutes, you can press the deformation back into shape. This means you over cured it, but at least your part isn't ruined. There is a fine line between ruining the part and a small deformation. Although, for rocketry, this is probably the best time to remove if you can fix the deformation. Why vapor? Without acetone vapor, there is a possible breakpoint on every vertical print line. By using acetone vapor, you are melting all the lines together. A long duration vapor deeply penetrates all the way through part, making it uniform. That is what I have done to your parts. After acetone vapor is complete, the part is somewhat flexible for hours, and you have to be careful with it, but you can pick it up and carry it around. It stinks of acetone for days, so I typically leave it outside or in the garage. Still, as a caution, when you drill a hole through the transition coupler, start with a small drill bit and slowly work up by increasing drill bit size in increments, like you are drilling through plexiglass.>>
Update 09/26/2023 - Something to consider: <<--- EDIT: DISREGARD THIS POST, I FORGOT TO PLOT OVER TIME, AS THE MOTOR SHEDS WEIGHT ---I just found another extreme concern. On a Mach 1 or higher rocket, you should have a stability margin of 2 calipers. If you go into Tools>Component Analysis drag the Mach number indicator up to max speed (Mach 2+) As you are dragging, watch your stability margin on the main window top right of rocket side profile. It is only 0.81.Rocket design should be adjusted to get you 2 calipers as it becomes possibly unstable at speeds over Mach 1.58 or use less powerful motor. You may want to consider plugging your rocket into Rasaero too. I found it best to just redesign the rocket in rasaero from scratch rather than trying to import. >>
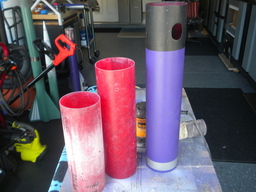
Update 10/23/2023 - Got the pieces from Tim and Jason last weekend at the launch. Tim gave me more then enough airframe tubes (4"). I rocket epoxied already two pieces together, and those are solid. Still have to glue that extension on the existing fin can section. Need to order more rocket poxy. Also will have to fiberglass the coupler that Jason gave me. I will do this to make it real snug on the top.
Update 10/24/2023 - Fiberglassing today, Top and bottom part of the coupler will be fiber glassed. Jason also made an inner section for the coupler, I also will use the top part of the inner section to glue that inside to make it more solid. I will use rocket poxy for that. Also filled up the space between the two airframes and some screw holes with rocket poxy. After a few hours it started to cure better and it feels real solid already.
Update 10/24/2023 - Fiberglassing the mid section of the coupler. Also putting a clear coat on the lower section to make it a bit more snug. And epoxy the little crack on the upper booster. While fiberglass is drying, I Sanded the inner bulkhead to match�the inner coupler.
Update 10/25/2023 - Sanded the mid section of the coupler a bit till is was some kind of smooth. Then applied a clear coat of epoxy. When dry I will light sand it and apply bondo in some places and prime it, Will check also before painting. Also used the left over epoxy to put a coat on the sleeve, the fin can sleeve to make the joint a bit tighter before applying rocket poxy. All is drying now. Sanded the coupler and then touched it up with bondo sanded it again smooth and applied primer. Sanded the primer a bit and applied a new coat of primer, still need to touch up a bit. The primer is rated for 600 degrees car engines.
Update 10/26/2023 - Full day of sanding and priming, lots of sanding and re-priming. Primed the bottom of the coupler a few times to get the desired snugness.
Update 10/27/2023 - Finding the right design of the sled. It's a bit longer to accommodate the switches on the top. The windows will be in the same location. Have to order a fiberglass plate - 1/8" thick. Cut the old camera holder from the previous sled, Sanded it down a bit and will be glued on the new sled. Did another primer coat on the coupler, and again, to get closer to the snugness feeling.
Update 10/28/2023 - Cutting and cleaning out the window sections in the coupler. Also cutting them out and cleaning up and matching up with the booster windows. Giving the coupler a last few coats of primer, it getting really nice and snug now with more than 10 coats of primer. It also looks that I can reuse the glass windows for this coupler also, But I have to glue the inner top coupler inside the original one before installing the glass for the windows.
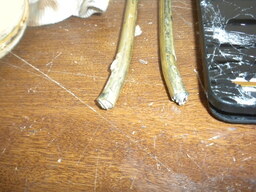
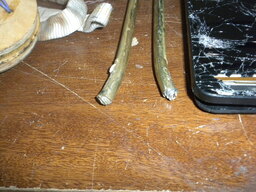
Update 10/29/2023 - Went to the Home Depot after a nice Beach walk here, bought the rod for the Avbay, measured them and cut them in size. Got the washers and nuts on and all good to go, Have to glue the inner part of the coupler in to make it all complete, then painting silvery.
Update 11/06/2023 - Did some work on the sled today, cut the sled out of the 1/8" fiberglass sheet. Drilled the holes and installed the battery holders and the stratologgers. After all is glued in I have to measure out the switch holes and the camera holder position. The rods will go in also after that all. Had some time and cut the cupper hollow rod and glued it in.
Update 11/07/2023 - Today I sanded the sleeve a bit to get a better fit when I glue the upper booster part in. Also connected the wires on the stratologgers and used zip ties to secure them.
Update 11/10/2023 - Ok glued the bottom and top and side fiberglass pieces in the hold the phone. I will have to finish this off with rocket poxy. Gave the phone some room for passing. The left over epoxy was used for a coat on the coupler.... again, will have to sand that all down.
Update 11/12/2023 - Had to cut away a bit of the lower fiberglass to accommodate the GoPro a bit better, Need to be in more if not it will hit the window. All pieces cut and ready to glue in.
Update 11/13/2023 - Cleaned up the epoxy and sanded the sled a bit. There was some epoxy inside the hollow brass tubing so I have to drill that out also. All fits well now. The camera and phone lines up pretty good with the windows, I will have to drill the other holes when I have the rocket poxy done.
Update 11/19/2023 - Did get the Rocket poxy from Tim at the November launch. Started to glue the sections together, with rocket poxy and also a mix of regular epoxy. All dry now and sanding today. Filled in some gaps also. Also glued in the inner section of the coupler, same thing Rocket poxy and regular epoxy. All dry, cleaned up and fit the bulkhead. Put some rocket poxy on the top nuts also to secure them on the rods.
Update 11/20/2023 - Sanded the booster till it is smoother. Also figured out the holes for the switches on the coupler. They were a bit off so I have to re-drilled it all again, plugged the old holes with rocket poxy. Now those switches are going in smooth no obstruction they just cleared the rods. Lucky me. I will re drill the other holes again for the metal screws. Everything has to line up perfectly before I re-drill those metal screw holes again.
Update 11/21/2023 - Did some work on the AvBay and coupler again, Holes for switches are drilled, faulty holes are plugged up with rocket poxy and sanded smooth, also matches the holes with the outer upper bay holes. Also drilled the holes for the metal screws after everything was lined up properly. Sanded the whole upper bay and nose cone ready to paint. I used 12 short metal screws to hold it all together, and right now it really really snug. Installed the glass windows also, will see tomorrow how everything fits when all of this is dry.
Update 11/22/2023 - Tested the fully loaded AvBay and sled, all fits in nicely, happy about this.
Update 11/23/2023 - I already ordered the harness (2) from onebadhawk. It's already on it's way, thanks Ted.
Update 12/08/2023 - Got the harness some time ago, might swap them with another rocket set. Today I fully primed all the parts, including the coupler. All good.
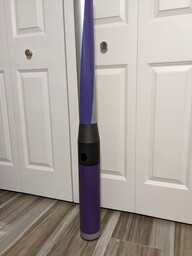
Update 12/10/2023 - Swapped all the shock cords out with the Thunder struck rocket, those shock cords are tubular kevlar and much stronger. Also painted the rocket parts grape color, will do the silver/aluminum when I have the can. Also installed the launch button. I connected the switches with the stratologgers and did a first test with a 9V battery, looks like they beeping out fine, will do another test with a fully loaded 9V battery soon.
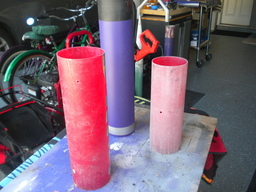
Update 12/15/2023 - Painted the silvery�sections on the rocket, booster, coupler, nose cone and upper bay. All came out nice.
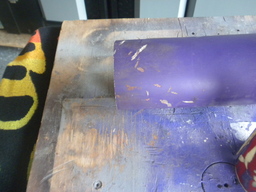
Update 12/16/2023 - Started on the silver ring design on the booster, taped the area off with masking tape, filled in the dents, and wen dry started sanding. After sanding i applied the primer. When this is dry I will apply a few coats of bright silver paint. It's all drying for now inside the house to get it a bit warmer.
Update 12/17/2023 - Painted the silver ring design on the booster, all painting is done now. Will put rocket together and calculate the CG and CP.
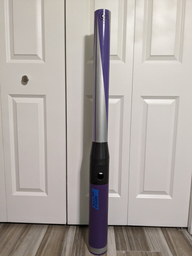
Update 12/21/2023 - Made an X design on the rocket, taped it off and painted it silver, when dry the middle leg of the X will be gold color. Just something different. All dry. Rocket is ready.
Update 04/19/2024 - Extended th main wires so I can be more comfortable getting the sled in and out, Have them soldered and taped off. I will do a test soon.


 1 2 3 4 ... 7
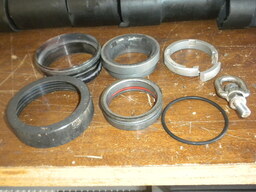


Comments
Glad you got all the parts back. I'd like to take a try at recovering data from your phone. It looks intact enough for me to tinker with.