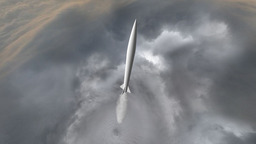
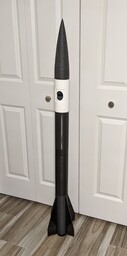
Diameter of rocket governed by safely housing width of new phone.
Nothing fancy, but should perform well.
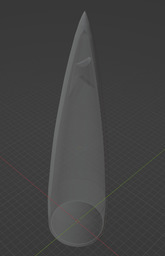
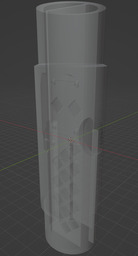
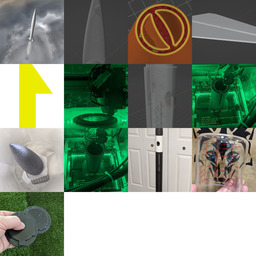
What is interesting about this rocket is that I printed most of the rocket with the exception of the fins and motor mount.
Some of the parts are thick for structure strength, but have an internal rectilinear fill pattern with mostly empty space in between.
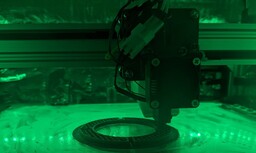
Polycarbonate + Carbon Fiber is used for motor enclosure & nose. For plastic, it is very strong and has a fairly high glass transition temperature of 143°C. To print well with this material, you must have a print enclosure around or over 90°C.
For the rest of the printed parts, it is a combination of ABS and ABS / CF.
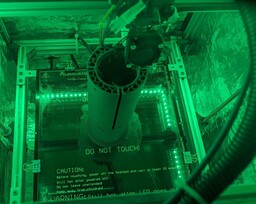
The motor mount tube is standard loc cardboard and is sleeved directly into the printed part.
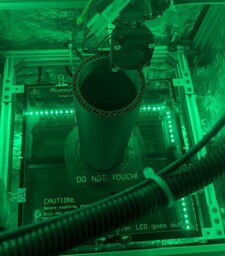
Electronics bay is be nice and tight, housing everything including my custom deployment system, phone, raven, batteries, and GoTenna transmitter.


Comments
What are your plans launching this rocket ?? Black rock ??
This is just a small project for Florida. Experimenting with printing en masse and inspecting for component fatigue after each launch.
I'll start printing parts tomorrow.
frewi80 on 2023-10-04 15:49:08Z wrote:
That looks great Jason !!
Thanks!
frewi80 on 2023-10-27 14:39:20Z wrote:
I'm going to rig the bay next as there are still some worry points due to tight space. This will occur before any other assembly.
This includes: