   |


 1 2
1 2
Subject: Custom Electronics Rev2 for Primary Deployment
This project at its core is an Arduino Nano 33 BLE. It can fire up to four independent pyrotechnics (drogue chute, main chute, stage separation, stage ignition) or other devices like servos with up to two amps per circuit. The design is based off of an earlier and still operational prototype that I made that was previously used in my this rocket. The additional function of this version is to report voltage current levels per pyro. This insures I can easily tell continuity to external connections like ematches. You can view the original design details here: https://www.insanerocketry.com/main/displaymessagelist/-3711951308618969595/ On the earlier design, prior to each flight, I had to insure continuity by testing with a Christmas light just prior to launch since it had no built in detection. This revision adds safe and constant continuity detection with voltage to each of the deployment mechanisms. No more Christmas light necessary.
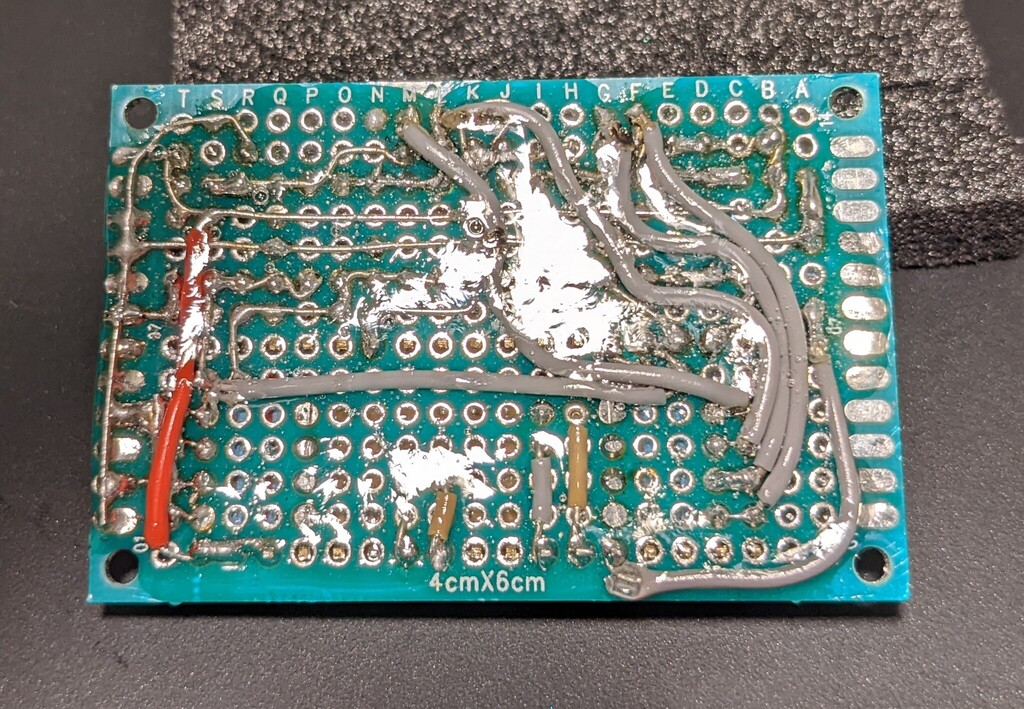
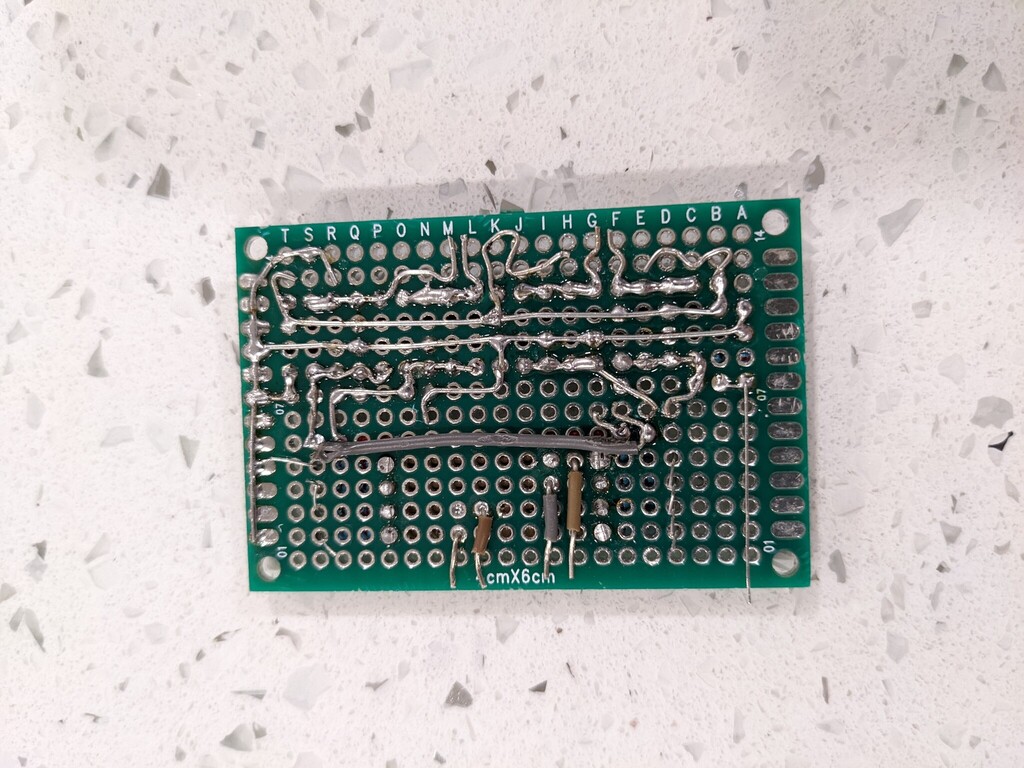
The color lines are the additional wiring required to support the enhancement. I soldered the new prototype in steps. This board is at a point where I need to learn how to use PCB designing software so I an finalize.
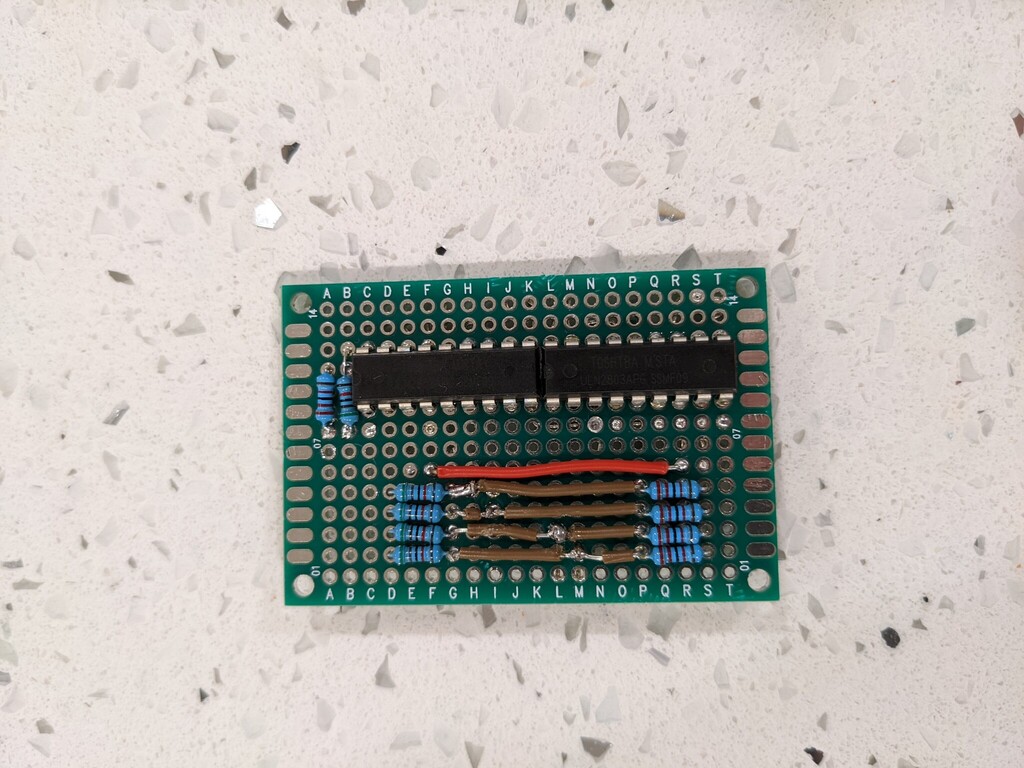
The picture above is the front side of the circuitboard. The Arduino Nano 33 BLE will be soldered in place covering the resisters on the lower half. In addition to soldering the Arduino down, I still need to install the terminal blocks, but I need to check clearance in 3d housing before doing so. The picture below is the nearly complete backside of the circuitboard. Unsoldered ends are where the Arduino and the terminal blocks mount. There's still about 6 connections that need to be soldered with insulated wire, but it is nearly complete.
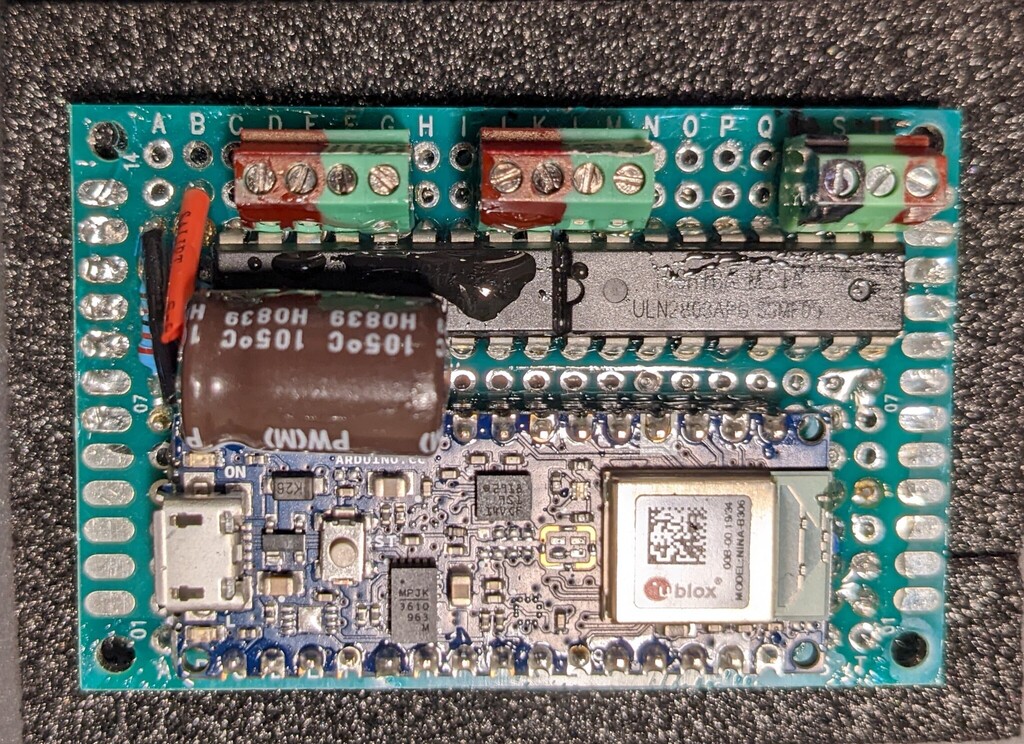
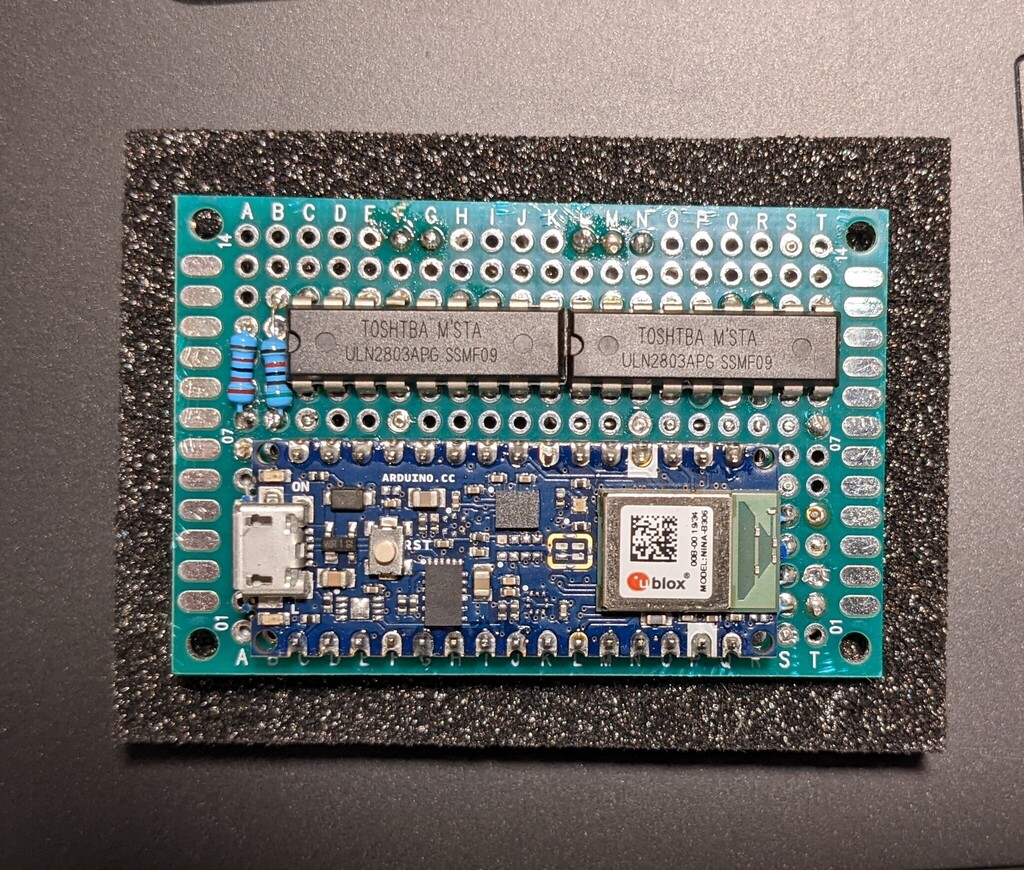
Orientation is the same, the arduino will fit on the lower side, but on the other side of the circuitboard.Like real rocket hardware, once the board is fully tested, I will lay a coat of epoxy on the circuitboard to cement everything in place, insuring with many launches that open circuits and shorts do not occur. Test have now proven successful for all functions of the prototype. The Arduino is soldered in place. I still need to solder terminal blocks in place, but have to insure it fits in rocket first. Clearance is minimal.
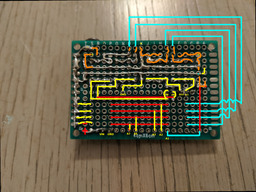
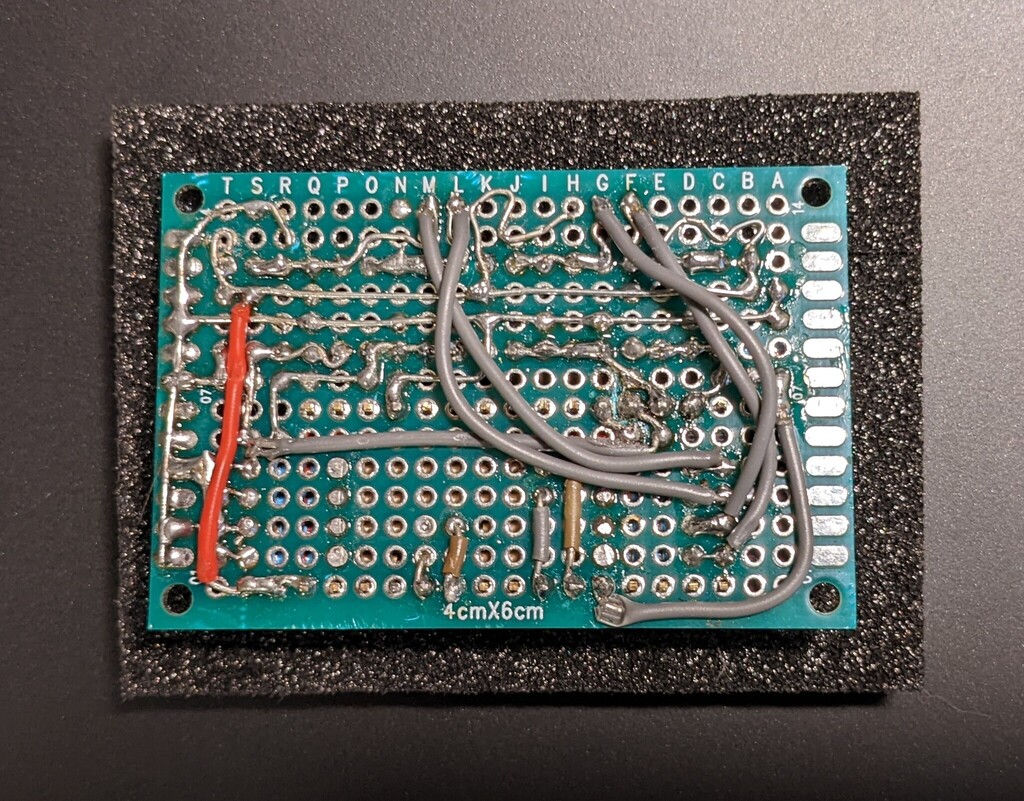
The image below shows the additional connections in place. I'll tack them neatly to board once terminal block is installed.
More details soon. | ||||||||||||||
You really getting good in this soldering stuff Jason. | ||||||||||||||
Thanks, I appreciate it! I need to learn PCB design software. It would be so much easier with a PCB and significantly less soldering. It shouldn't take that long to learn and there's plenty of tutorials out there too - I just need to dedicate some time. frewi80 on 2022-05-23 19:37:33Z wrote:
| ||||||||||||||
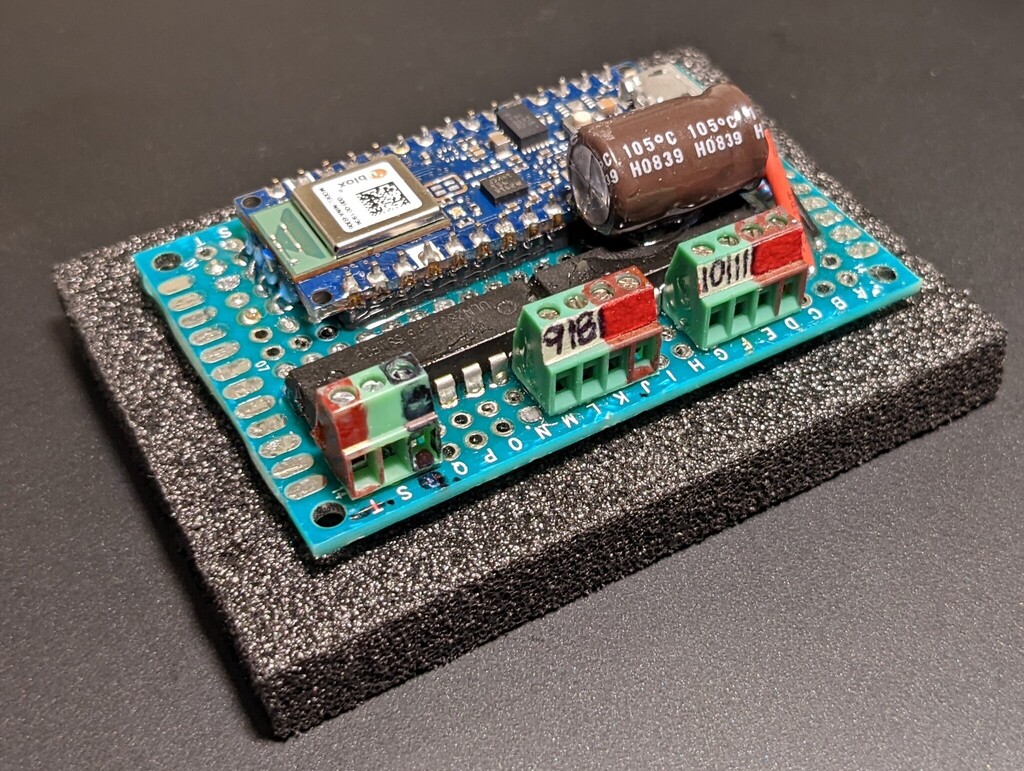
Epoxy applied, component is ready.
Below is the front with epoxy and large capacitor I mentioned previously.
Below is a nice view of the completed part.
| ||||||||||||||
That will hold for sure t Mach 5 flights... | ||||||||||||||
With all those tacked wires, I have to be thorough. It is pretty easy to add the coat of epoxy too. I just have to mask off the areas I don't want epoxy to flow. When the epoxy has the consistency of gum, I remove the masking tape and spot check, scraping off any incorrect glue points. frewi80 on 2022-05-28 09:07:08Z wrote:
|
 esotericdude

 frewi80